Chapter 4 - Bulkheads, Instrument Panel, Front Seatback and Temporary Firewall
Chapter 4 starts off fairly simple - you’re working entirely with flat shapes that are all internal to the aircraft. The only curves are the edges.
Current status: Finished! ✅ 2022-12-05
Front Seatback
Status: Finished! ✅ 2021-10-23
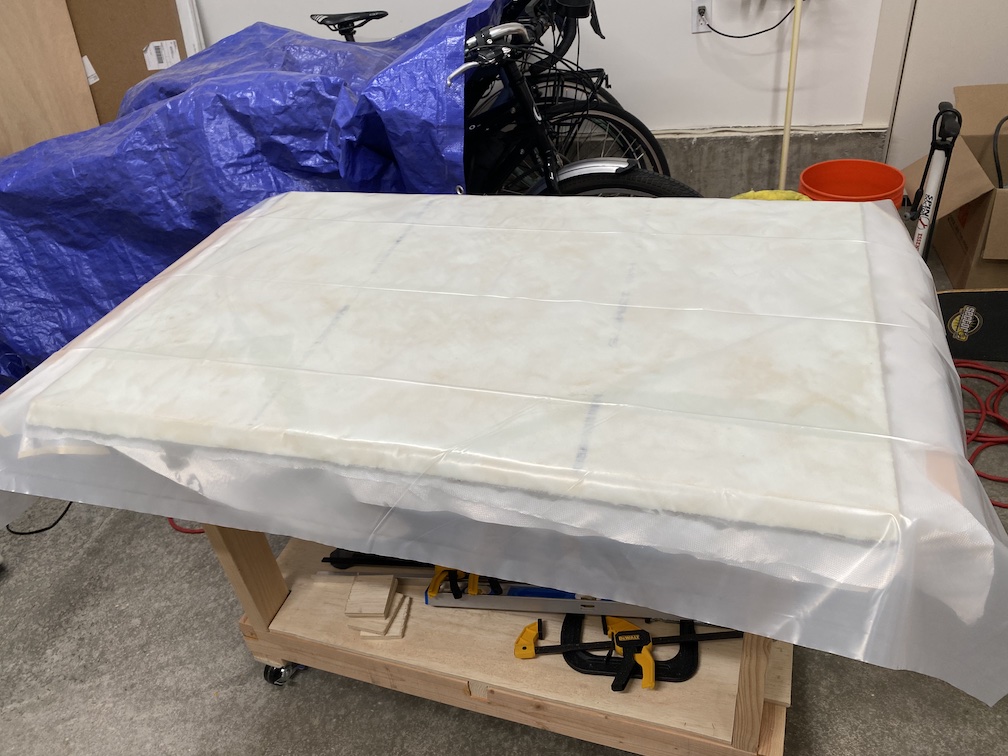
The front seatback is very simple - cut down a slab of 0.75“ thick foam, shape two of the edges to be 45°, and glass it. Following the advice of other builders, I used a tablesaw to make those cuts. You can see the result below.
The foam for the front seatback prior to glassing.

Closeup of the 45° edge on the front seatback foam.

A few days later, I did the next step, which is to add micro and UNI fiberglass to one side. I interpreted “micro” in this case to be wet micro, not micro slurry. We’ll see how it turns out.
I cut out 2 lengths (approximately 42-45 inches) of full-width UNI and laid them out. I had to cut and rearrange the glass while laying it out, and there was some excess, but this worked well. Instead of using the polyester sheet as peel ply, like I had previously, I used plastic sheeting. We’ll see how it turns out.
The forward side of the front seatback, while curing after being glassed.
The forward side of the front seatback.
As you can see, it turned out fine. I did go back to using polyester peel ply for the aft side of the front seatback. Which also turned out fine and was relatively easy to pull out.
F-28 Bulkhead
Status: Finished! ✅ 2022-07-14
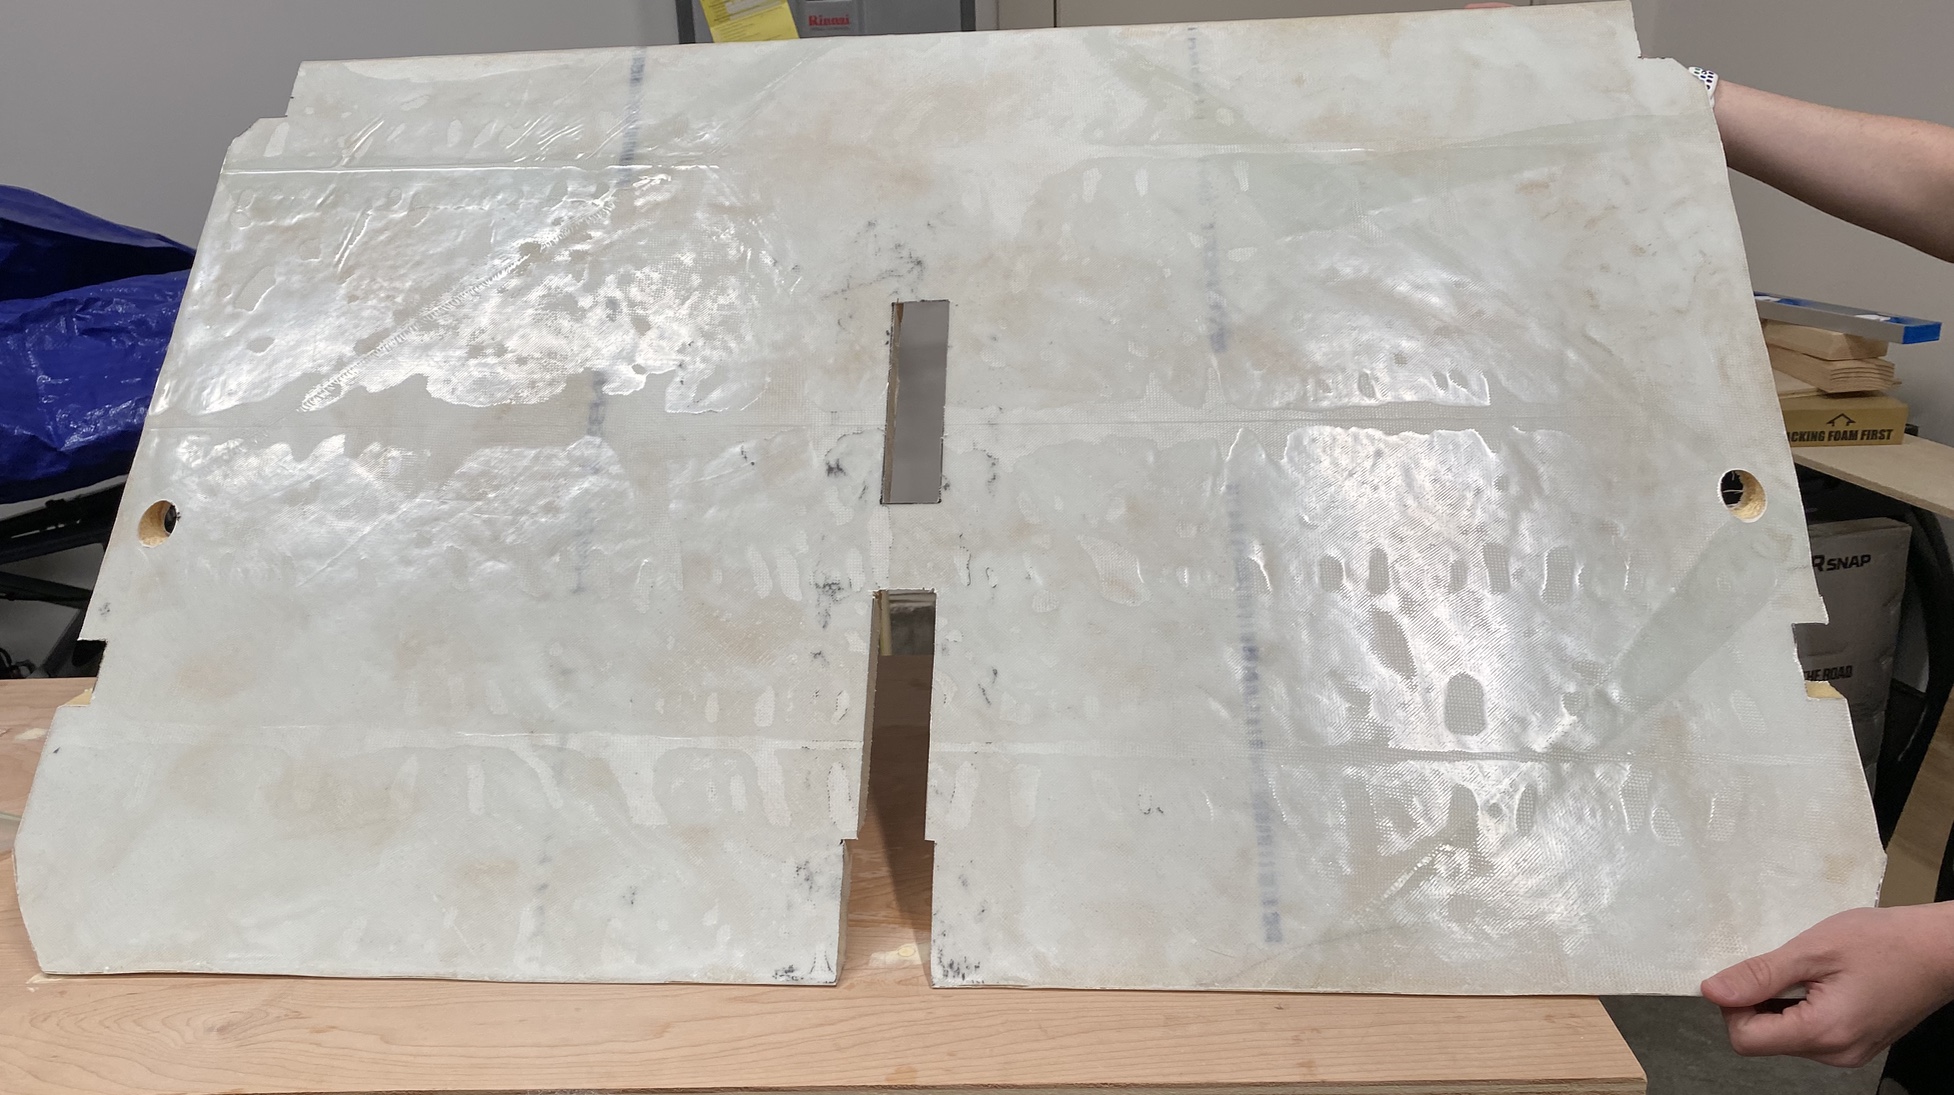
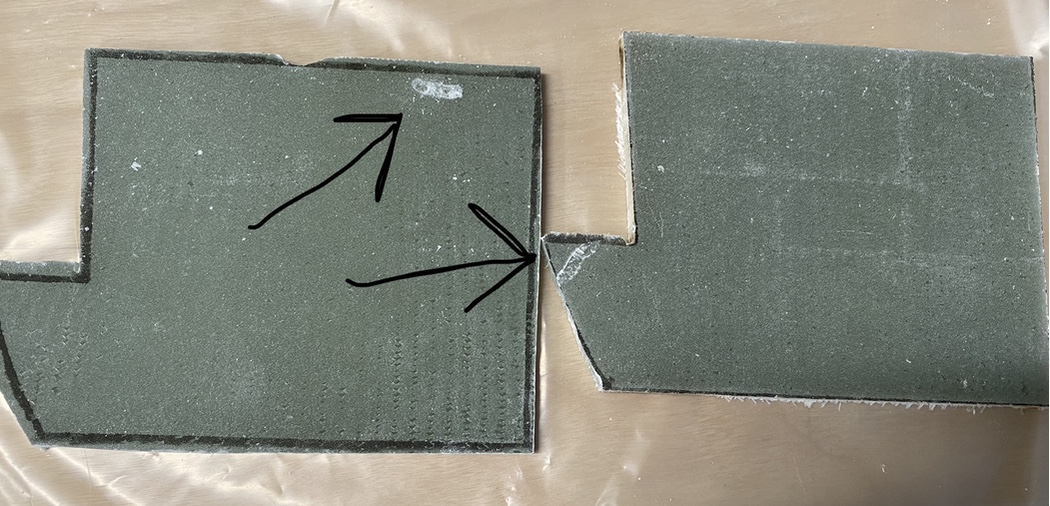
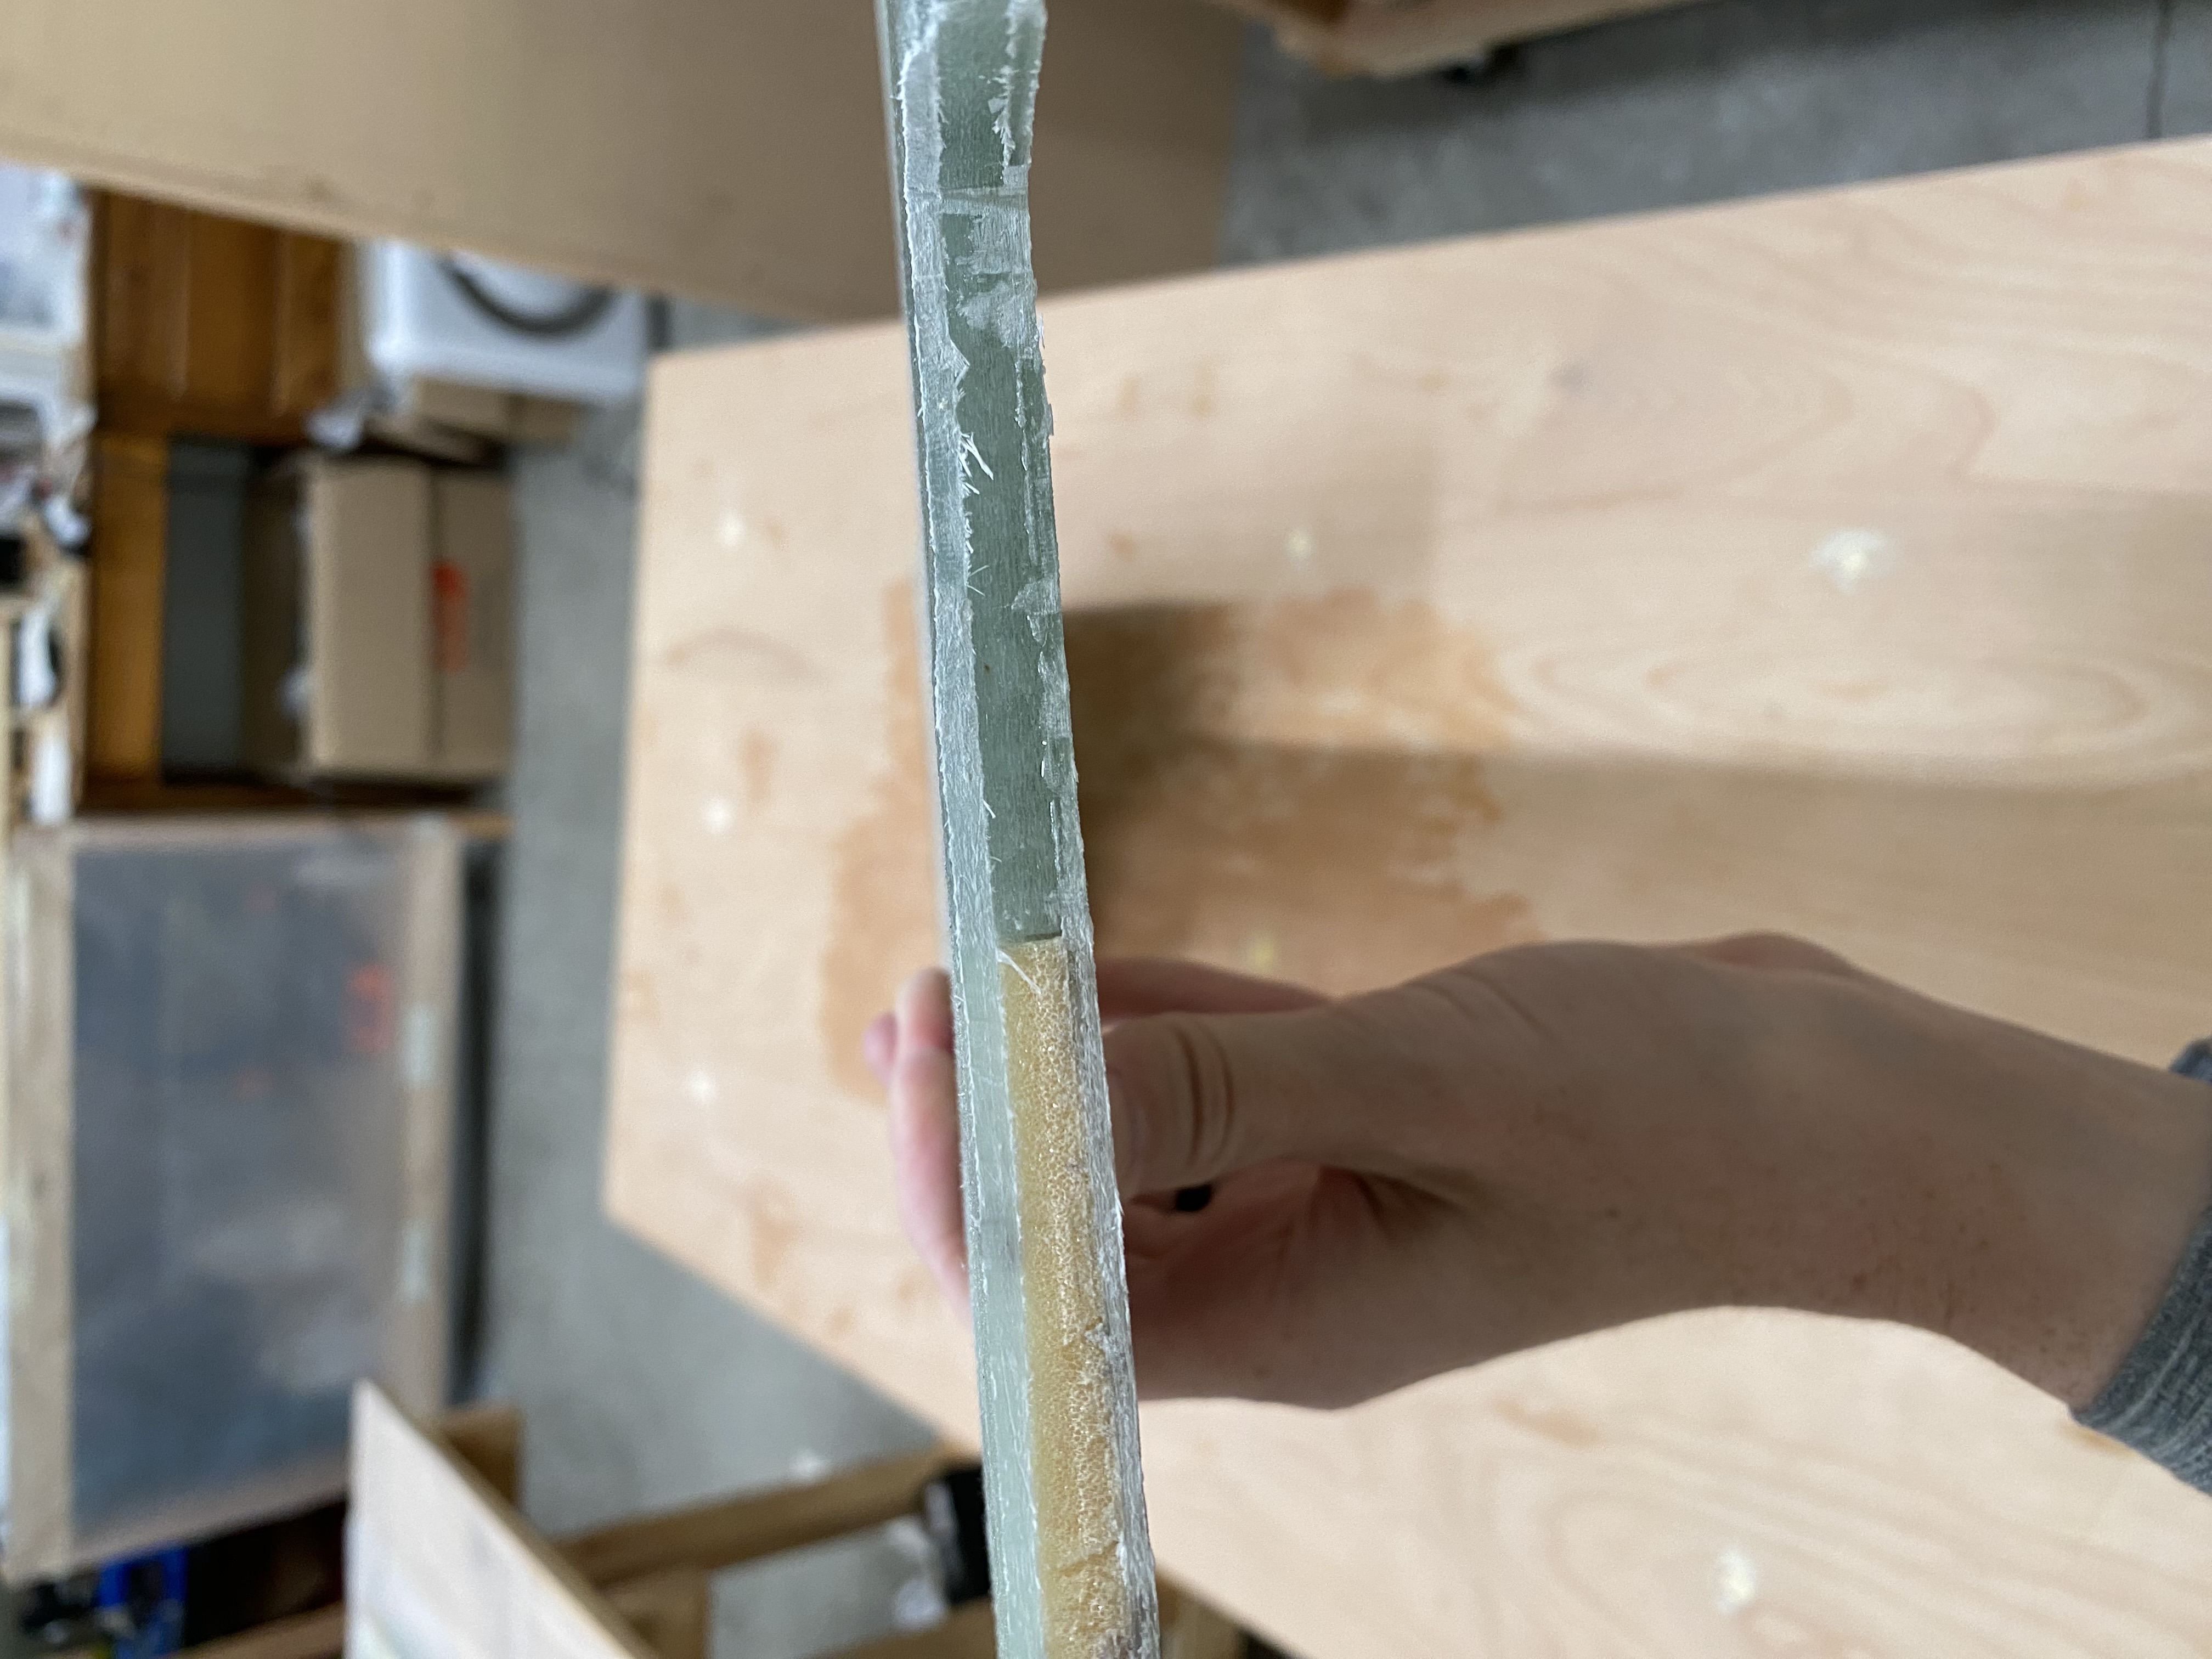
The F-28 Bulkhead is a relatively small piece, and will be made of fiberglass glassed onto clark foam. I cut the foam out using a utility knife and a Fein tool.
One side turned out better than the other. The first side I glassed, I put down a significantly thicker layer of wet micro than I should have. I determined that while that wasn’t enough of an issue to warrant remaking the part, and made a note to only place a thin layer of wet micro when I did the other side.
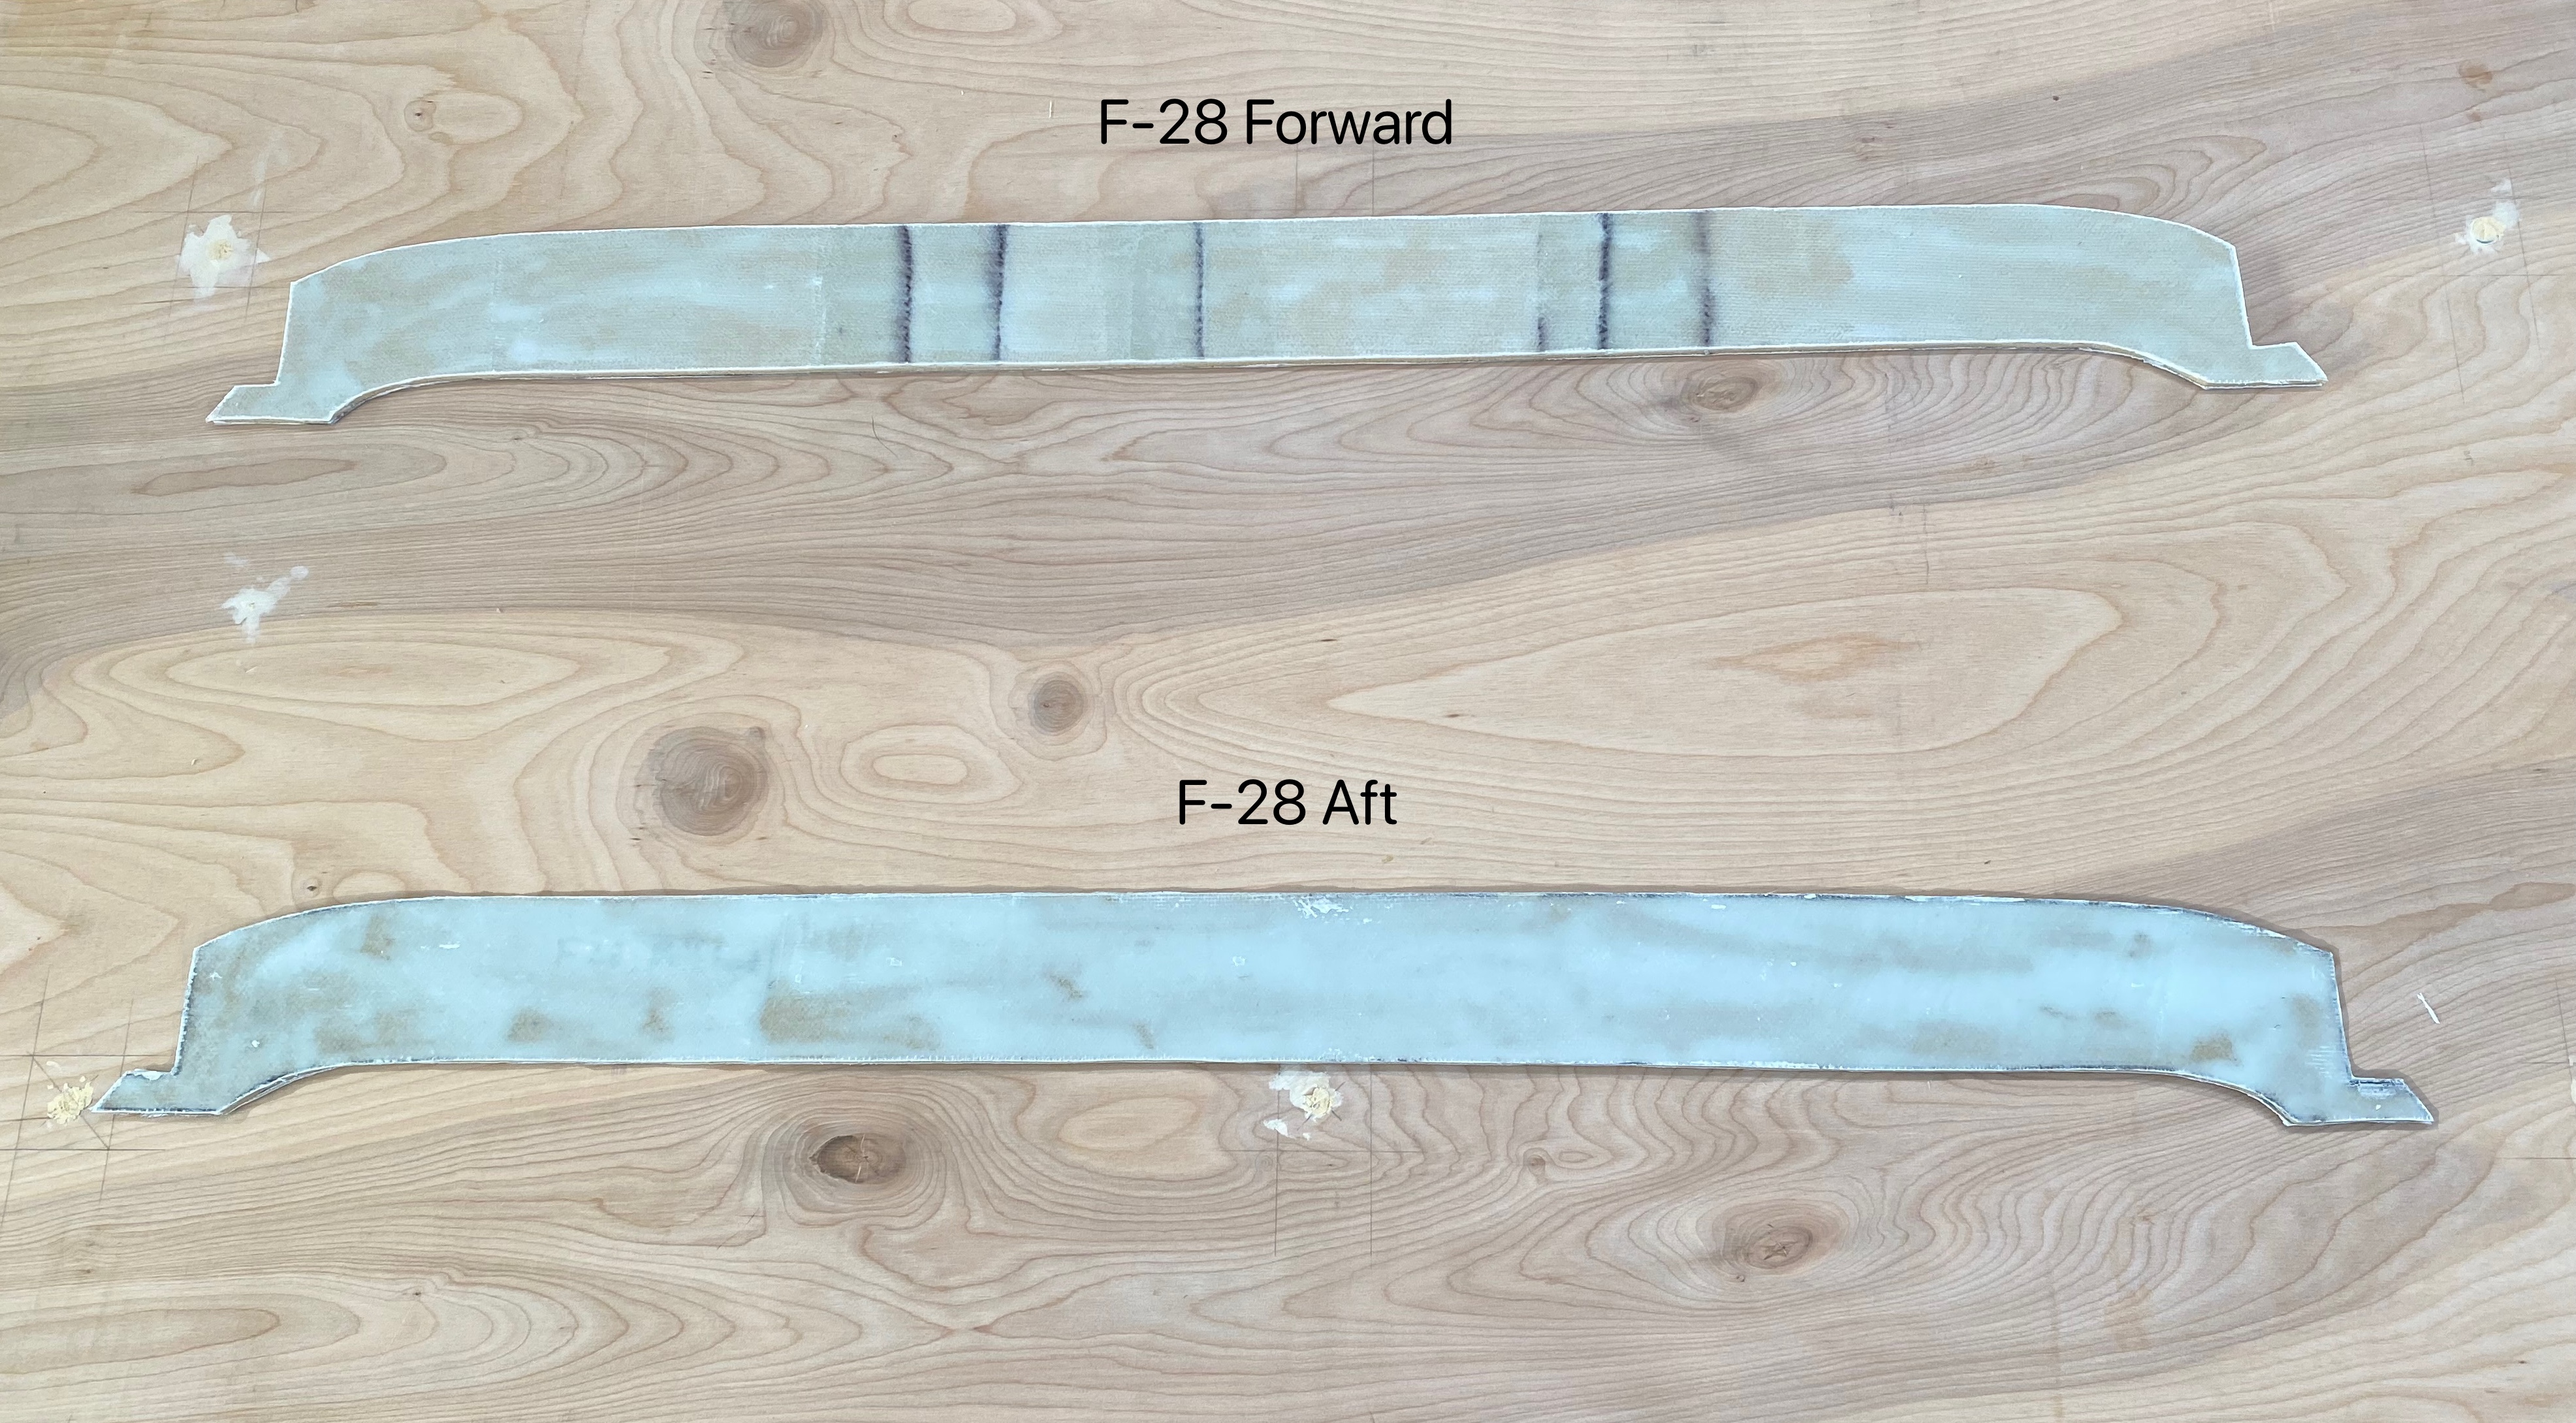
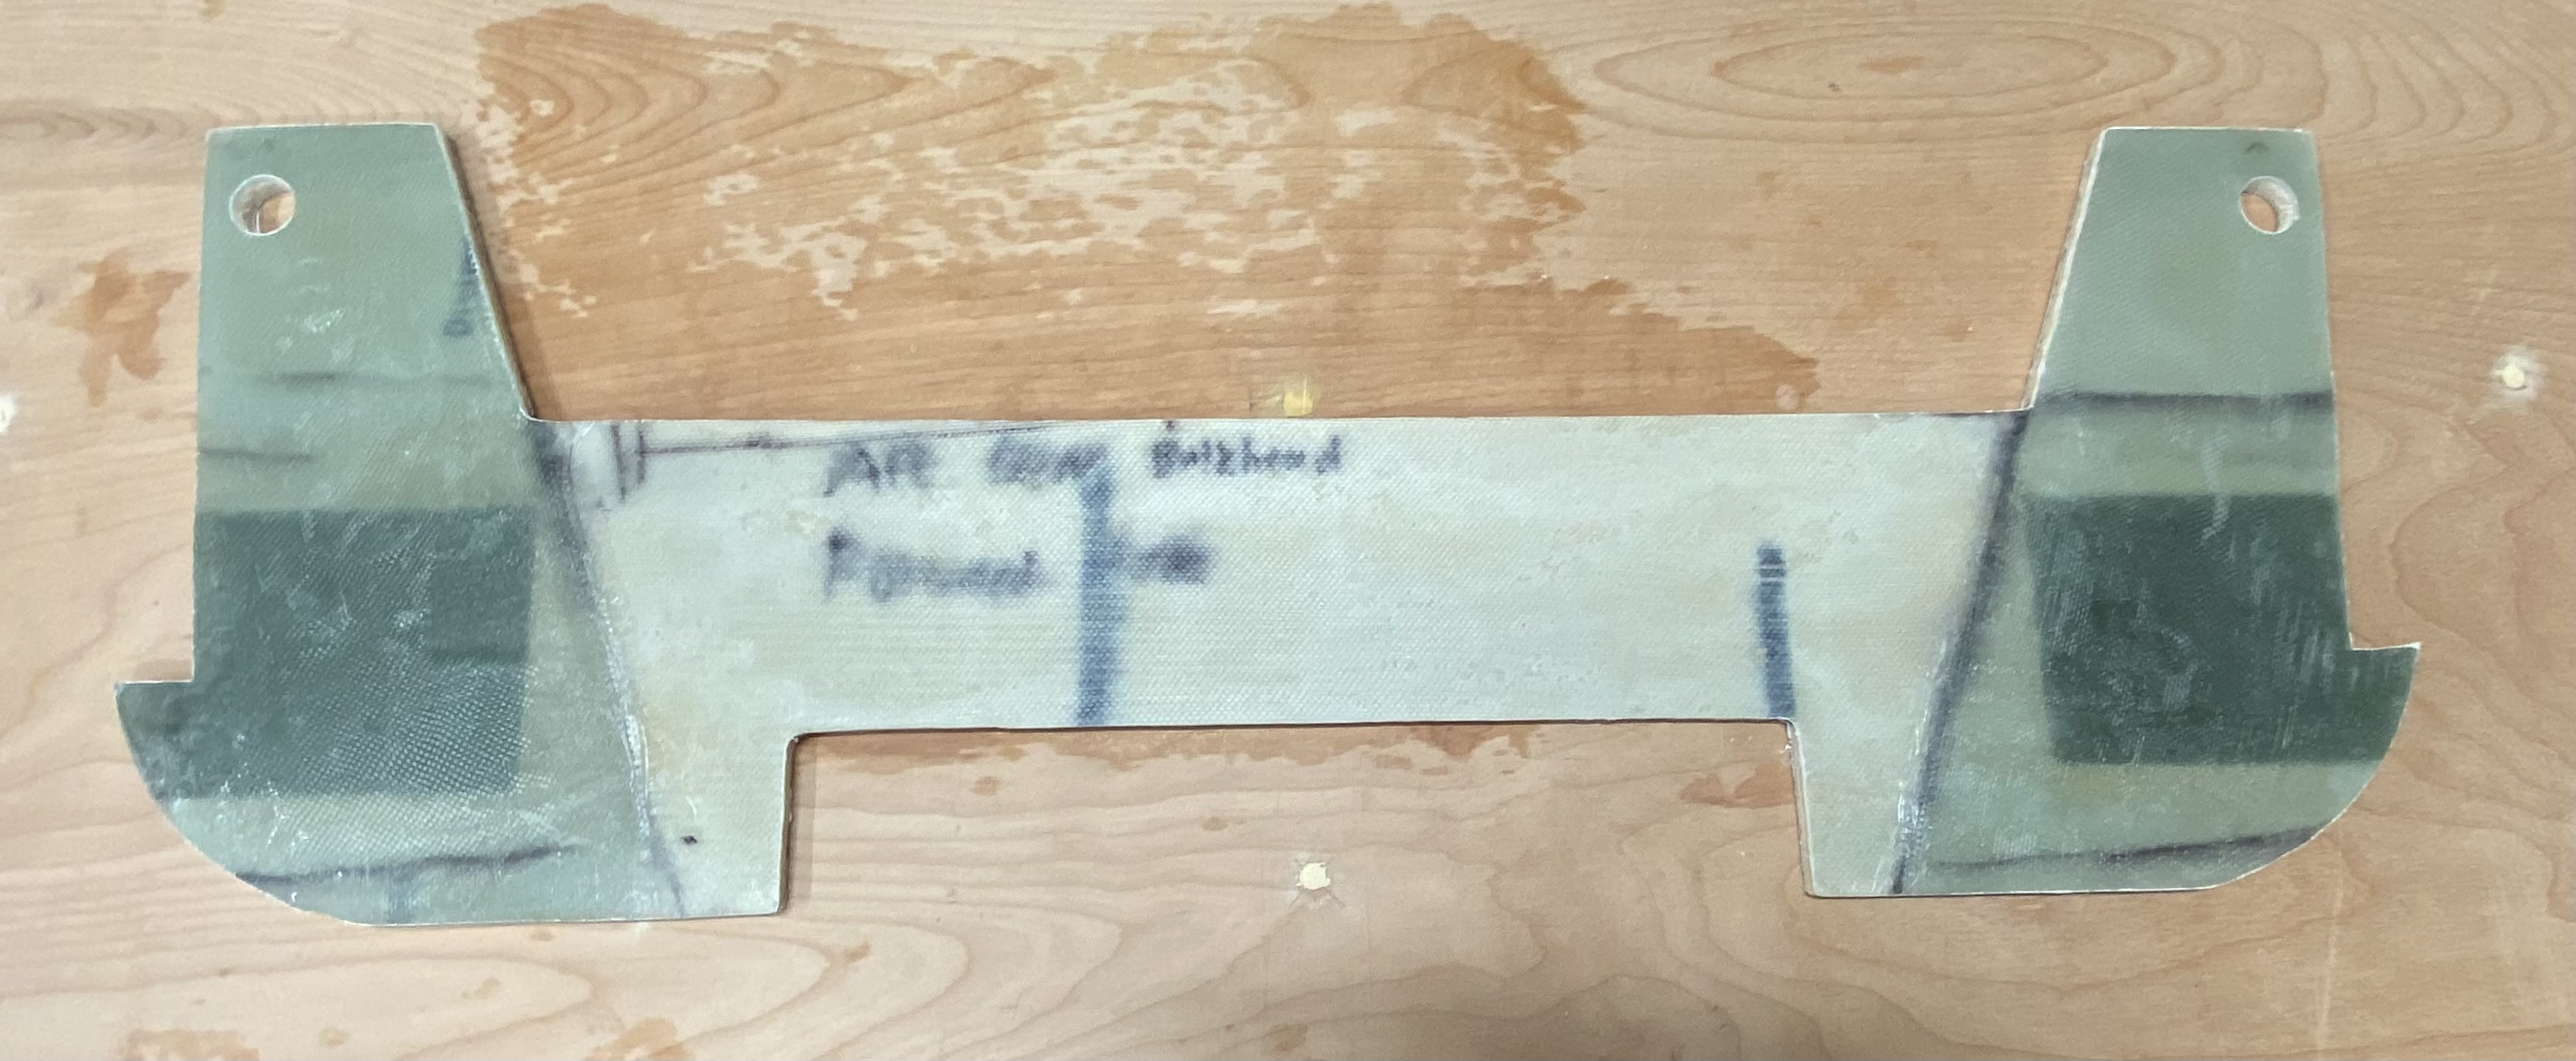
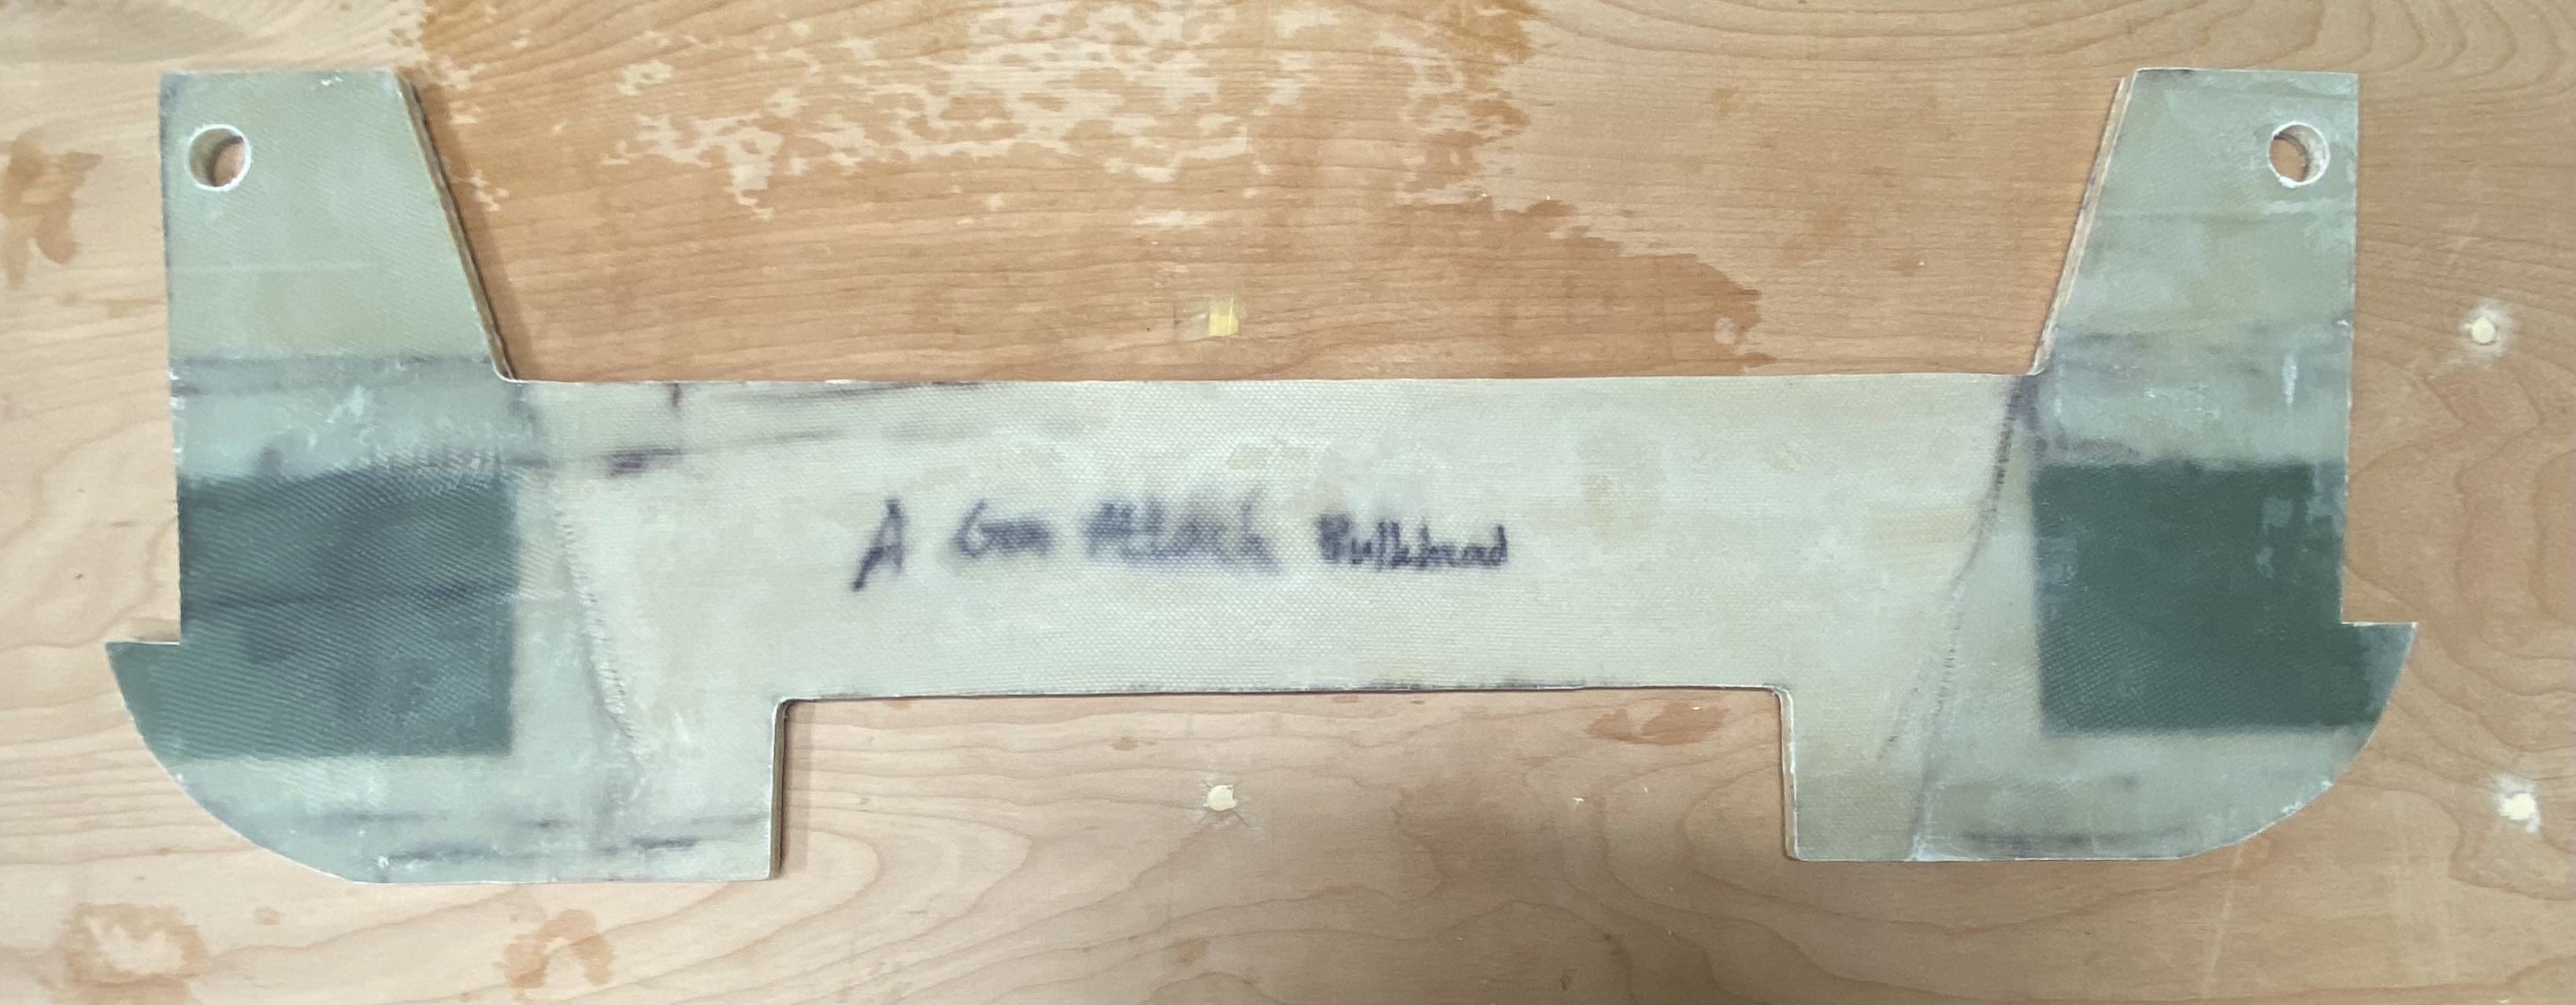
The image below is a composite image of both sides of the F-28 bulkhead, which shows the differences in the layup. Each side is labeled for convenience, both sides of F-28 received the same amount of fiberglass.
 .
.
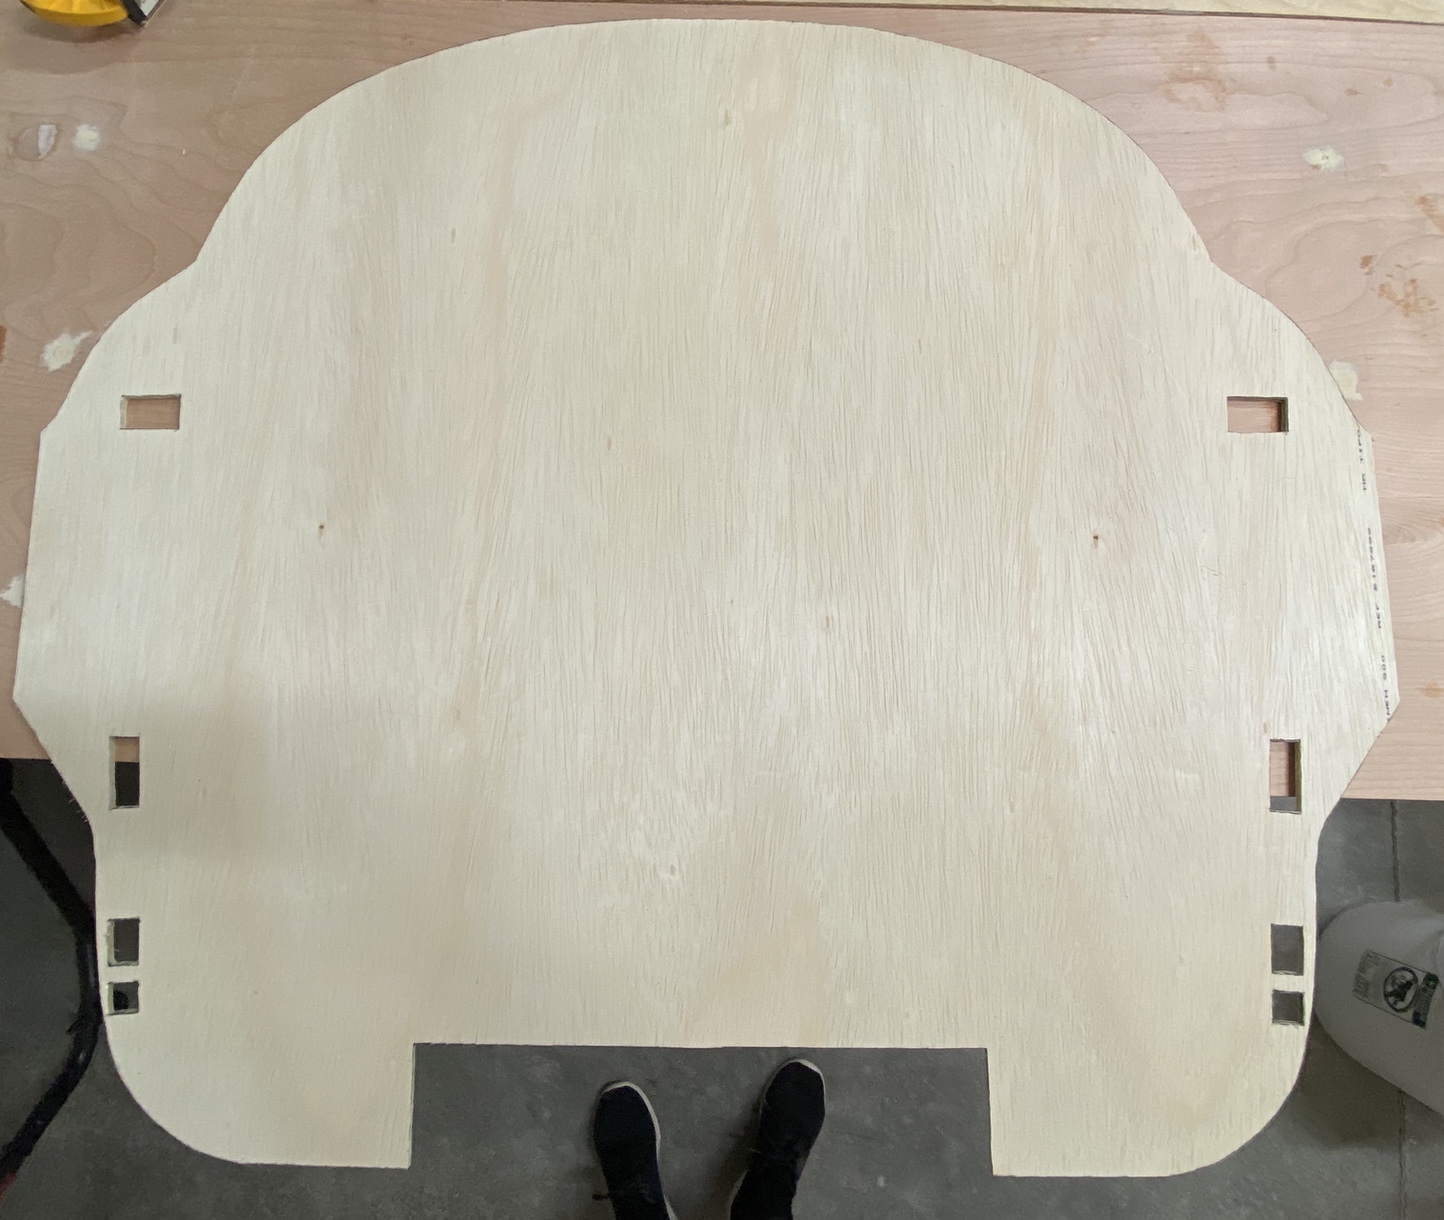
Instrument Panel
Status: Finished! ✅ 2022-09-18
The Instrument Panel is a little bit larger than the F-22 bulkhead. I made this by cutting pieces of it out of clark foam, and them gluing them together with 5-minute epoxy. Afterwards (much later in my case), I laid up both sides with 2 layers of BID everywhere, and then a layer of UNI running top span only.
I chose to attach and glass the stiffeners in 6 parts: First, I attached the horizontal stiffeners, which largely run across the upper span of the instrument panel. Second, I glassed the upper part of those stiffeners. Third, I glassed the lower part of those stiffeners. Which includes adding the “lip” to run wire channels and harnesses through. Fourth, I attached the vertical stiffeners, which run vertically along the center span of the instrument panel. Fifth, I glassed the inner parts of the vertical stiffeners (which don’t have a lip on them). Lastly, I glassed the outer part of the vertical stiffeners. I went with this order so that the fiberglass used for the lower-horizontal stiffener would already be in place when I attached the vertical stiffeners. Additionally, I didn’t want to deal with trying to add fiberglass underneath one of the “lips”. For all of this glassing, I used BID tape with either 1 or 2 plies of BID, as called out in the plans.
Note: I actually ended up using UNI instead of BID for this. Which while not according to spec, I don’t expect this to be an issue. I’m also expecting to make a slightly different instrument panel later on, to account for the glass cockpit I’m intending to build.
F-22 Bulkhead
Status: Finished! ✅ 2022-11-03
Tip: When adding the doubler, be sure to apply wet micro to both sides of the doubler. Micro is supposed to applied to every side of foam that touches glass.
I had built out one F-22 bulkhead, with the aft face looking pretty decent. However, I had made a number of errors glassing the forward side. These errors were such that I’d essentially have to strip most of the fiberglass from the forward side. Additionally, after discussing this with other people, I realized that I had added way too much wet micro to the foam. With both of those, I made the decision to remake the F-22 bulkhead entirely.
For the second go around, I had ordered more clark foam to use. Which meant I could be way more liberal with material usage as this high-density clark foam is not used after this chapter. This meant that I could minimize the amount of joins I needed to make, which made things a little bit easier.
Glassing the aft face went went. It took a while before I got around to trimming the excess fiberglass. Once I did, the next day I glassed the aft face.
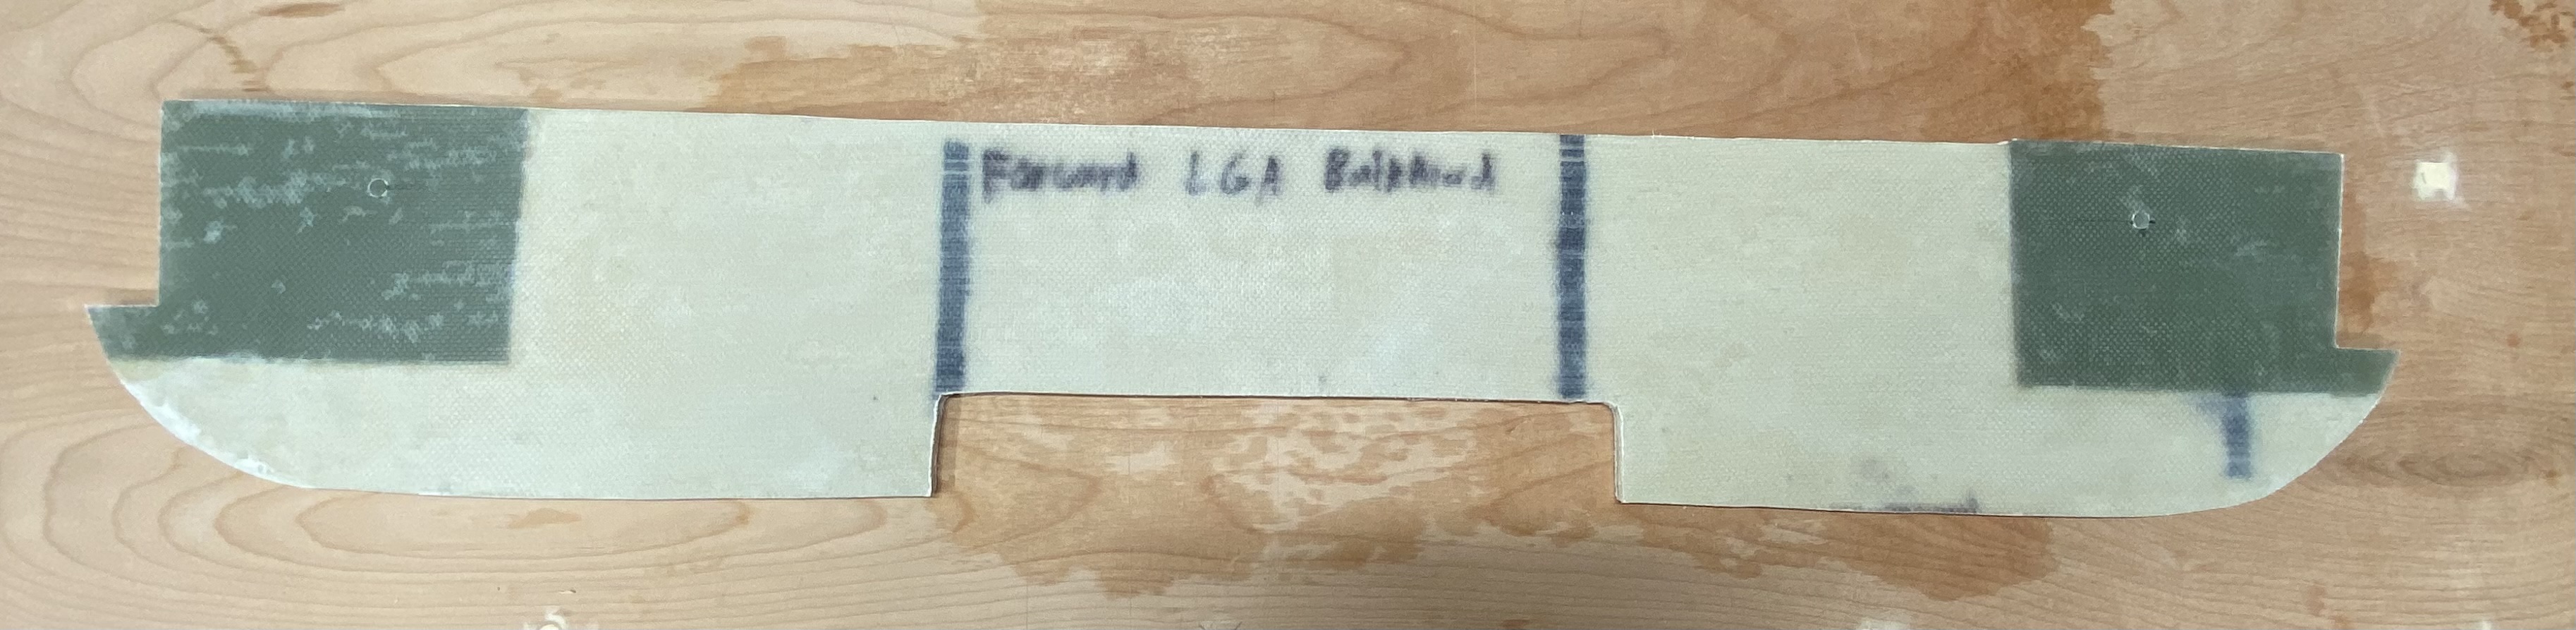
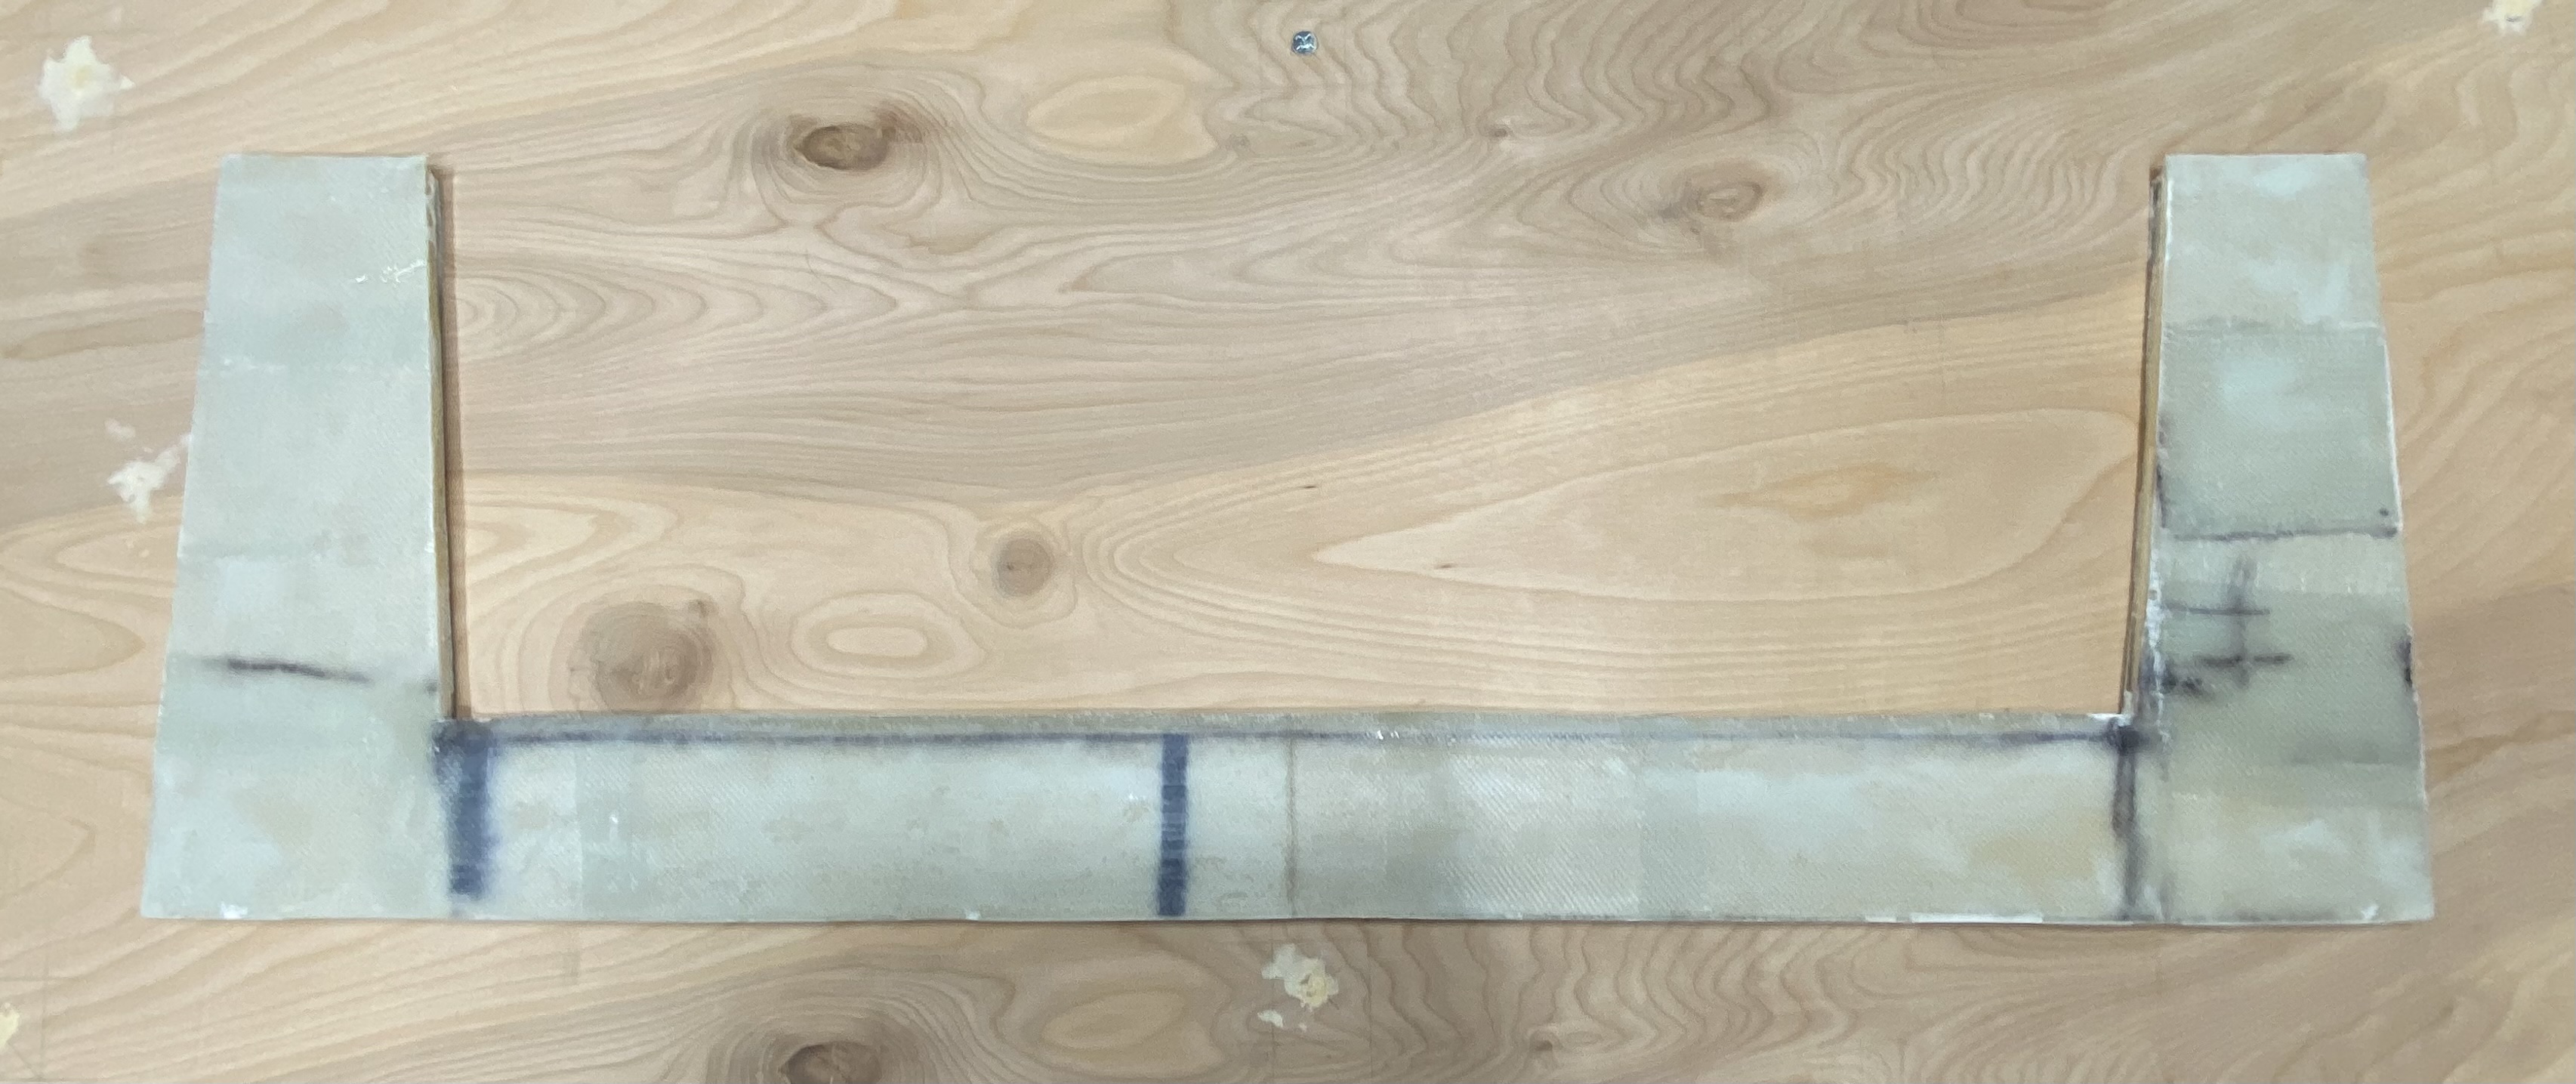
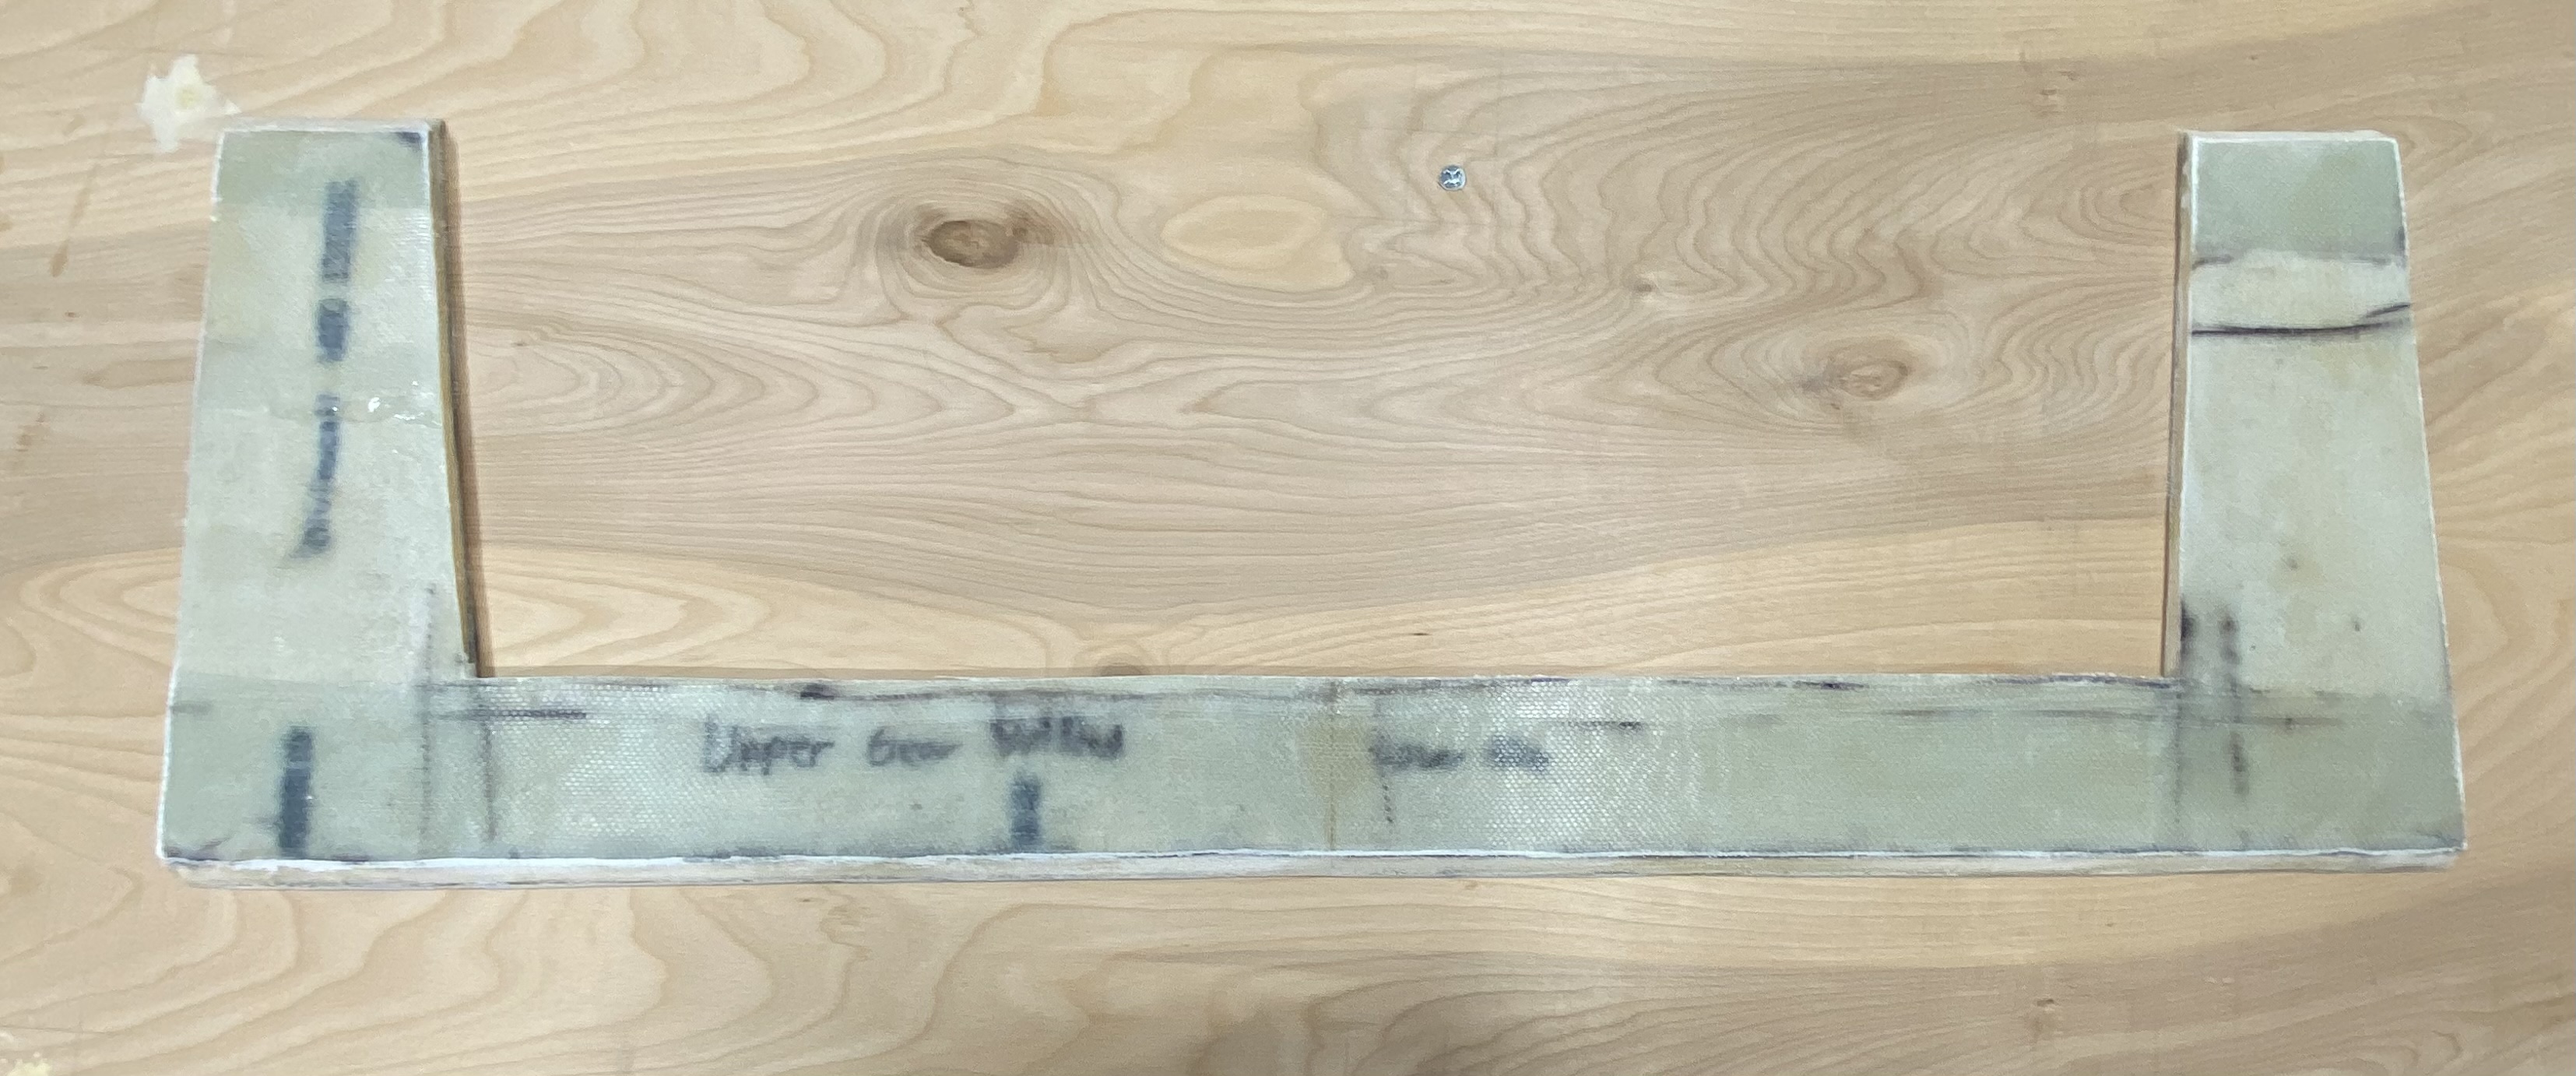
Landing Gear Bulkheads
Status:
| Upper Landing Gear Bulkhead | Forward Landing Gear Bulkhead | Aft Landing Gear Bulkhead |
|---|---|---|
| Finished! ✅ 2022-11-03 | Finished! ✅ 2022-10-28 | Finished! ✅ 2022-10-30 |
The landing gear attach bulkheads are the bulkheads used to attach the main landing gear to the rest of the airplane. When installed into the fuselage in Chapter 6, they’ll form a box with an open bottom. This bottom is where the mains will be inserted, and then clamped into. During installation, the forward and upper landing gear bulkheads will be joined together into one bulkhead, while the aft landing gear bulkhead will remain separated.
Note: The plans call the upper landing gear bulkhead and the forward landing gear bulkhead the same part. But they are made separately and then later joined. For that reason, as well as because “upper forward landing gear bulkhead” is a bit much, I’m going to refer to the lower portion of the forward landing gear bulkhead as the forward landing gear bulkhead. Similarly, the upper portion of the forward landing gear will be referred to as the upper landing gear bulkhead.
Tips:
- When glassing the forward and aft bulkheads, add epoxy onto the hardpoints before adding glass. I found this significantly improves adhesion and also reduces air bubbles and other imperfections.
- When you glass these bulkheads, it’s a really good idea to apply masking tape to opposite faces. Especially around the hardpoints. I found that epoxy could very easily get underneath the foam where the bulkheads are. Masking off the underside face will likely save you from having to sand off that epoxy.
For all three of these bulkheads, I initially misread the plans and made them out of high-density clark foam like the other bulkheads are. These should be made out of lower-density PVC foam, which I am working on remaking these with. Thankfully, I had not done much other than assemble the foam core of the bulkheads. Additionally, these are still useful as templates for making additional copies of the foam cores.
When I remade them with the correct foam, I was able to cut them in one piece - no epoxying with 5-minute epoxy required.
When joined in the fuselage, the landing gear bulkheads will form a box. The fuselage struts will be bolted on in between the hardpoints on either side.
Making the Hardpoints
I made 12 inch by 8 inch sheets of 22 ply BID fiberglass for the bulkhead hardpoints. Which is enough to make 8 hardpoints. Which has turned out to be a good mistake because I irreparably damaged 2 of them with my trim router while I was trying to trim them to their final shape.
Tip: If you’re using a handheld router, hold the router with both hands. Don’t try to hold it with one hand, and a vacuum hose (for dust collection) with the other. I was lucky and didn’t get hurt when this happened.
My second attempt was much more successful. I didn’t bother with the router at all, and cut the fiberglass with an oscillating tool. I used a belt sander for final shaping, and it came out quite well.
Forward and Upper Landing Gear Bulkheads
At this point, the forward and upper landing gear bulkheads should only be glassed with 2 layers of BID and a layer of UNI (horizontally). Later in Chapter 6, the forward and upper landing gear bulkheads will be joined together with some additional reinforcement layups. In my first version of the upper landing gear bulkhead, I made the mistake of adding the reinforcement layups while building the initial part. That and other mistakes (not applying the horizontal layer of UNI to the vertical sides of the part, the 45° edges delaminated from the foam during cure) led me to conclude that I should redo the upper landing gear bulkhead. Don’t make the same mistake I did, double check the layups you’ll be doing before doing them.
However, my forward landing gear bulkhead was built with the 3 layers as described in the plans. Unfortunately, I rejected this part after curing both sides because I accidentally used the wrong kind of fiberglass.
On 2022-09-11, I discovered that some replacement BID I had switched over to in August was actually UNI. This mistake was due to blindly trusting that the BID I had ordered was actually BID, without verifying that. Once I realized this mistake, I went through my build footage to check which parts were affected, and to my relief, it was really only the forward landing gear bulkhead (the other parts I had used the not-BID for were either rejected, or were the stiffener ribs on the instrument panel, which I don’t think will be an issue). I marked that part as not-for-flight, ordered new foam and fiberglass, and made a note to check that in the future the fiberglass I receive is actually I actually ordered. Once the new fiberglass came, I did verify that it was actually BID, and that the fibers were running as they should be.
The next forward landing gear bulkhead I made had what looked like too many air bubbles over the hardpoints. After trying to sand off enough fiberglass to repair that mistake, I realized it would be faster to just cut off the hardpoints and re-use them with a new foam core. Which is exactly what I did.
This third forward landing gear bulkhead I tried was successful. This is where I had the idea to try adding epoxy to the hardpoints before adding fiberglass, which worked amazingly well. Once both faces were glassed, cured, and trimmed, I sanded off the stray glass then drilled the quarter-inch holes into the forward bulkhead.
(The white spots here are artifacts left over on the very top layer of epoxy from pulling off the peel ply, not indications of air bubbles. Took me a while to realize that too. It means the layup was a little too wet.)
Upper Landing Gear Bulkhead
The upper landing gear bulkhead is made much like the lower landing gear bulkhead. It does not have hardpoints, but it still receives the same 2-BID, 1-UNI layup.
I made a mistakes here, which I didn’t discover until near the very end. The top and bottom 45° edges are not supposed to be glassed. I did glass them. Fortunately, because these edges didn’t turn out evenly, decided to sand them off, with the intention to reglass them. I should’ve stopped once I sanded those layers off, but I also thought the faces should still be glassed, so I also sanded off some nearby fiberglass, per the instructions for doing repairs. I have since re-glassed those areas, and am awaiting curing.
Additionally, after I glassed the upper face, while removing the peel ply, I took off some of the top layer of UNI. Which isn’t a big deal. Sand down the area to create a good surface for a mechanical bond, also sand the surrounding area a bit. And reglass with a layer of BID (to replace the layer of BID I damaged by sanding in to), and a layer of UNI. Just in the affected areas. Not too difficult.
Aft Landing Gear Bulkhead
Unlike the forward bulkheads, the aft landing gear bulkhead does receive side reinforcement layers at this stage. Additionally, the entire bulkhead is covered in 2 layers of BID and 2 layers of horizontal UNI. The reinforcement layers for the aft bulkhead are 8 layers of UNI (vertically skewed, aligned with the inside edges) on each outer edge of the forward side, and 3 layers of UNI (vertically skewed, aligned with the inside slant) on each outer edge of the aft side. Then at the end, you drill in 2 7/8“ holes near the top on the outer edges.
Firewall
Status: Temporary firewall complete. 3 out of 4 pieces of the permanent firewall are also complete.
Temporary firewall, cut from a large 4x8 sheet of 1/8 inch birch ply I got from a big box store. It’s terrible wood, but that doesn’t matter because it’s not going to fly. It’ll be used briefly in chapter 6 as a fit check before assembling the fuselage with the lower piece of the permanent firewall.
The permanent firewall is made out of very high quality baltic birch (with a price to match).
I delayed building the permanent firewall due to worrying about the blind screws. The way you’re supposed to secure the blind screws is essentially by applying a bunch of flox and hoping that the epoxy holds - has been known to cause a ton of issues, because the flox does not handle torque well. There are a couple possible solutions. One is to use hex bolts and chisel out a recess for the bolt heads. Another is to use clickbonds from cozygirrrl. A third is to wrap a metal thread around the screws. After some deliberation, I decided to go with hex bolts. I ordered a bunch of AN3-5A hex bolts from Aircraft Spruce (21/32“ nominal length, 1/4“ grip length, cadmium plated, undrilled), and will be finishing the firewall with them once they arrive.
After the hex bolts arrived, and not a whole lot of other excuses to put this off, I decided to start cut out the aluminum blocks for the engine mount. This was a pain, because I don’t really have metal cutting tools available to me. Thankfully, aluminum can be cut with woodworking tools - it just takes a while. I cut these 4 using a dremel and my oscillating tool. This was my first time using a dremel, and I’m just happy I didn’t explode a cutting wheel. If I were to build another firewall, I would 100% buy already-cut blocks of aluminum. Even if I have to oversize them, it would be worth it to me.
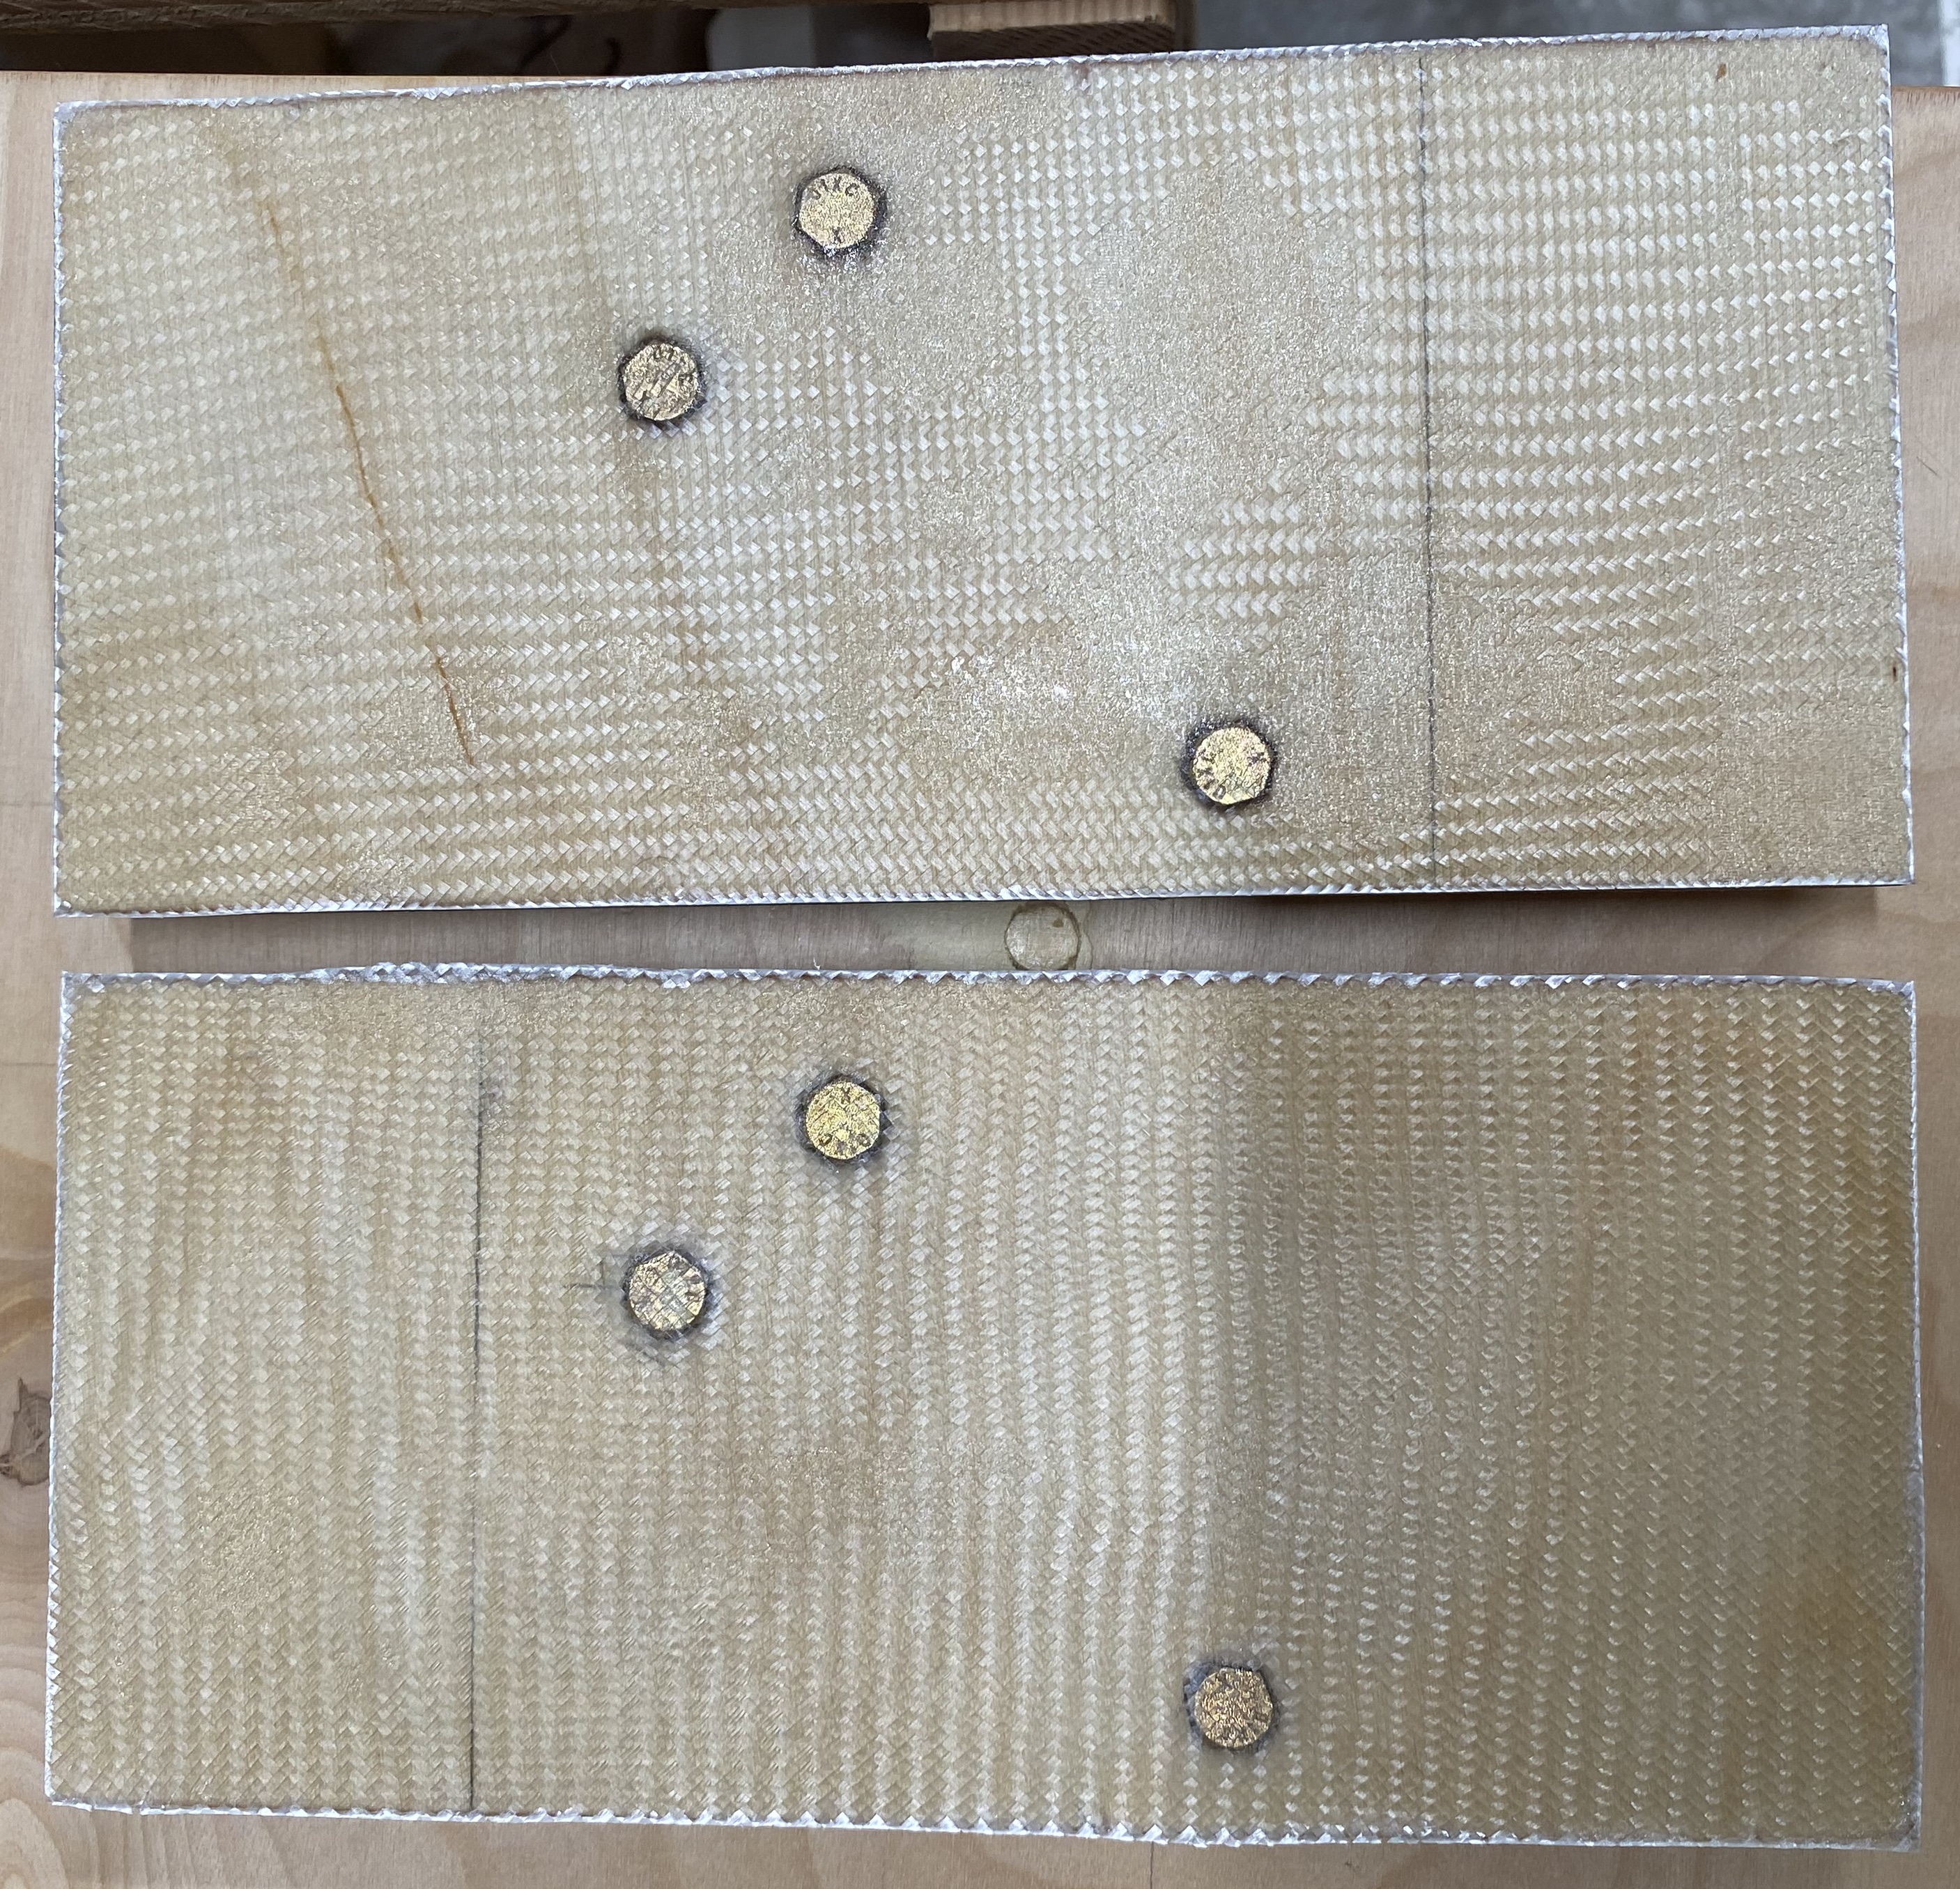
A few days after I had cut the motor mounts, I installed them in the firewall pieces and glassed the aft faces of all 4 pieces of the permanent firewall.
About a week after glassing the aft face, I used a dremel to route out recesses for the hex bolts. I installed the hex bolts, using flox to fill out the remaining space, and then glassed the forward faces of the firewall pieces.
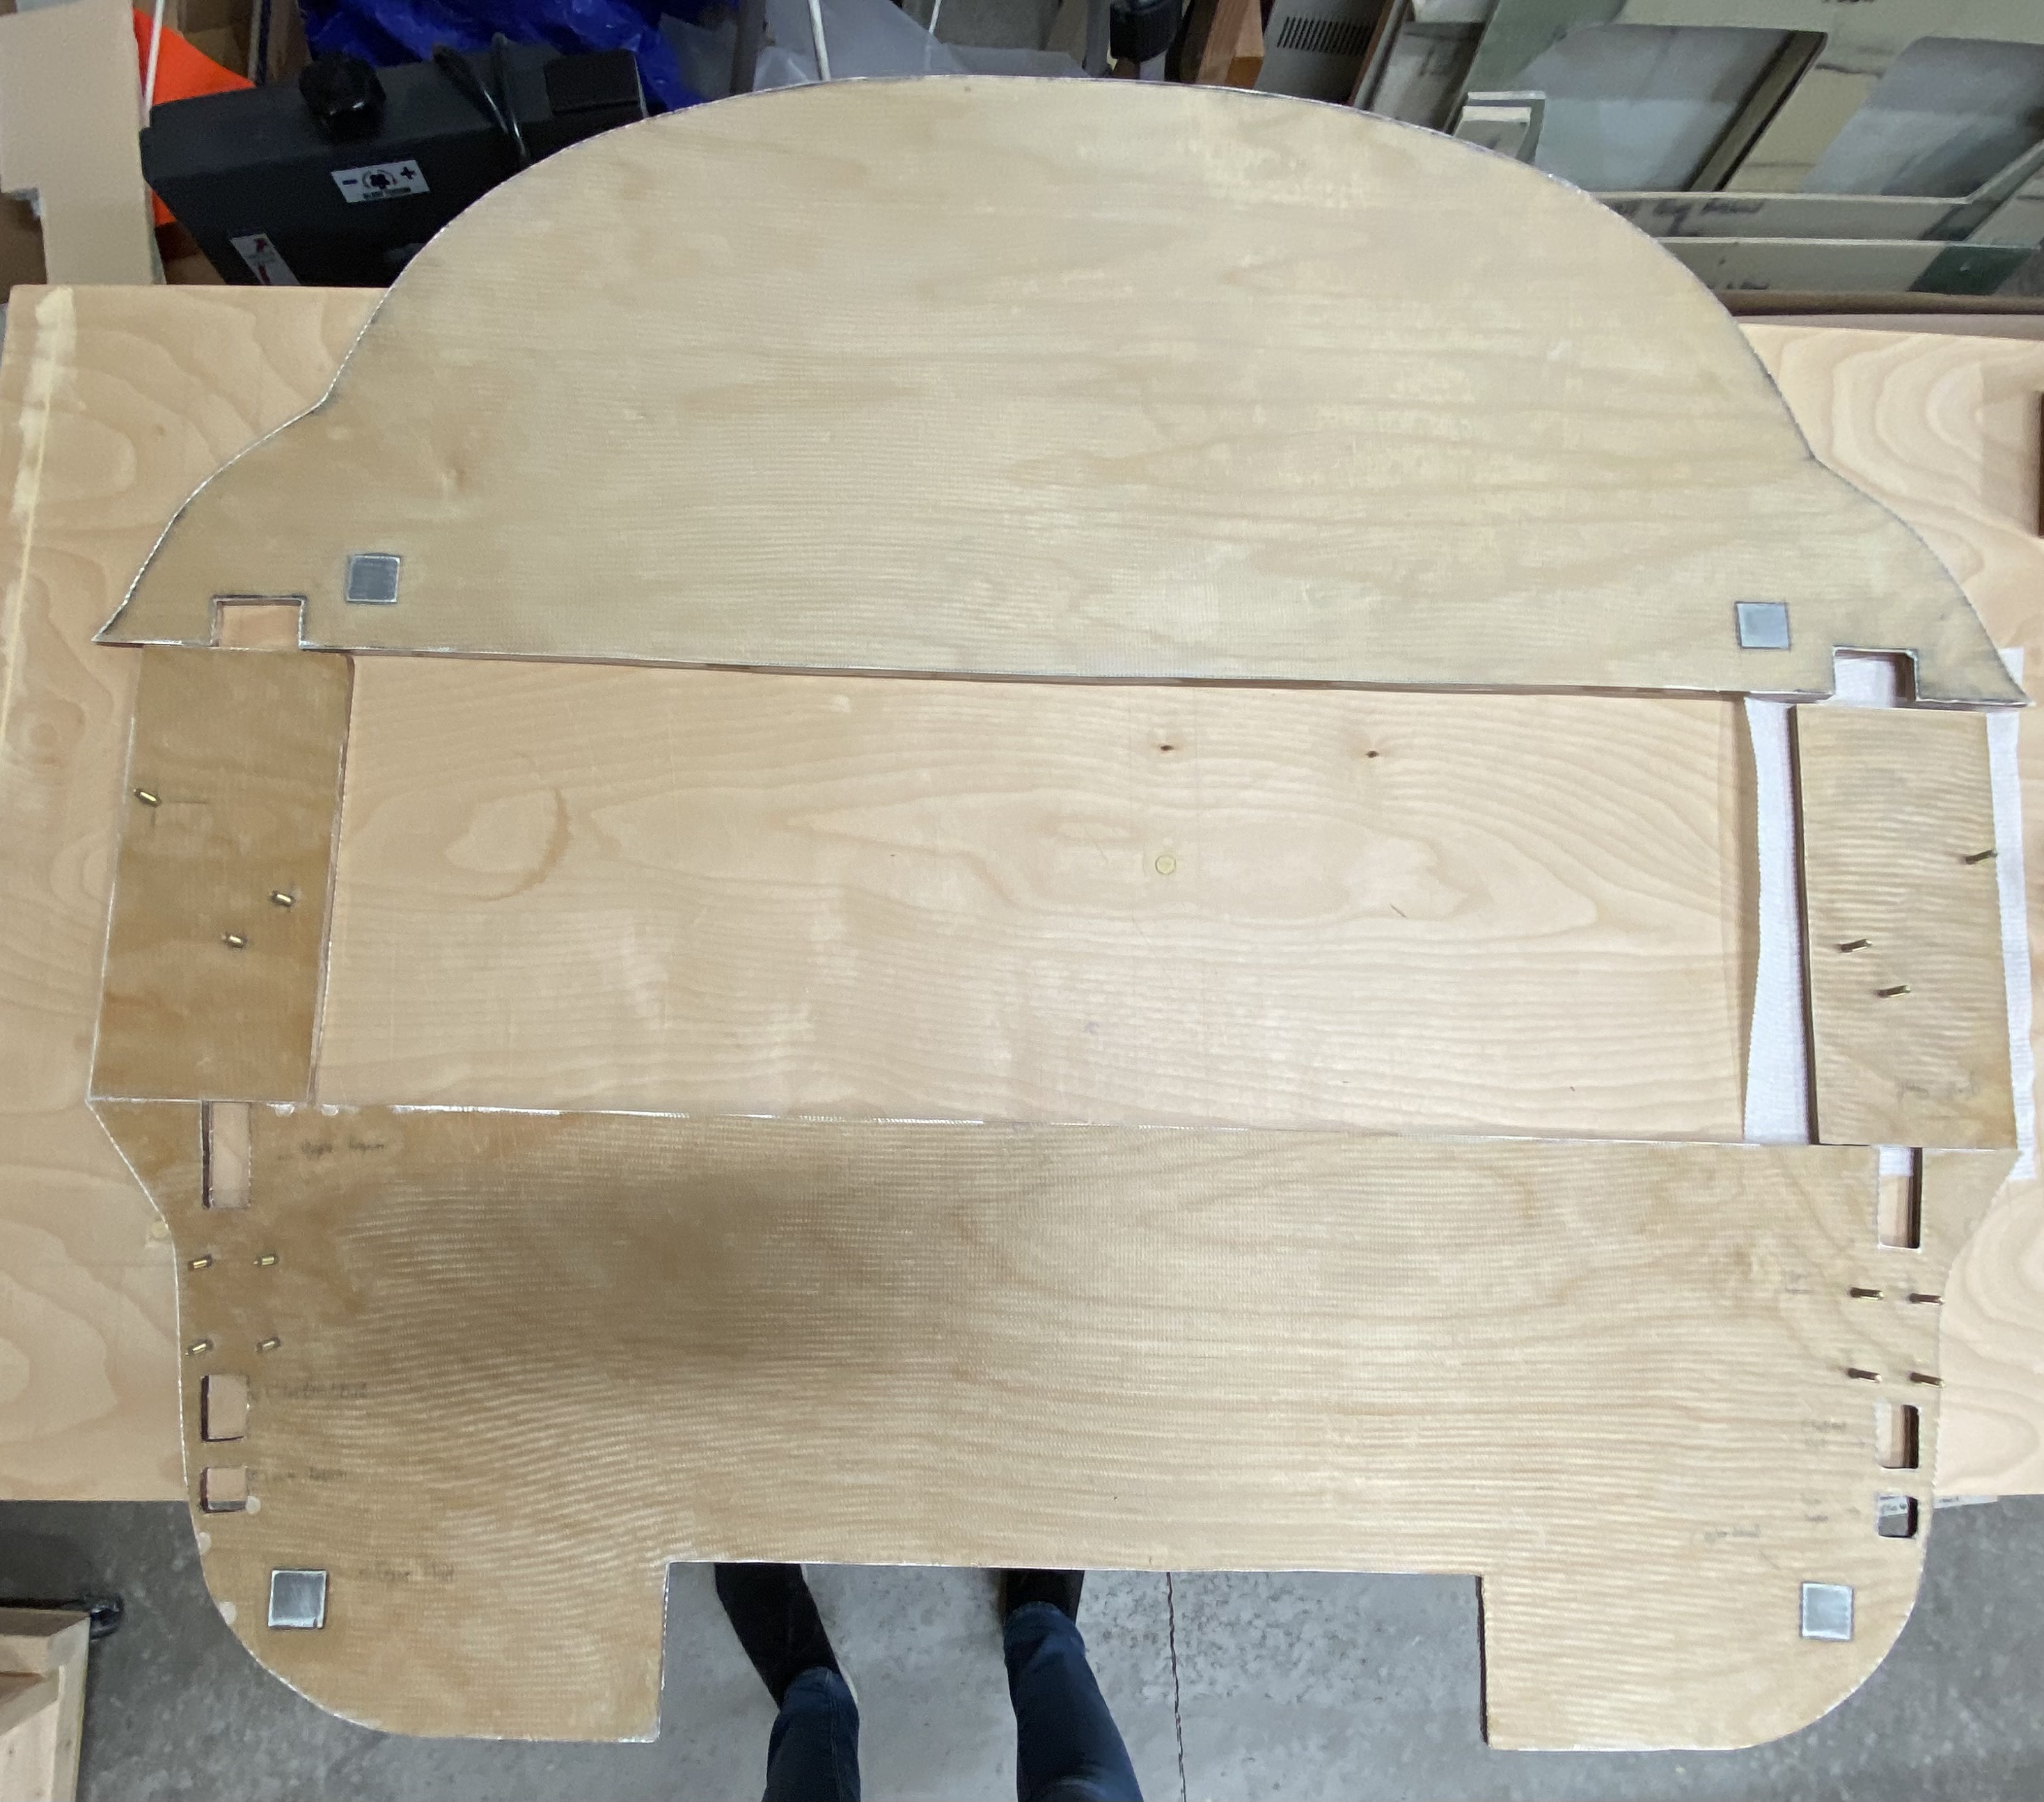
The next day, I pulled off the peel ply. I lined up pieces for a final “yay, I’m done” photo, when I realized I had accidentally made 2 copies of the left-middle piece.
The following day, I cut out a wood core for a right-middle firewall piece. I marked where the bolt holes should go, then I marked which face is which. Then I checked that those markings were correct. Twice. Then I glassed the aft face of that firewall piece. A few days later, I drilled out the recesses for the bolts, installed the bolts, and laid up the forward face. The next day, I pull off the peel ply and cut off the excess fiberglass. Thus completing the firewall pieces and chapter 4.
Log
- 2021-10-09 - Cut front seatback foam panel to size.
- 2021-10-12 - Glassed forward side of front seatback.
- 2021-10-15 - Cut out corners from front seatback. Glassed aft side of front seatback.
- 2021-10-23 - Finished front seatback (cut rest of holes).
- 2021-10-27 - Cut foam shapes for F-28 & the F-22 doubler (initial).
- January 2022 - Cut foam for F-22 (initial) & Instrument Panel. Glued them together. Also cut & glued the wrong foam to make the landing gear bulkheads. Didn’t realize this mistake until June 2022.
- 2022-03-29 - Start cutting temporary firewall out of home depot 1/4 inch birch plywood. Which is fine, because this won’t go on the final aircraft.
- 2022-03-31 - Finished temporary firewall.
- 2022-04-05 - Cut rough outline for permanent firewall.
- 2022-05-14 - Laid up 2 of 4 fiberglass bricks for landing gear bulkhead hardpoints
- 2022-05-15 - Sanded down angles of F-22 doubler to the correct shape
- 2022-05-20 - Laid up 2 more fiberglass bricks for landing gear bulkhead hardpoints. You don’t necessarily need 4 bricks (you can easily get 2 hardpoints per brick. 3 if you’re really careful. At the time, I thought it was 1 brick per hardpoint). But this worked out for me because I made errors cutting the 2 of the hardpoints.
- 2022-05-22 - Laid up aft side of F-22 bulkhead (initial).
- 2022-05-25 - Trimmed excess fiberglass from aft side of F-22 (initial).
- 2022-05-28 - Laid up aft side of Instrument panel and one side of F-28.
- 2022-05-29 - Laid up forward side of F-28 bulkhead
- 2022-05-30 - Cut initial hardpoints for the forward landing gear bulkhead. Router slipped from my hand and both were damaged and in a to-me unrepairable state.
- 2022-05-31 - Trimmed rest of the two larger shapes of the permanent instrument panel.
- 2022-06-03 - With help of my wife’s labmates, re-cut the landing gear bulkheads. This time in the correct foam.
- 2022-07-09 - Trimmed fiberglass from aft side of Instrument Panel.
- 2022-07-10 - Re-cut hardpoints for the forward landing gear bulkhead. These ones came out much better.
- 2022-07-11 - Glassed other side of F-28.
- 2022-07-14 - Trimmed fiberglass off F-28. It’s now finished!
- 2022-07-19 - Glassed forward side of Instrument Panel.
- 2022-07-28 - Cut stiffeners for instrument panel. Also cut new foam for F-22.
- 2022-07-?? - Cut out side panels for permanent firewall.
- 2022-08-03 - Drilled holes for screws in permanent firewall (side panels & bottom).
- 2022-08-04 - Sanded down hardpoints for landing gear bulkheads.
- 2022-08-06 - Attached horizontal instrument panel stiffeners with 5-minute epoxy.
- 2022-08-10 - Glassed forward side of upper landing gear bulkhead (the one without hardpoints).
- 2022-08-23 - Pulled off pointers tape from instrument panel. Should’ve done this while the epoxy was still green. There’s still some small amount tape that’s under some cured epoxy. Because of the location, the best I think I can do is scrape at it with a knife.
- 2022-08-24 - Removed as much painters tape on the instrument panel as I could, time-boxing to 2 hours. Also cut fiberglass for glassing the stiffeners.
- 2022-08-25 - Cut fiberglass in preparation for glassing the aft side of the upper landing gear bulkhead (the one without hardpoints).
- 2022-08-26 - Beveled edges of upper landing gear bulkhead. Was going to glass the aft side of this bulkhead, but ran into an issue with the new revision of the epoxy dispenser board and had to work around it.
- 2022-08-27 - Glassed the aft side of the upper landing gear bulkhead. Also glassed the upper side of the horizontal stiffeners on the instrument panel.
- 2022-08-28 - Pulled off the peel ply from the upper landing gear bulkhead & horizontal stiffeners.
- 2022-08-29 - Epoxied (with 5 minute epoxy) the hardpoints to the forward landing gear bulkhead. (The aft landing gear bulkhead’s hardpoints still need a little bit of material trimmed from them).
- 2022-08-30 - Cut fiberglass for both fore and aft sides of the forward landing gear bulkhead.
- 2022-08-31 - Glassed one side of the forward landing gear bulkhead.
- 2022-09-01 - Glassed lower side of the horizontal stiffeners on the instrument panel. Also pulled off fiberglass from failed layup of the forward landing gear bulkhead.
- 2022-09-02 - Glassed the 45° edge on the upper end of the horizontal stretch on the aft side of the upper landing gear bulkhead.
- 2022-09-04 - Installed the vertical stiffeners on the instrument panel. Glassed the inner corners of these as well.
- 2022-09-05 - Installed hardpoints to the aft landing gear bulkhead. Re-glassed the forward landing gear bulkhead.
- 2022-09-06, 2022-09-08 - Cut fiberglass for the landing gear bulkheads.
- 2022-09-09 - Glassed the other side of the forward landing gear bulkhead. Glassed the exterior of the vertical stiffeners on the instrument panel.
- 2022-09-10 - Cut & shaped foam for a new upper landing gear bulkhead.
- 2022-09-11 - Realized I had accidentally been using UNI as BID, paused work as I figured out which parts were now useless and awaited for more actual BID to arrive. (Thankfully only need to redo the forward landing gear bulkhead)
- 2022-09-18 - Replacement foam for landing gear bulkhead arrived. Cut new foam for this. Also cut new hardpoint from last remaining hardpoint sheet. Also trimmed the last bit of fiberglass for the instrument panel, finishing it.
- 2022-09-22 - Glassed aft face of the forward landing gear bulkhead attempt number 2.
- 2022-09-23 - Glassed F-22 attempt number 2.
- 2022-10-02 - Glassed upper face of the upper landing gear bulkhead attempt number 2.
- 2022-10-08 - Glassed aft face of the aft landing gear bulkhead
- 2022-10-09 - Cut out and sanded foam off hardpoints from forward landing gear bulkhead attempt 2, to be used in attempt 3.
- 2022-10-12 - Rough trim of fiberglass off of the aft landing gear bulkhead. Will probably build a router table for the final trim.
- 2022-10-13 - Cut out new foam core of the forward landing gear bulkhead. Epoxied in place the hardpoints.
- 2022-10-14 - Glassed one side of the forward landing gear bulkhead.
- 2022-10-18 - Trimmed fiberglass off forward landing gear bulkhead. Did same to most of the upper landing gear bulkhead.
- 2022-10-19 - Sanded off epoxy that got on the unglassed sides of all of the landing gear bulkheads.
- 2022-10-22 - Glassed the other sides of the forward landing gear bulkhead and the upper landing gear bulkhead.
- 2022-10-23 - Cut fiberglass in preparation for glassing the forward face of the aft landing gear bulkhead, as well as the forward face of the F-22 bulkhead.
- 2022-10-24 - Glassed the forward face of the aft landing gear bulkhead.
- 2022-10-26 - Trimmed fiberglass on the forward and upper landing gear bulkheads.
- 2022-10-27 - Sanded off fiberglass from lower 45° angled side on the lower face of the upper landing gear bulkhead.
- 2022-10-28 - Trimmed fiberglass off F-22 bulkhead. Sanded excess micro & epoxy off F-22 bulkhead. Drilled 1/4 inch holes in hardpoints of forward landing gear bulkhead, finishing the part. Sanded off fiberglass from the upper 45° angled side pieces on the lower face of the upper landing gear bulkhead.
- 2022-10-29 - Glassed the forward face of the F-22 bulkhead.
- 2022-10-30 - Finished the Aft Landing Gear Attach Bulkhead (trimmed fiberglass & drilled holes). Pulled peel ply of of the F-22 bulkhead.
- 2022-11-01 - Re-glassed parts of the lower face of the Upper Landing Gear Attach Bulkhead.
- 2022-11-02 - Re-glassed parts of the upper face of the Upper Landing Gear Attach Bulkhead.
- 2022-11-03 - Trimmed excess fiberglass from F-22 and Upper Landing Gear Attach Bulkhead.
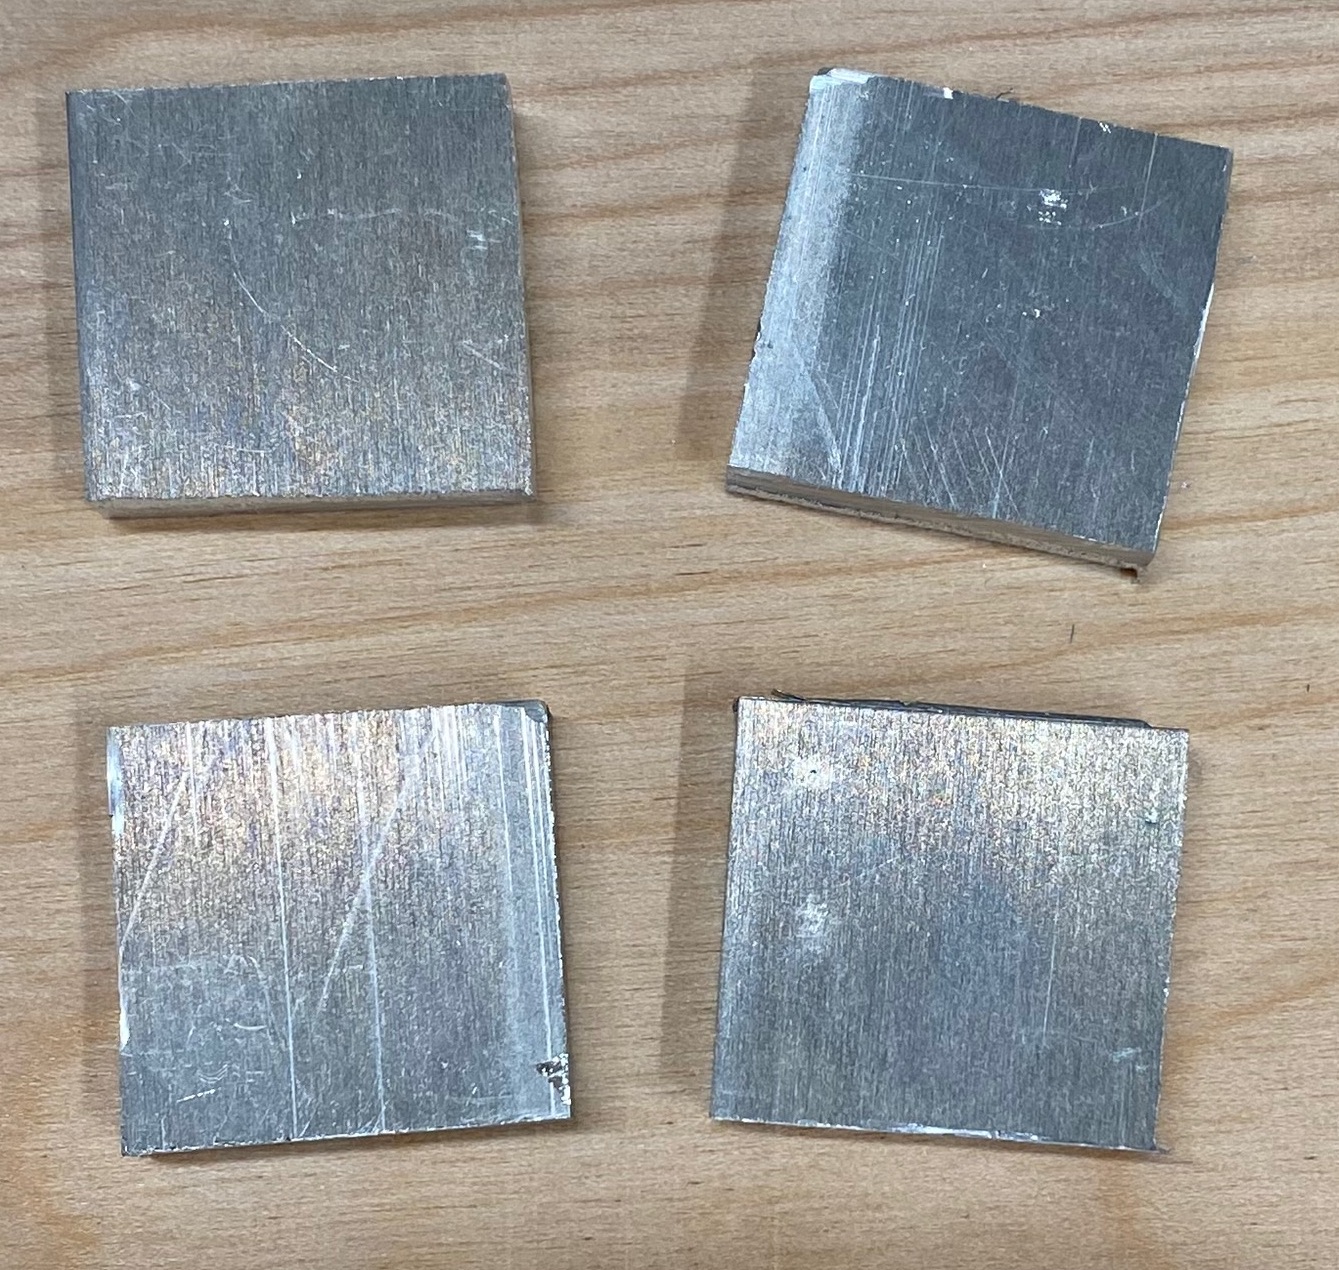
- 2022-11-16, 2022-11-17 - Cut out the 1“ by 1“ by 0.25“ aluminum blocks, to be used for the motor mounts on the firewall.
- 2022-11-18 - Alodined the aluminum motor mounts.
- 2022-11-21 - Glassed the aft face of the the 4 parts of the permanent firewall.
- 2022-11-28 - Installed hex bolts - a deliberate change from the plans. Glassed the forward faces of the permanent firewall.
- 2022-11-29 - Pulled off peel ply from the forward faces of the permanent firewall. Realized that I had accidentally made duplicates of the left-middle pieces in the firewall.
- 2022-11-30 - Cut new wood, marked where holes for bolts should be drilled, marked which side to glass first, and glassed the aft face of the new right-middle firewall piece.
- 2022-12-03 - Cut holes & drilled recesses for the bolts on the new right-middle firewall piece.
- 2022-12-04 - Fully installed bolts & laid up forward face of right-middle firewall piece.
- 2022-12-05 - Cut off excess fiberglass from right-middle firewall piece, completing chapter 4.
Last updated: 2022-12-05 20:39:19 -0800