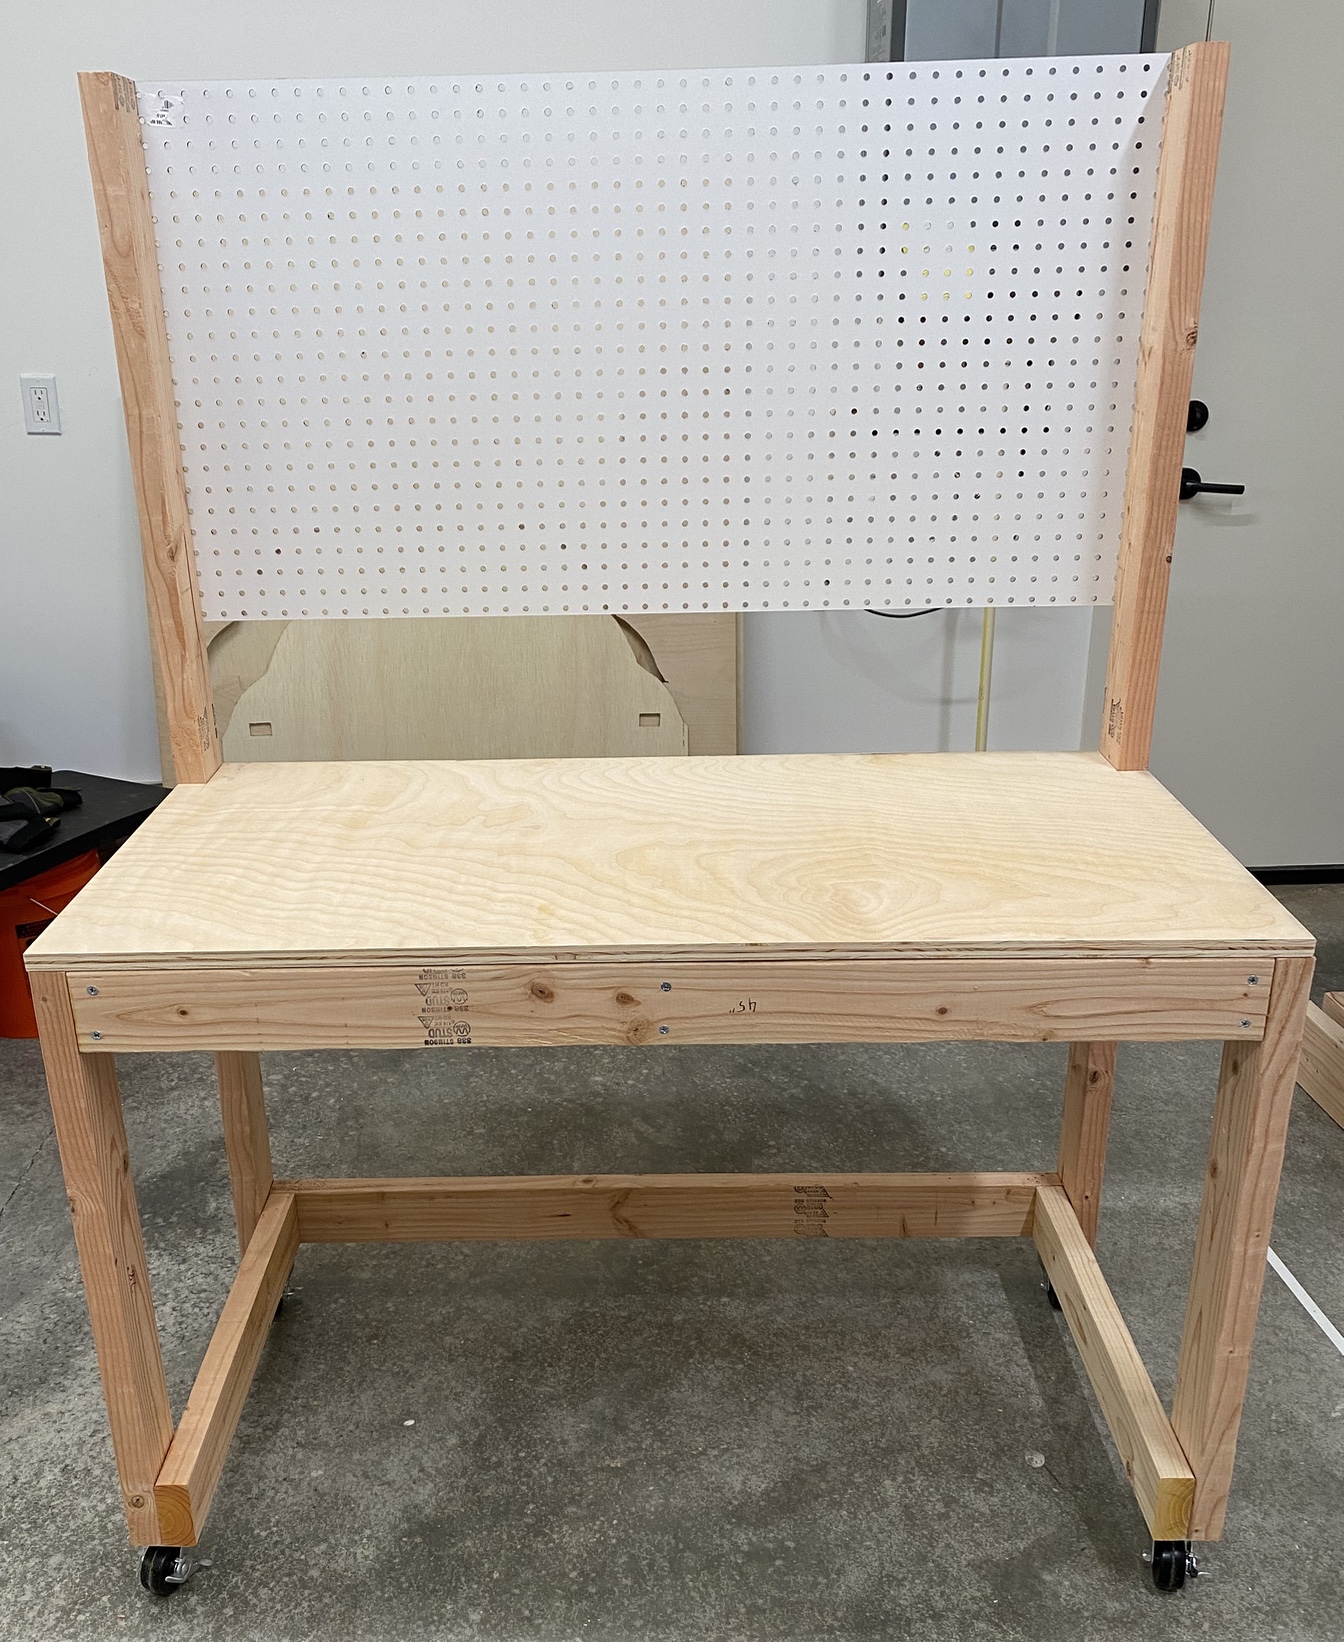
Workdesk
A simple workdesk on wheels with pegboard backing.
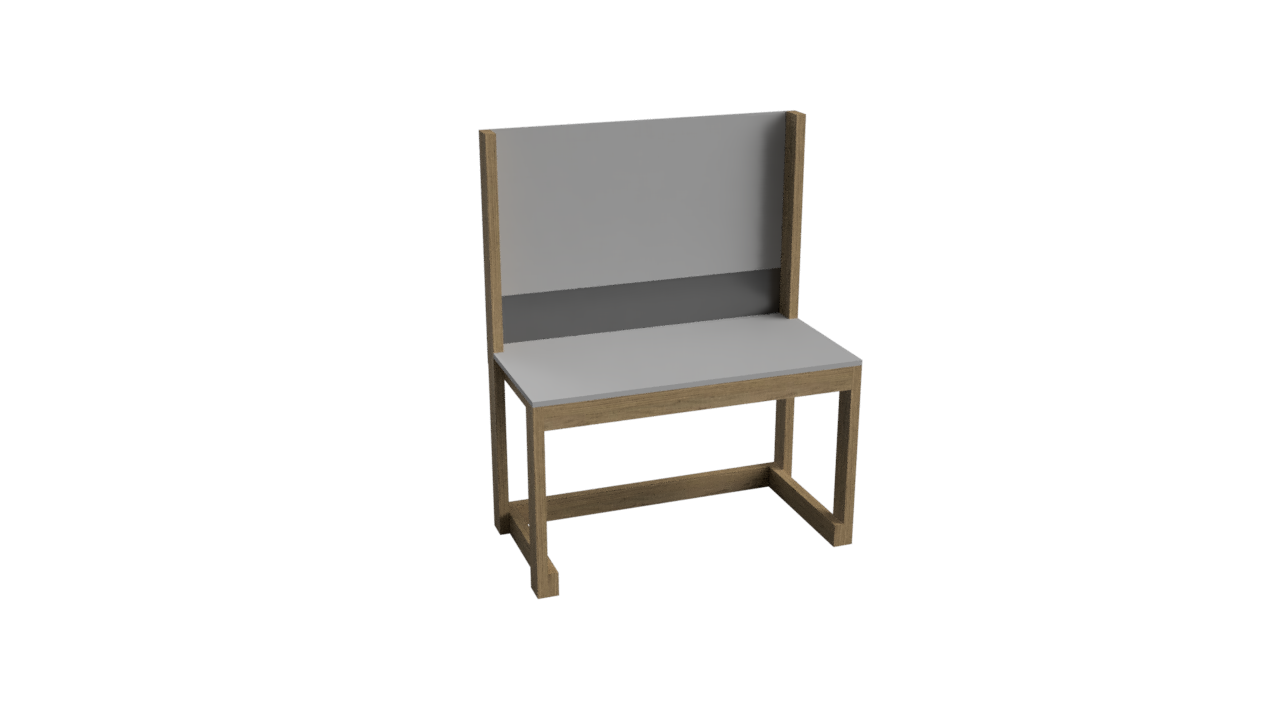
This project happened because, while I had quite a few workbenches made already, I wanted something that would also be more of a designated soldering station. As well as a place to store tools and other things so that they’re not just sitting on one of the workbenches.
Materials
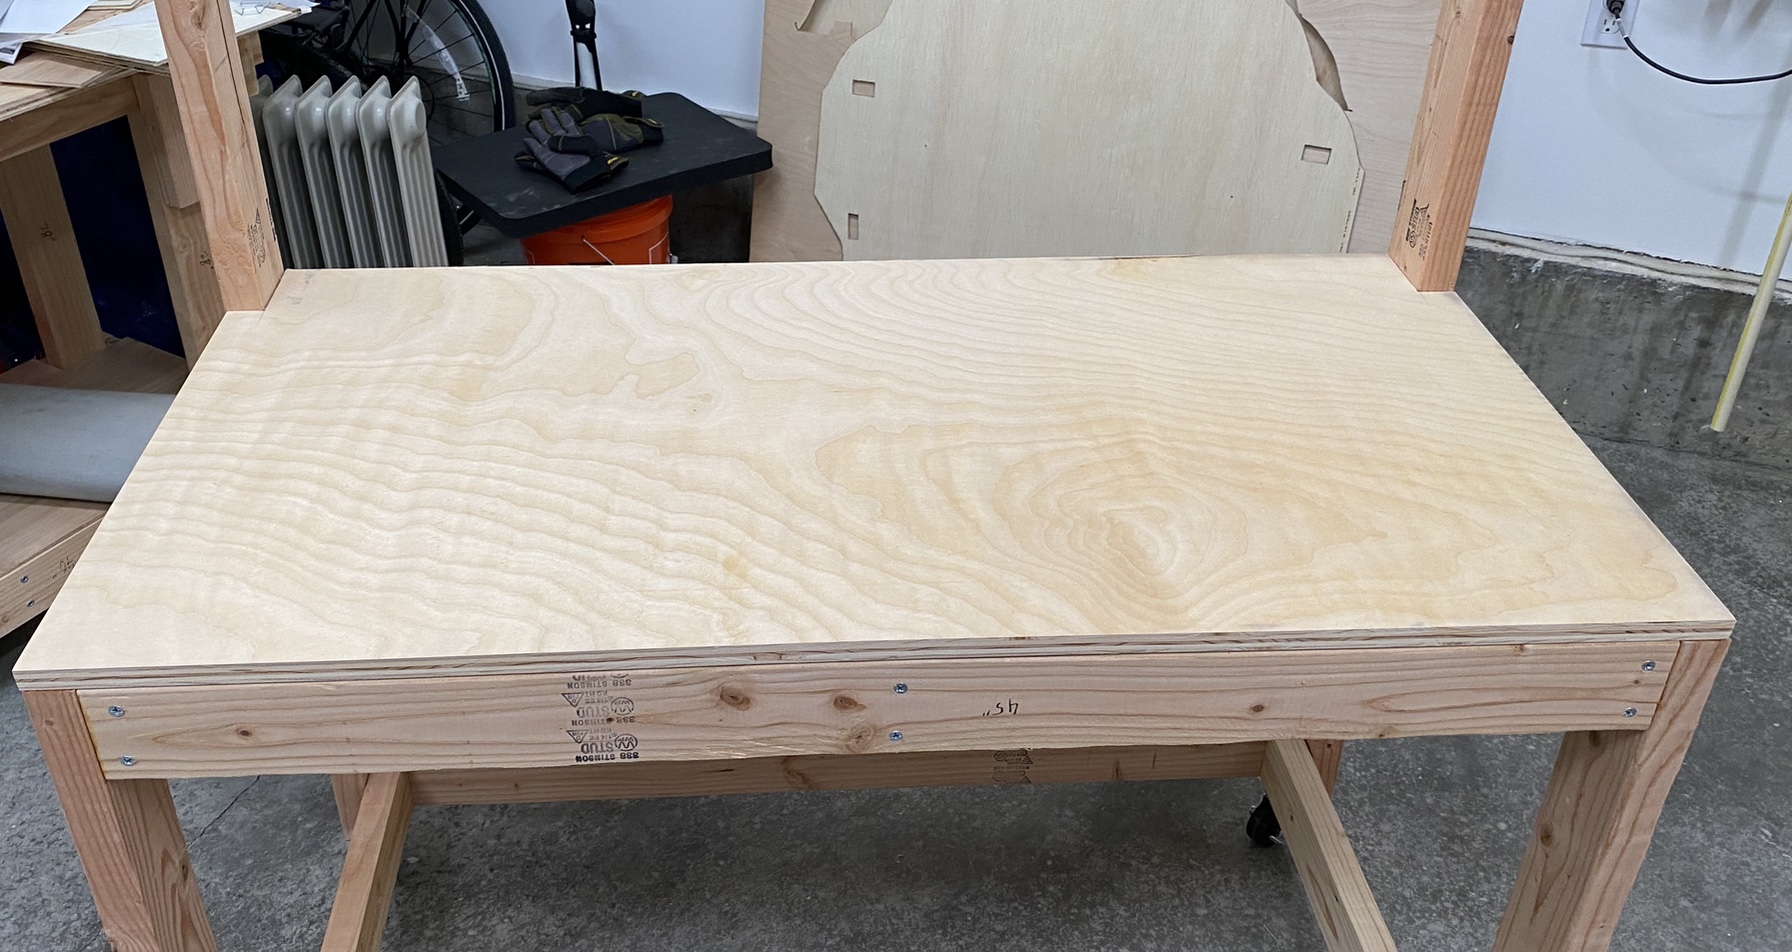
As with the workbench, this is constructed primarily with 2x4 studs, and uses a 2’ by 4’ sheet of 3/4“ plywood as the tabletop.
- 2x4 studs.
- 2x 60“ studs (the rear legs). (1)
- 2x 28“ studs (the front legs)
- 3x 45“ studs (the cross supports)
- 3x 21“ studs (the top depth supports)
- 2x 22.5“ studs (the bottom depth supports)
- Plywood/planes of wood
- 1x 48“ by 24“ by 3/4“ sheet of plywood (top surface)
- 1x 48“ by at least 8“ by any thickness sheet of plywood (to catch things from rolling off the back) (1)
- 1x 48“ by 24“ sheet of pegboard (1)
- Extra hardware
- 4x castering wheels, to make it easier to move around.
- Many 3“ screws.
(1): You can change the height of the rear legs to whatever you want. If you don’t need a backing (i.e. basically making another workbench), you can leave it at 28“ to match the front legs. It should be at least as high as the front legs height (28“) + the depth of the tabletop (3/4“) + however high your pegboard is (in my case, 24“) + any amount of “gap” between the bottom of the pegboard and the tabletop. Having a gap is desirable as it lets you better utilize the pegboard. The plans here specify 60“ because it’s easy to remember.
Instructions
This is intended to be as simple as possible.
- Use woodglue (you can dilute it 1:1 with water to make it easier, but I generally choose not to do this) on the endgrains of the cross and depth supports. This makes drilling into the endgrain result in a much stronger joint.
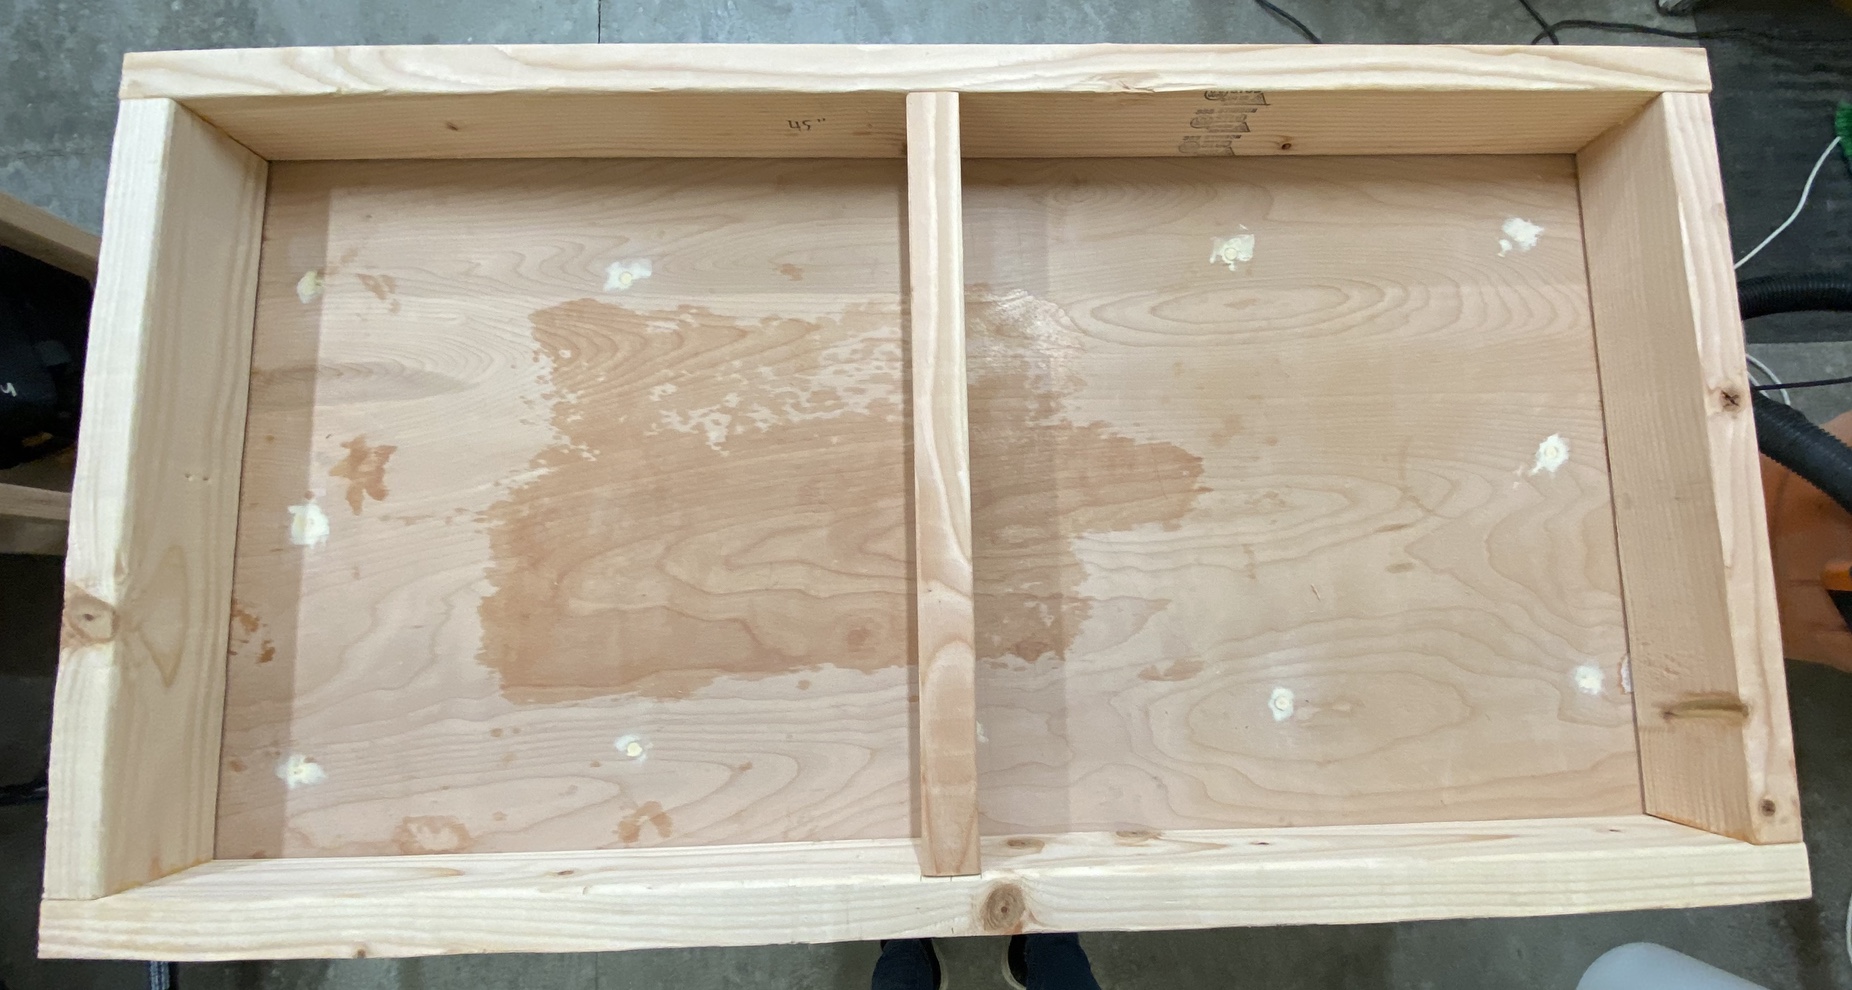
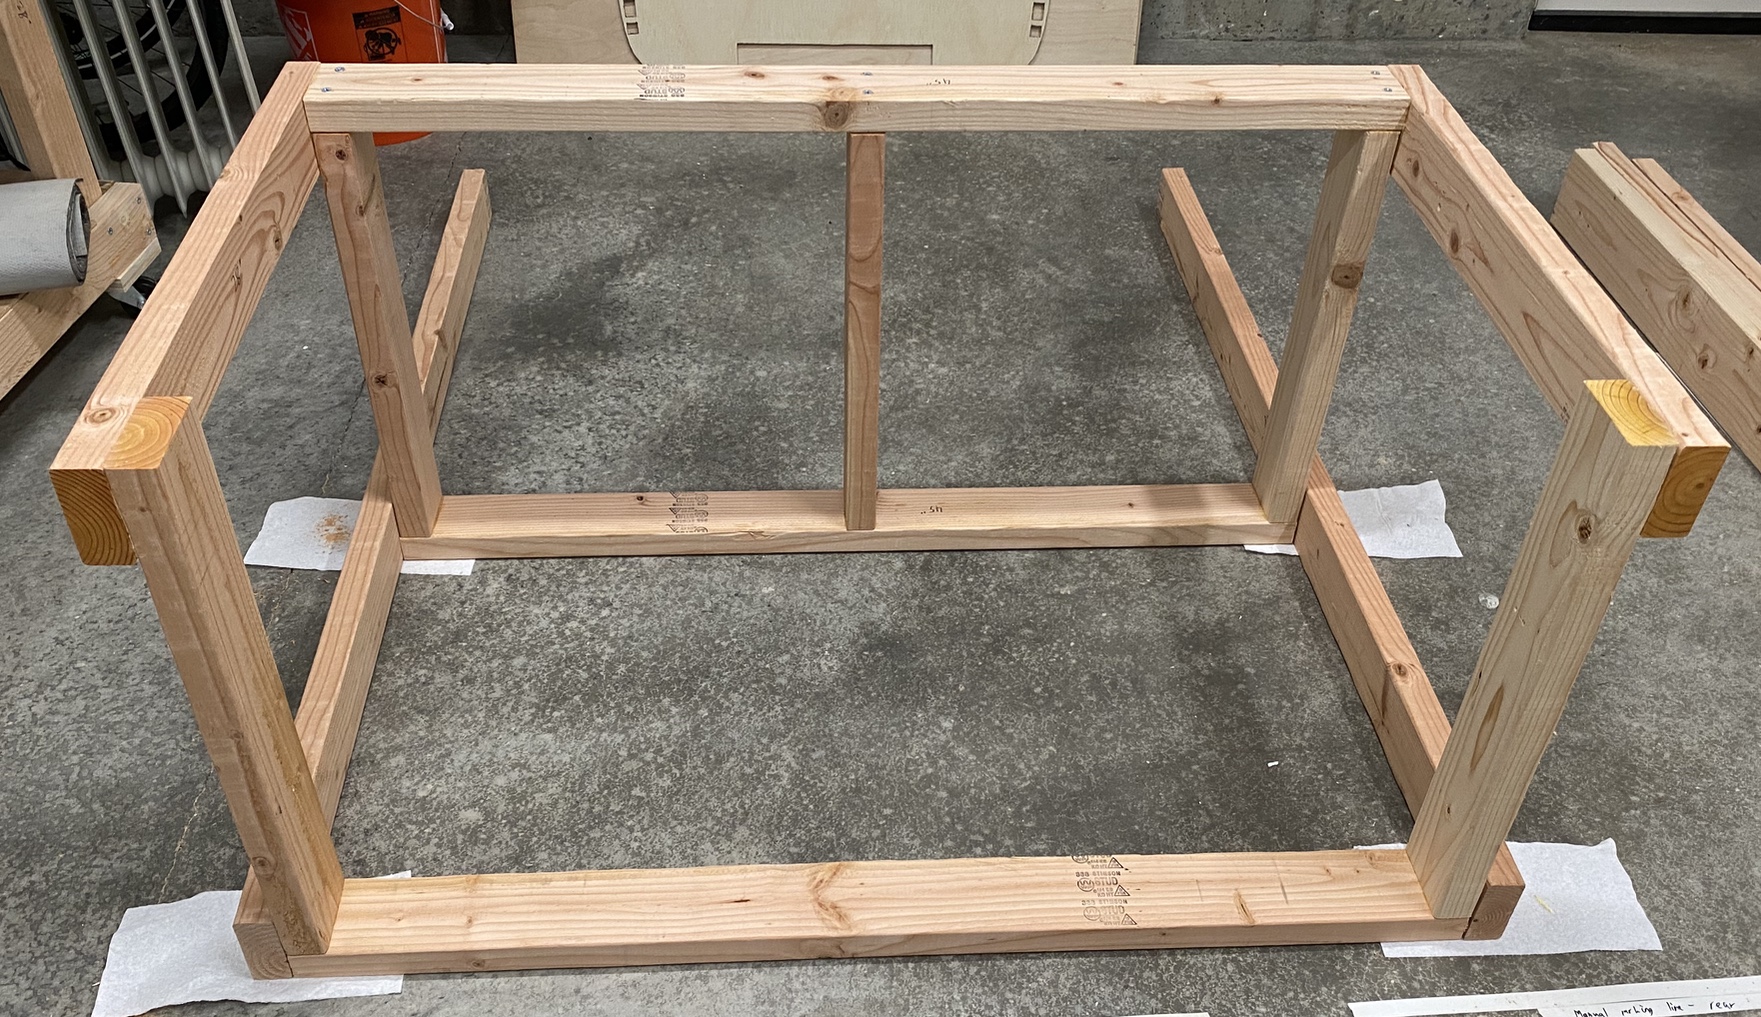
- Top Frame
- Line up the cross supports (the 45“ pieces) and depth supports (the 21“ pieces), with the depth supports inside of the cross supports, and 2 of the depth supports on either end, and the third in the center. Join them together with woodglue, then use screws to secure that connection. I simply screwed into the end-grain. Which isn’t that great of a bond. You could use pocket screws from the other end and it would be a much better joint. Either way works just fine for this.
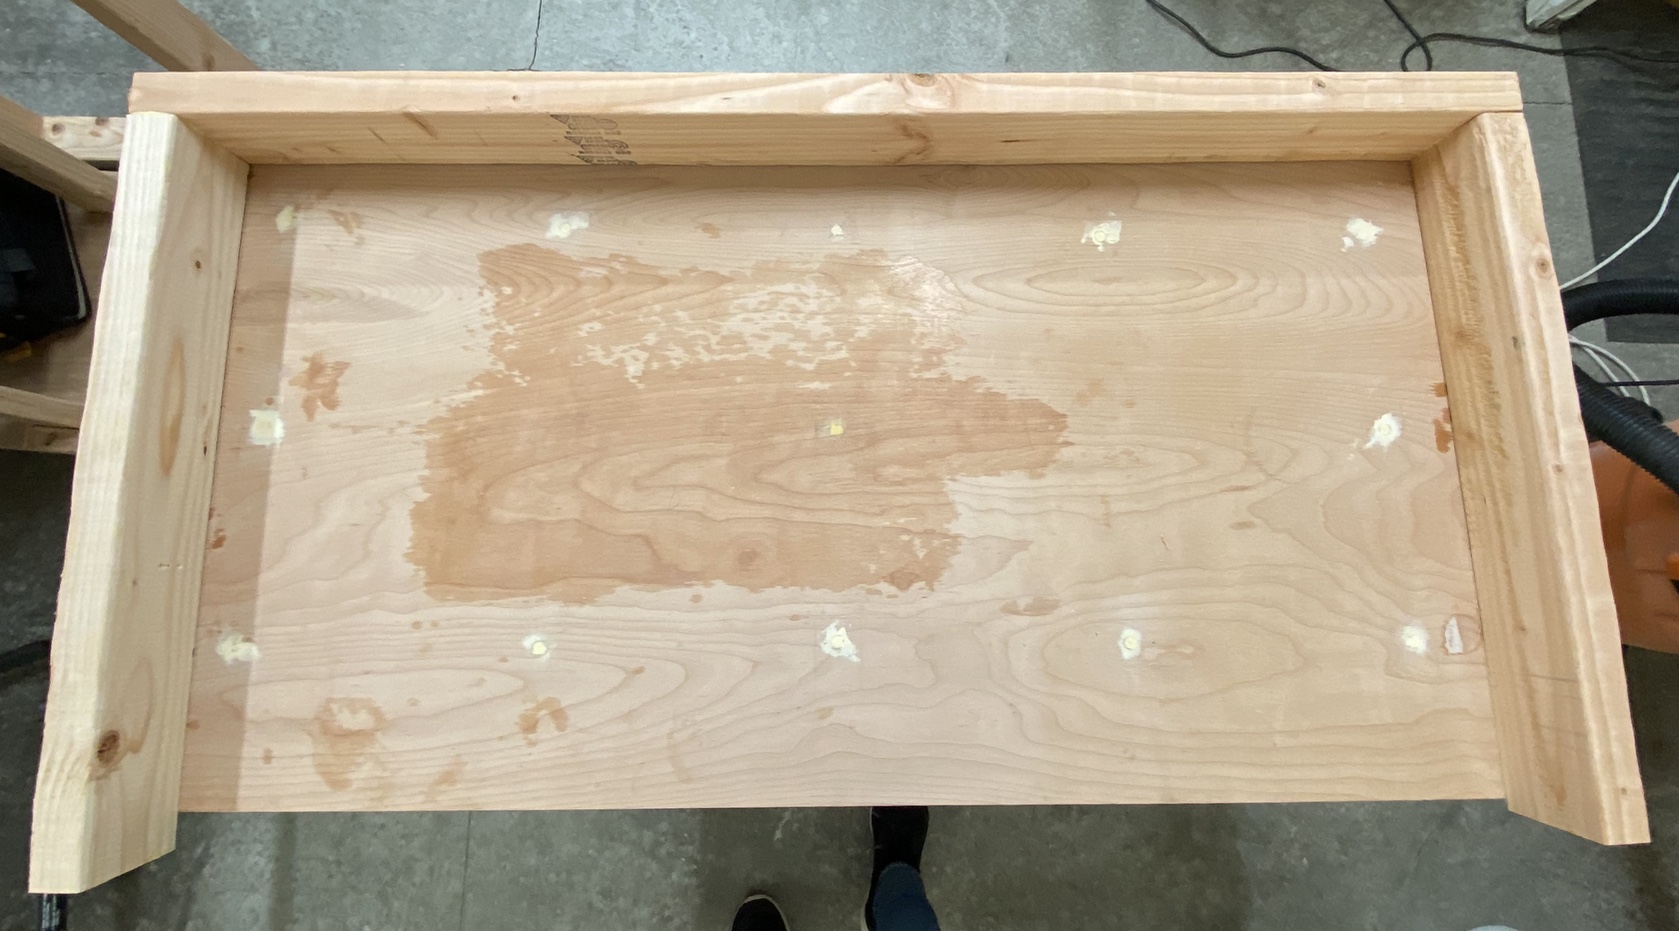
- Bottom frame
- Line up the cross support (45“ piece) and bottom depth supports (the 22.5“ pieces), similar to the top frame. Only this time, because there’s no center depth support, and only one cross support. That lack of extra cross support is why these depth supports are an extra 1.5 inches longer. Join them with woodglue and screws.
- Rotate the frames so that their fronts are facing down, and line up the front legs so that you can easily attach them using woodglue & screws.
- Installing the front legs first is recommended because the back legs, by virtue of being longer, are heavier and make the whole thing more unwieldy to move about.
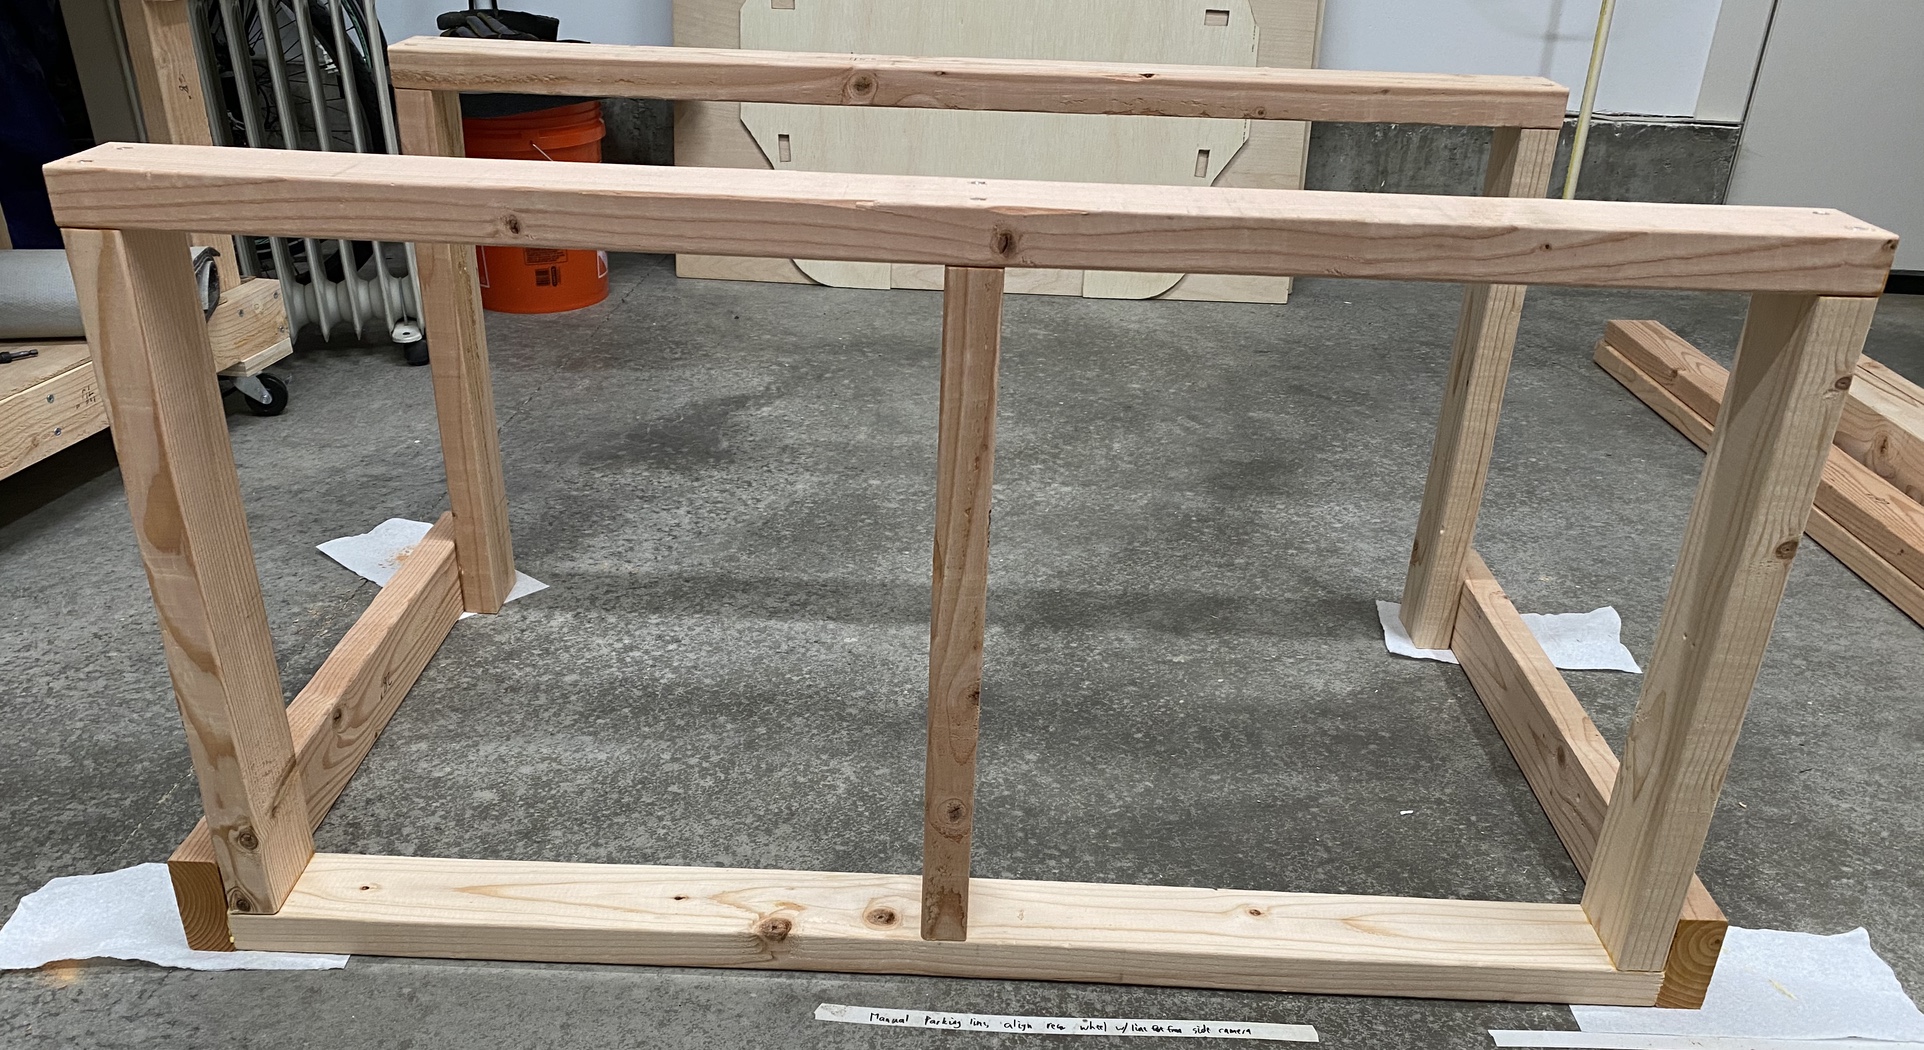
- Rotate the assembly again so that the backs are on the ground, facing down. Install the rear legs similar to how you installed the front legs.
- While the desk is on its back, install the front wheels. Then rotate it again and install the back wheels.
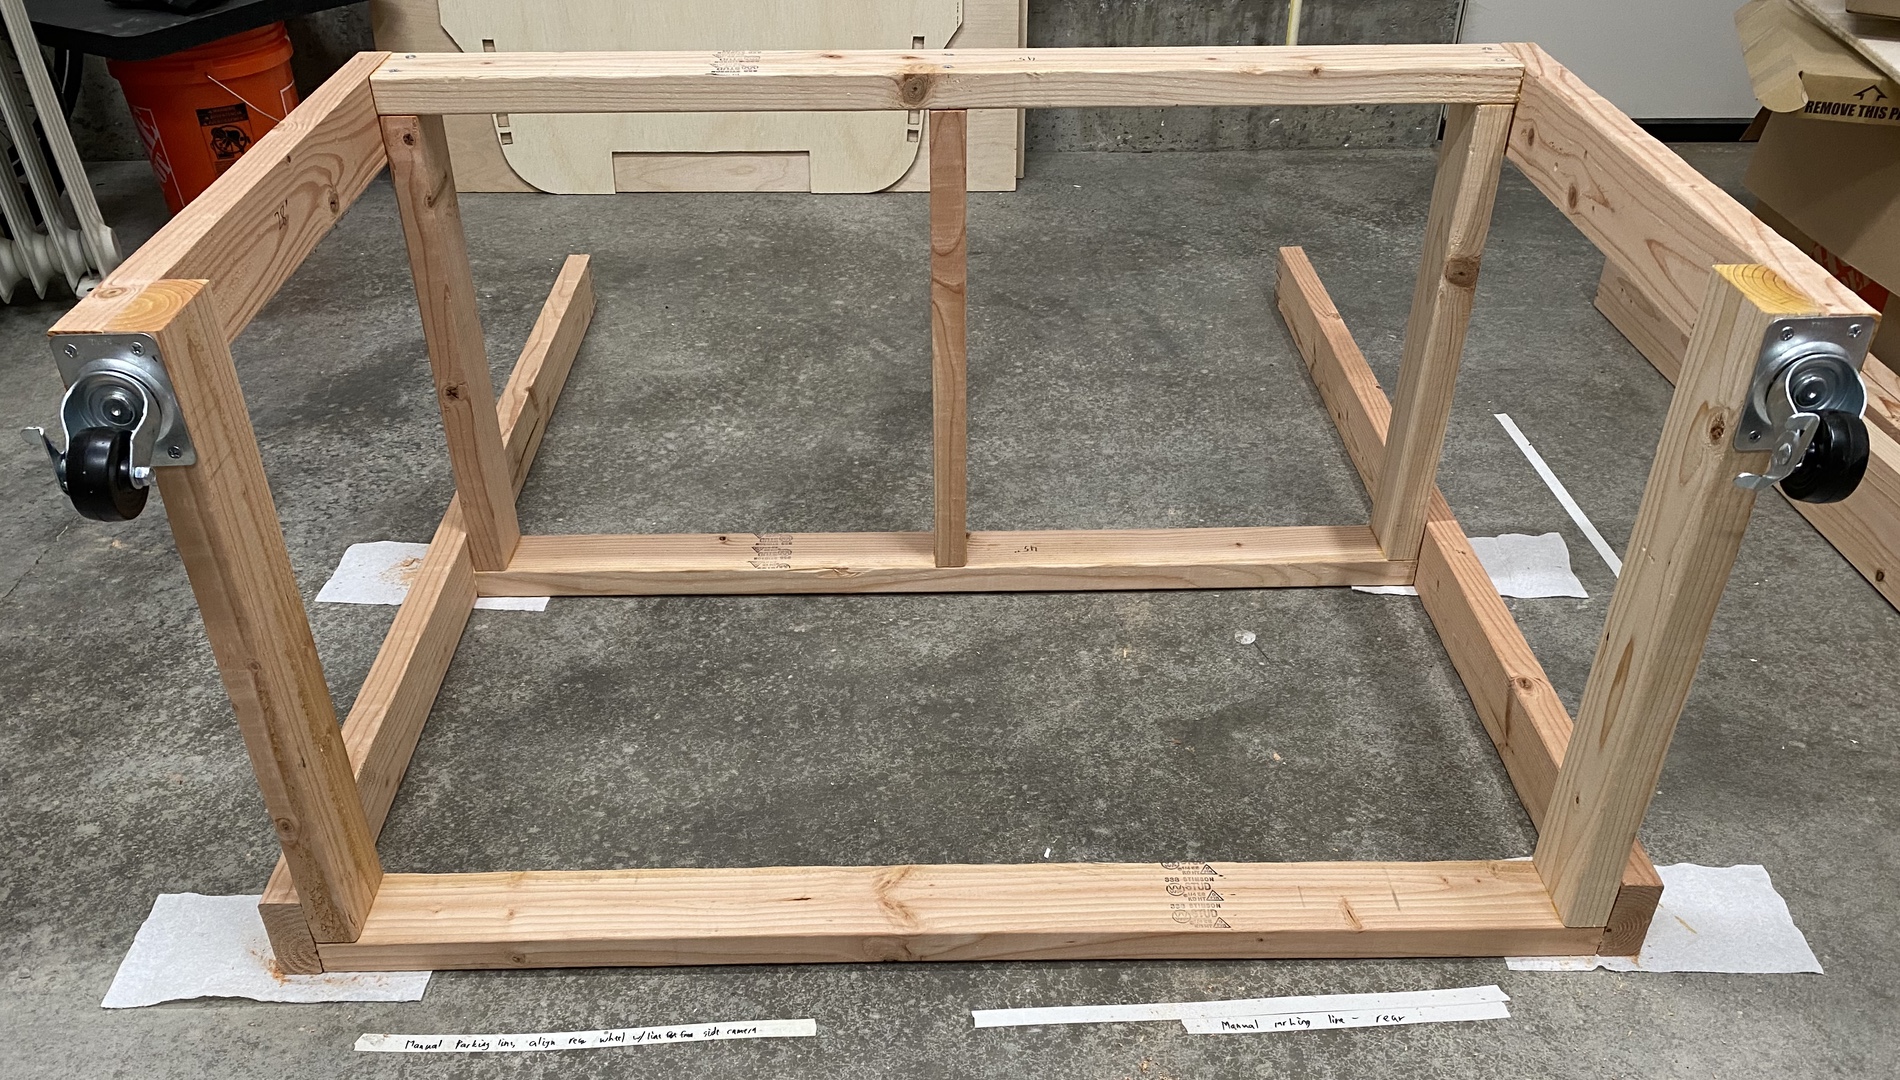
- Rotate the desk so that it’s upright.
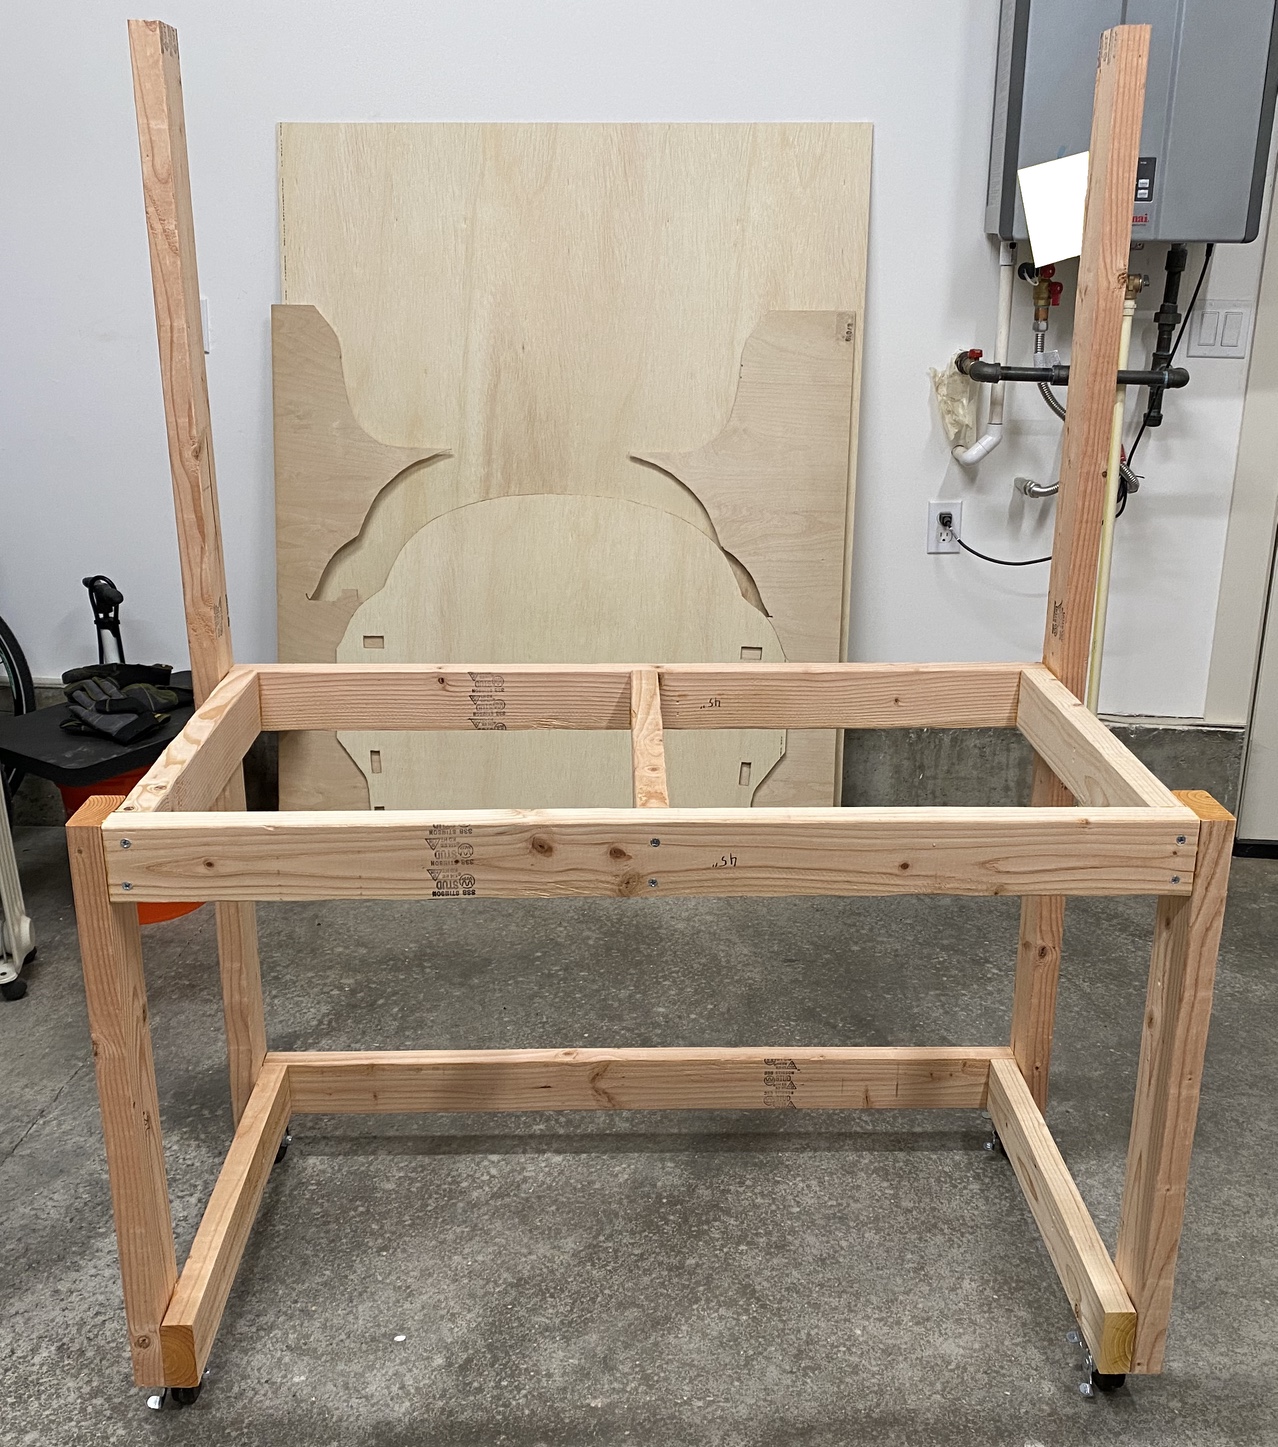
- Cut 2 1.5“ x 3.5“ tabs into the back of the tabletop such that it’ll fit nicely into the top of the desk with no overhangs on the front or rear.
- Get a friend to help you as you screw in the pegboard into the top of the rear legs.
- Install the “backguard” piece by screwing it in. You can add woodglue (or just actual caulk) as caulk to make sure that any small pieces that land back there don’t fall off the back.
- Screw the tabletop into the top frame. Don’t glue it in so that you can easily replace it in the future.
- Paint or finish it as desired. Be sure to sand down the rough edges prior to use.
Last updated: 2022-05-07 19:40:39 -0700