Chapter 6 - Fuselage Assembly
Rejoice! At the end of this, you’ll actually have something to show to people instead of just mostly flat panels.
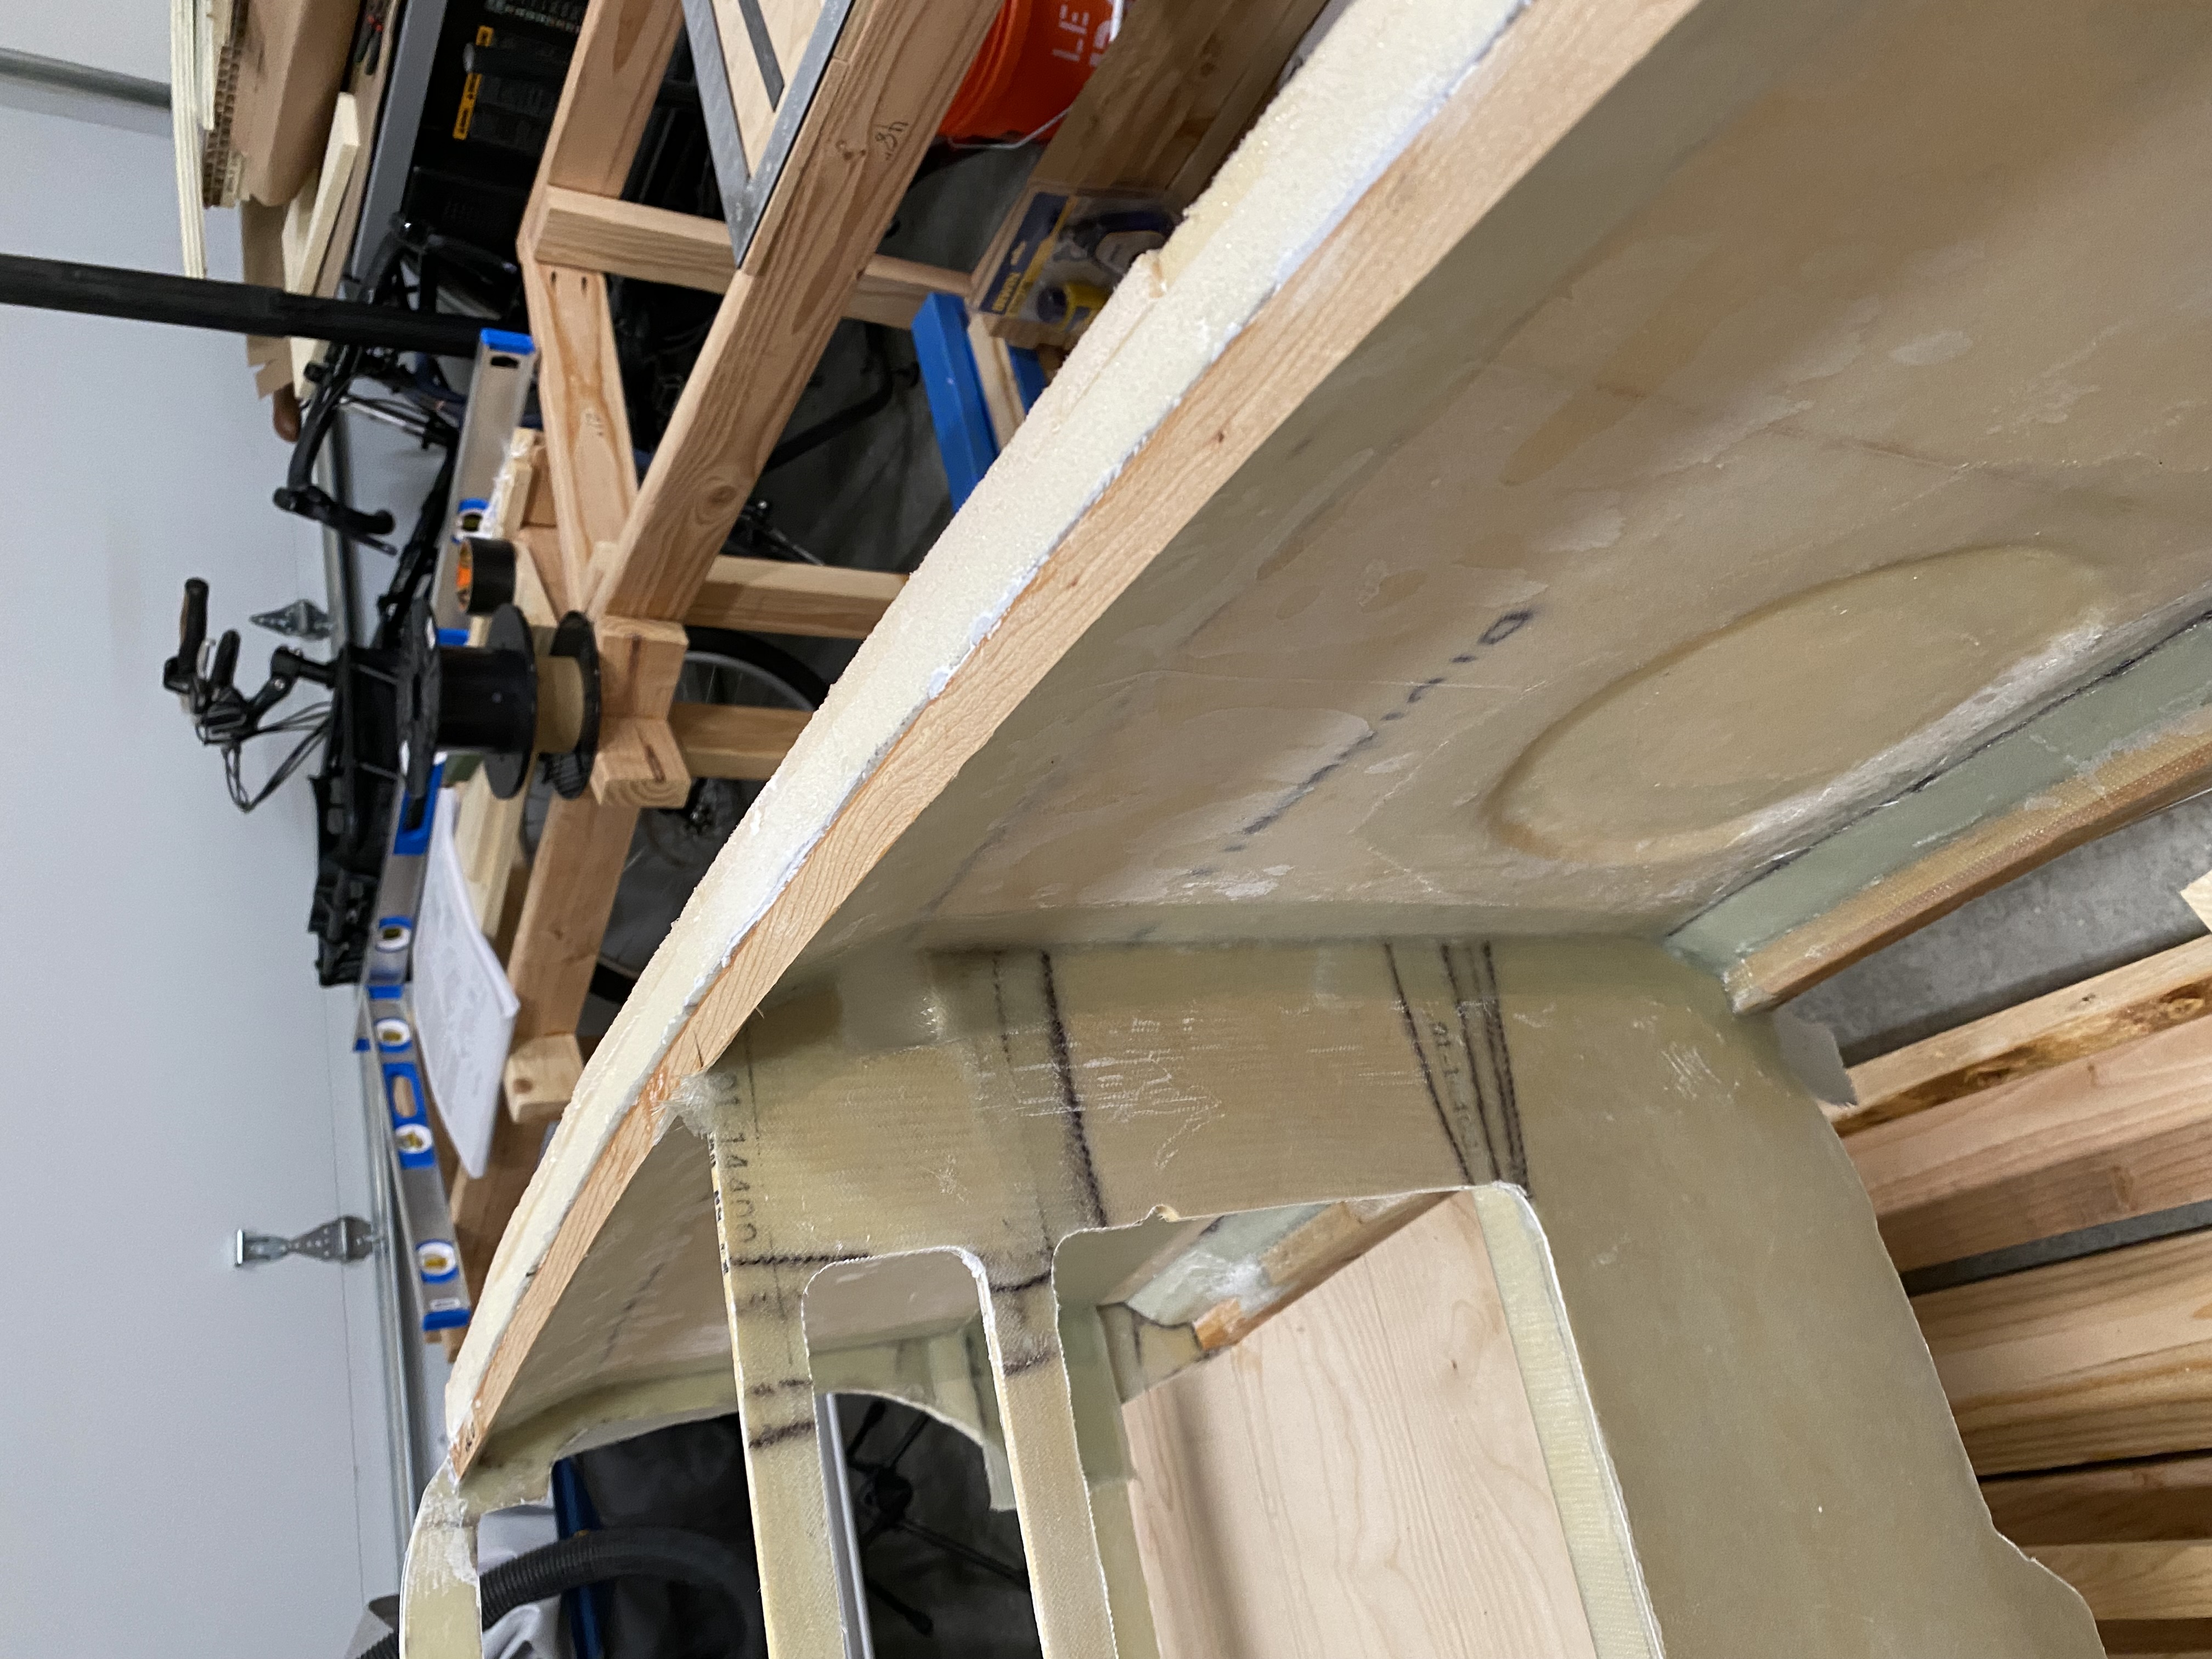
Now that the fuselage bulkheads and sides have been built, it’s time to put them together.
Current status (Late February, 2023): Fuselage and bulkheads mostly assembled. Center keel is assembled and waiting for install. Preparing to install the floor.
Fuselage Side Assembly
I decided to assemble my fuselage upside-down, as suggested and made popular by Wayne Hicks.
I struggled a lot with building the platform to do the assembly on. It’s incredibly important that this platform be level and square and I had extreme difficulty figuring out a wood structure that would suffice. My existing workbenches, which worked fine for holding the fuselage form jigs, would not work for this. I decided to purchase some T-slot aluminum extrusion and construct a work surface with that. The extrusion is machined to much higher tolerances than what I can do for wood. Additionally, for the fuselage assembly, I want to have the surface be low to the ground - my existing tables are not height-adjustable. The T-slot aluminum, while difficult to adjust the height (I can’t do it with any load or surface on it), is at least possible to lower.
Once the table frame was put together & leveled, I installed the table tops. I re-used the tops from my existing tables. They’re flat enough for this work - my real issue is that leveling 5 tables is incredibly hard to do. With the tops installed, including a space for the instrument panel, I used a laser level to draw a centerline across the entire table. I then drew lines marking where each bulkhead would be installed. I screwed in a piece of wood at the location where the top of the front seatback will be. Finally, I clamped a piece of wood to mark where the instrument panel should be installed.
Trial Fit
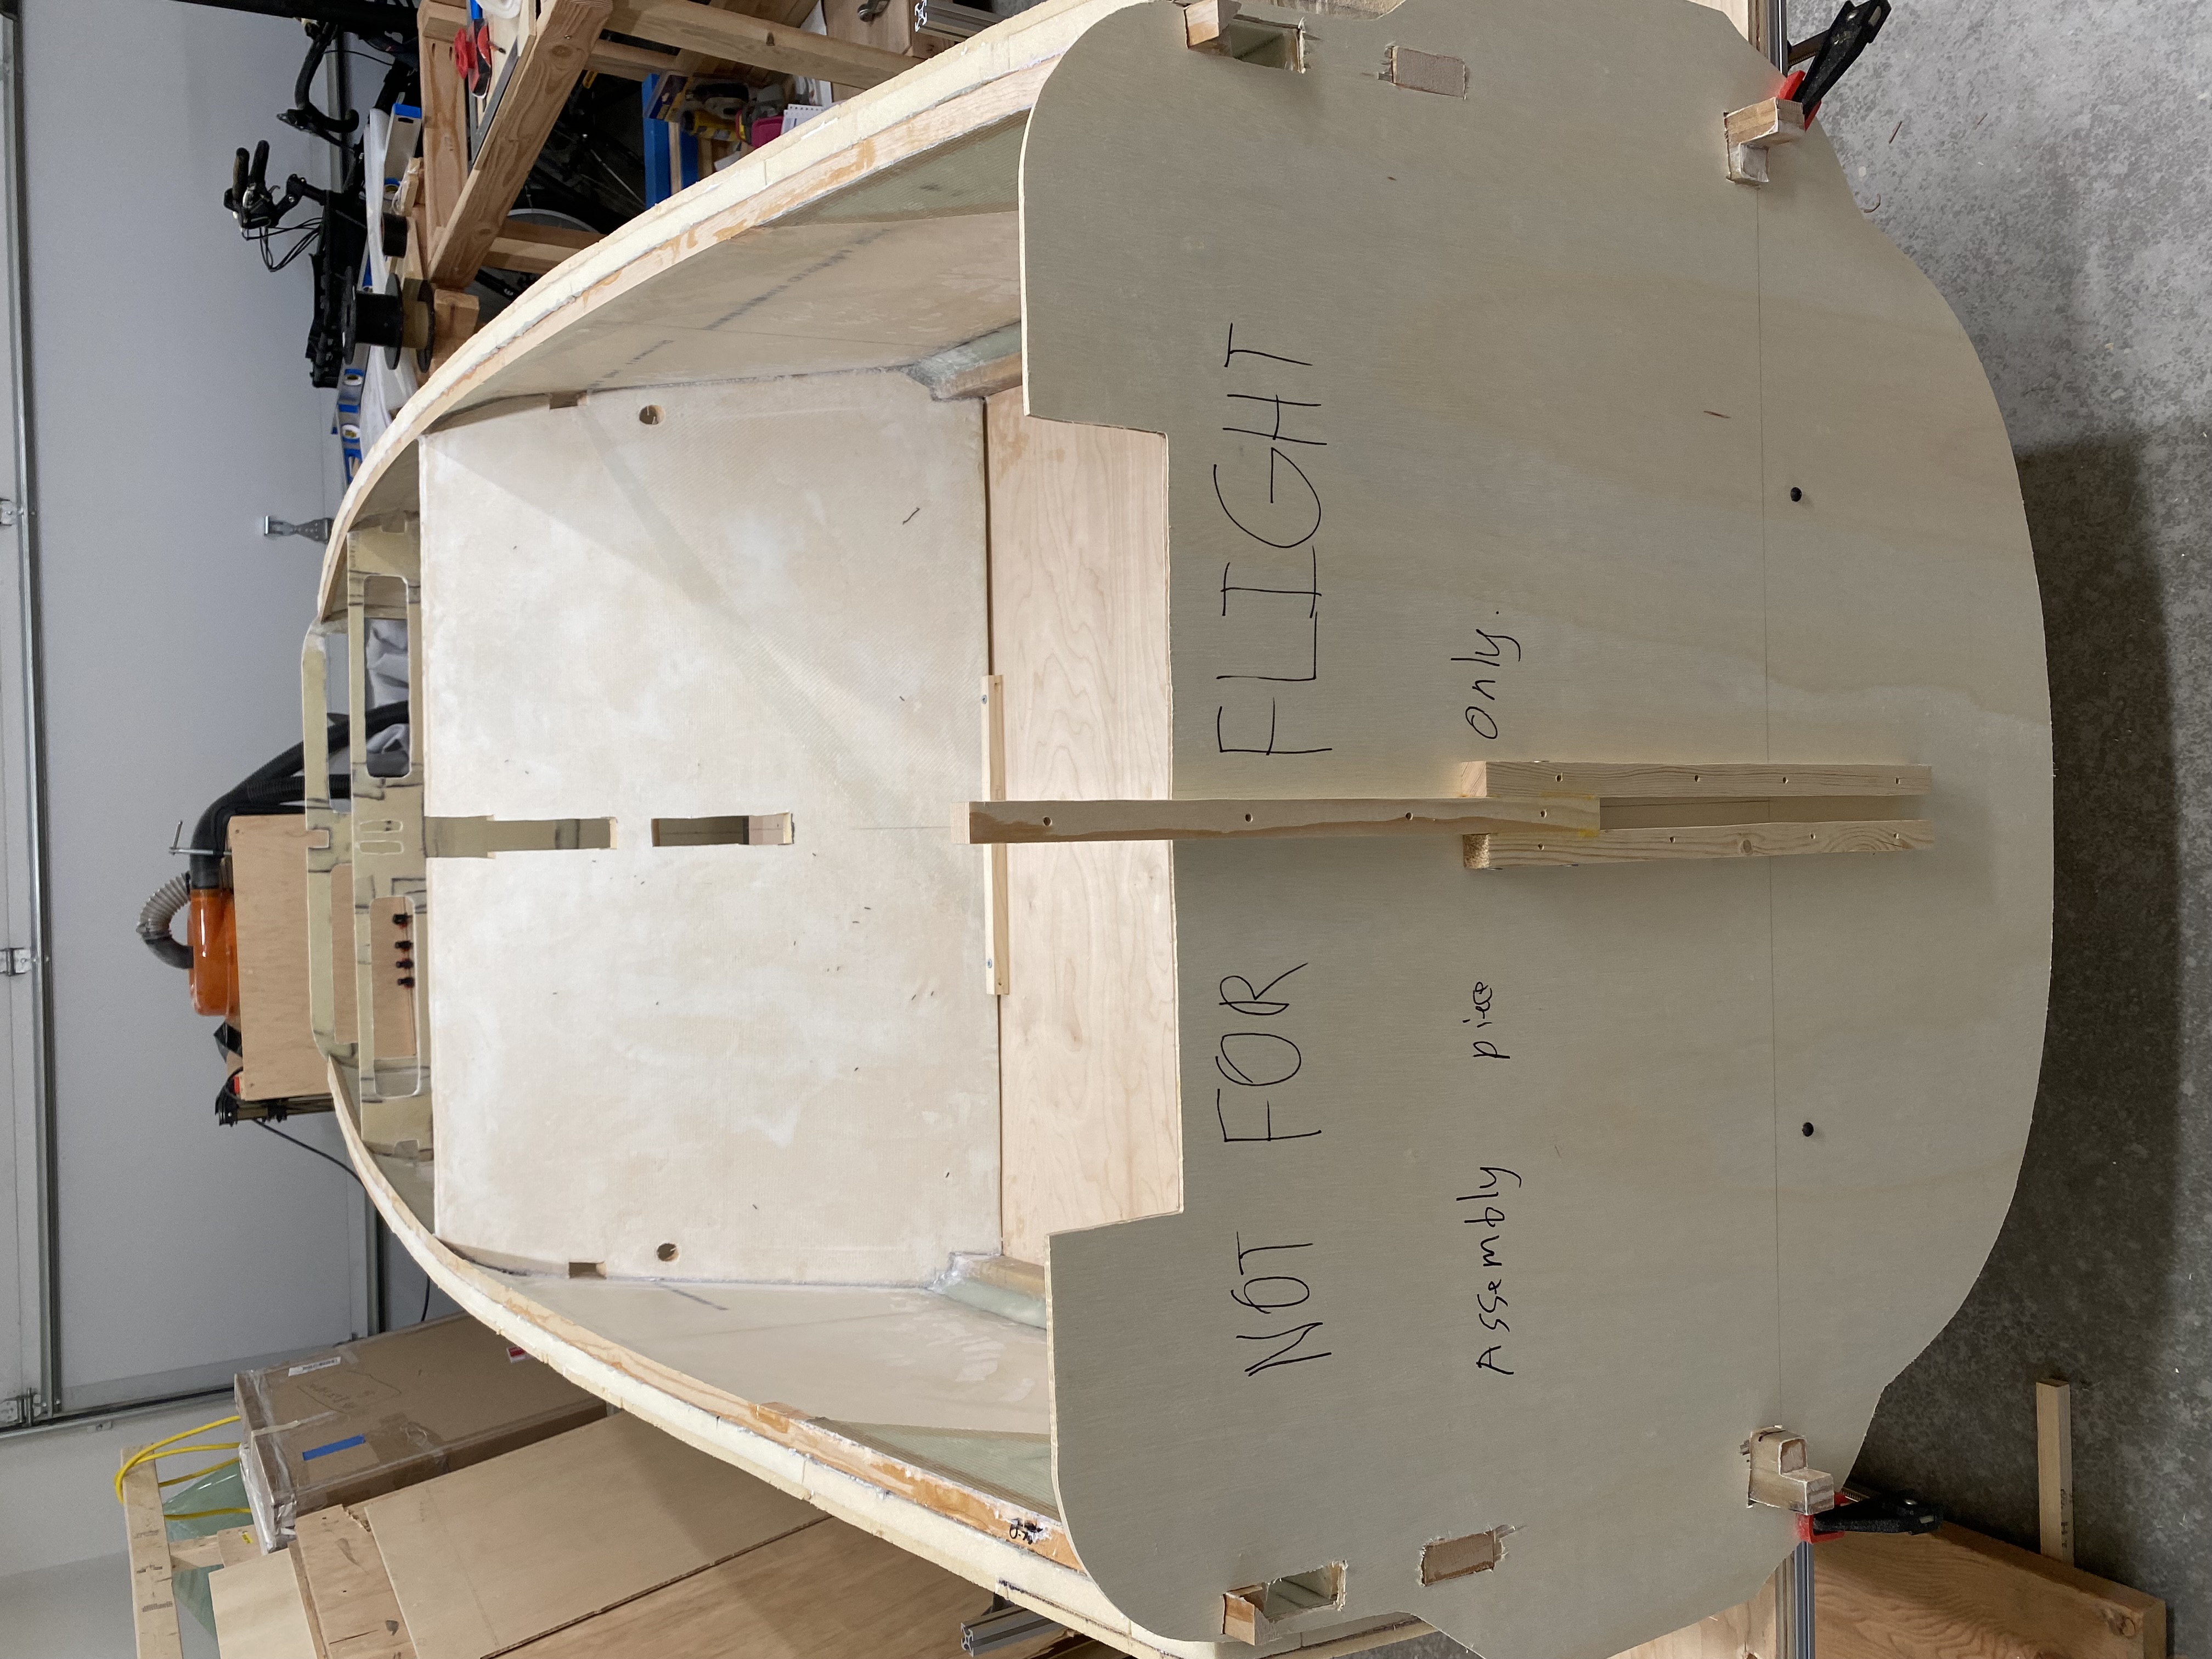
With the table put together and set to the desired height, I worked on attaching the temporary firewall. First, though, I added some wood beams to stiffen it and help it keep square. I attached it to the tabletop frame using 2 m5 bolts into T-slot nuts, then screwed in a brace to keep it square with the tabletop. Once it was sufficiently attached, I tried slotting in the fuselage sides. As expected, these didn’t fit. I found that a utility knife worked well to help carve out extra space from the thin and light wood I used for the temporary firewall.
Once I got both fuselage slides fully slotted in, I worked on the other end. I marked the centerline of F-22, lined that up with the centerline on the table. This allowed me to line up F-22 with the end of the fuselage sides. I found I needed to trim off material from forward end of the fuselage sides, which I did now. With that done, I drilled holes for screws to aid with re-assembling F-22, and also drew lines to mark where the fuselage sides end up when F-22 will be installed.
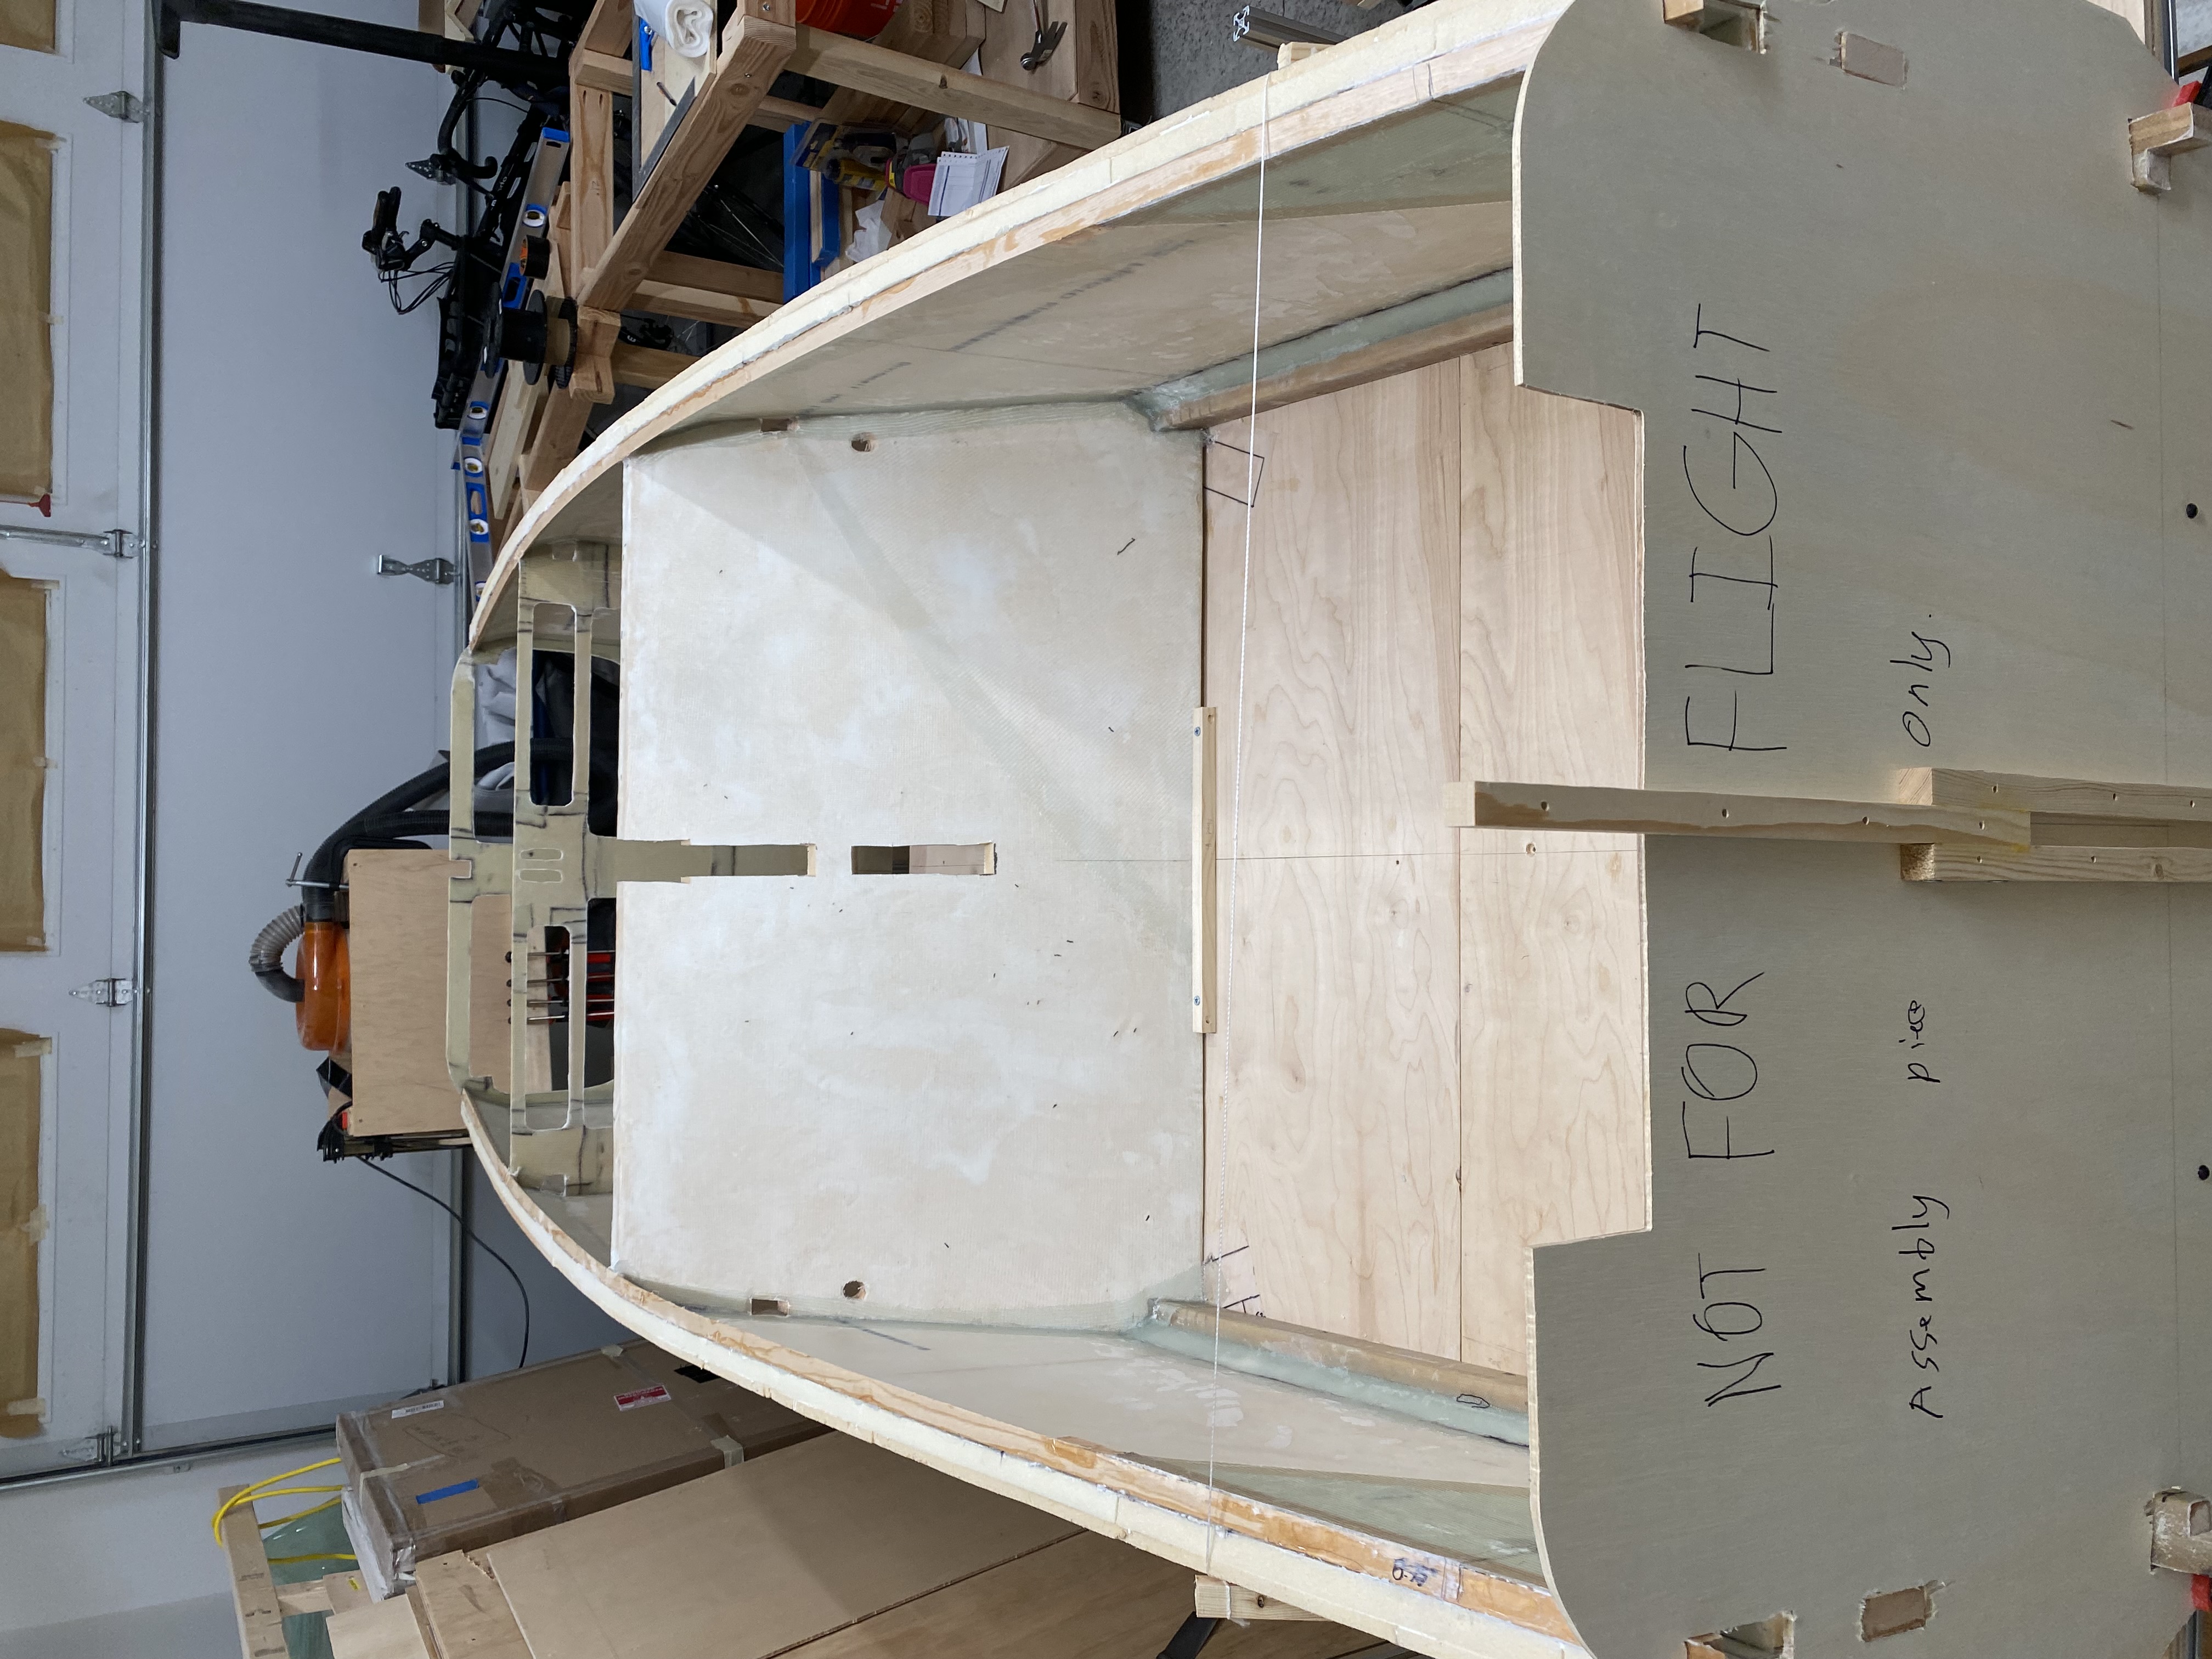
With the forward ends of the fuselage sides taken care of, I worked on getting the front seatback in place. This required me to trim some additional material from the front seatback to get it to fit. Which was disappointing, but not surprising. I tried my best to not trim more foam than necessary, but that proved impossible. In assembly, I filled the gaps with flox.
Once the front seatback was fitted, I worked on getting the instrument panel in. Which also required some trimming, but it was more around making the edges flat, and removing material from the horizontal stiffeners/cable channels. In other words, it went much quicker.
With the instrument panel fitted, I again placed F-22 on the forward end. This time, I drilled holes in the bottom longerons for screws to hold F-22 in. This provided full assurance that the bulkheads were in place. I marked on the fuselage sides where all these bulkheads would be installed, then I disassembled this and prepared for the full assembly (the next day).

Actual Assembly
With the trial fit complete, now was time to start on actual assembly. I mixed up a bunch of flox (2 batches ended up being necessary - first batch used 4 oz of epoxy, the second used 2 oz of epoxy), and applied flox to the mating surfaces of the fuselage sides and the bulkheads.
I started with the front seatback: the widest bulkhead, and in some ways, the most difficult. I used some drywall anchors to hold it in. Which worked well enough, but weren’t great. In hindsight, I probably shouldn’t have done this. Once everything was cured, I ended up stripping one of the drywall anchors upon removal. So that’s in there permanently. Thankfully, it’s lightweight plastic, so I didn’t take that much of a hit. I also used lengths of twine twisted taut between two pieces of wood to also clamp these together. Which worked pretty great. Probably why it’s recommended by the plans.
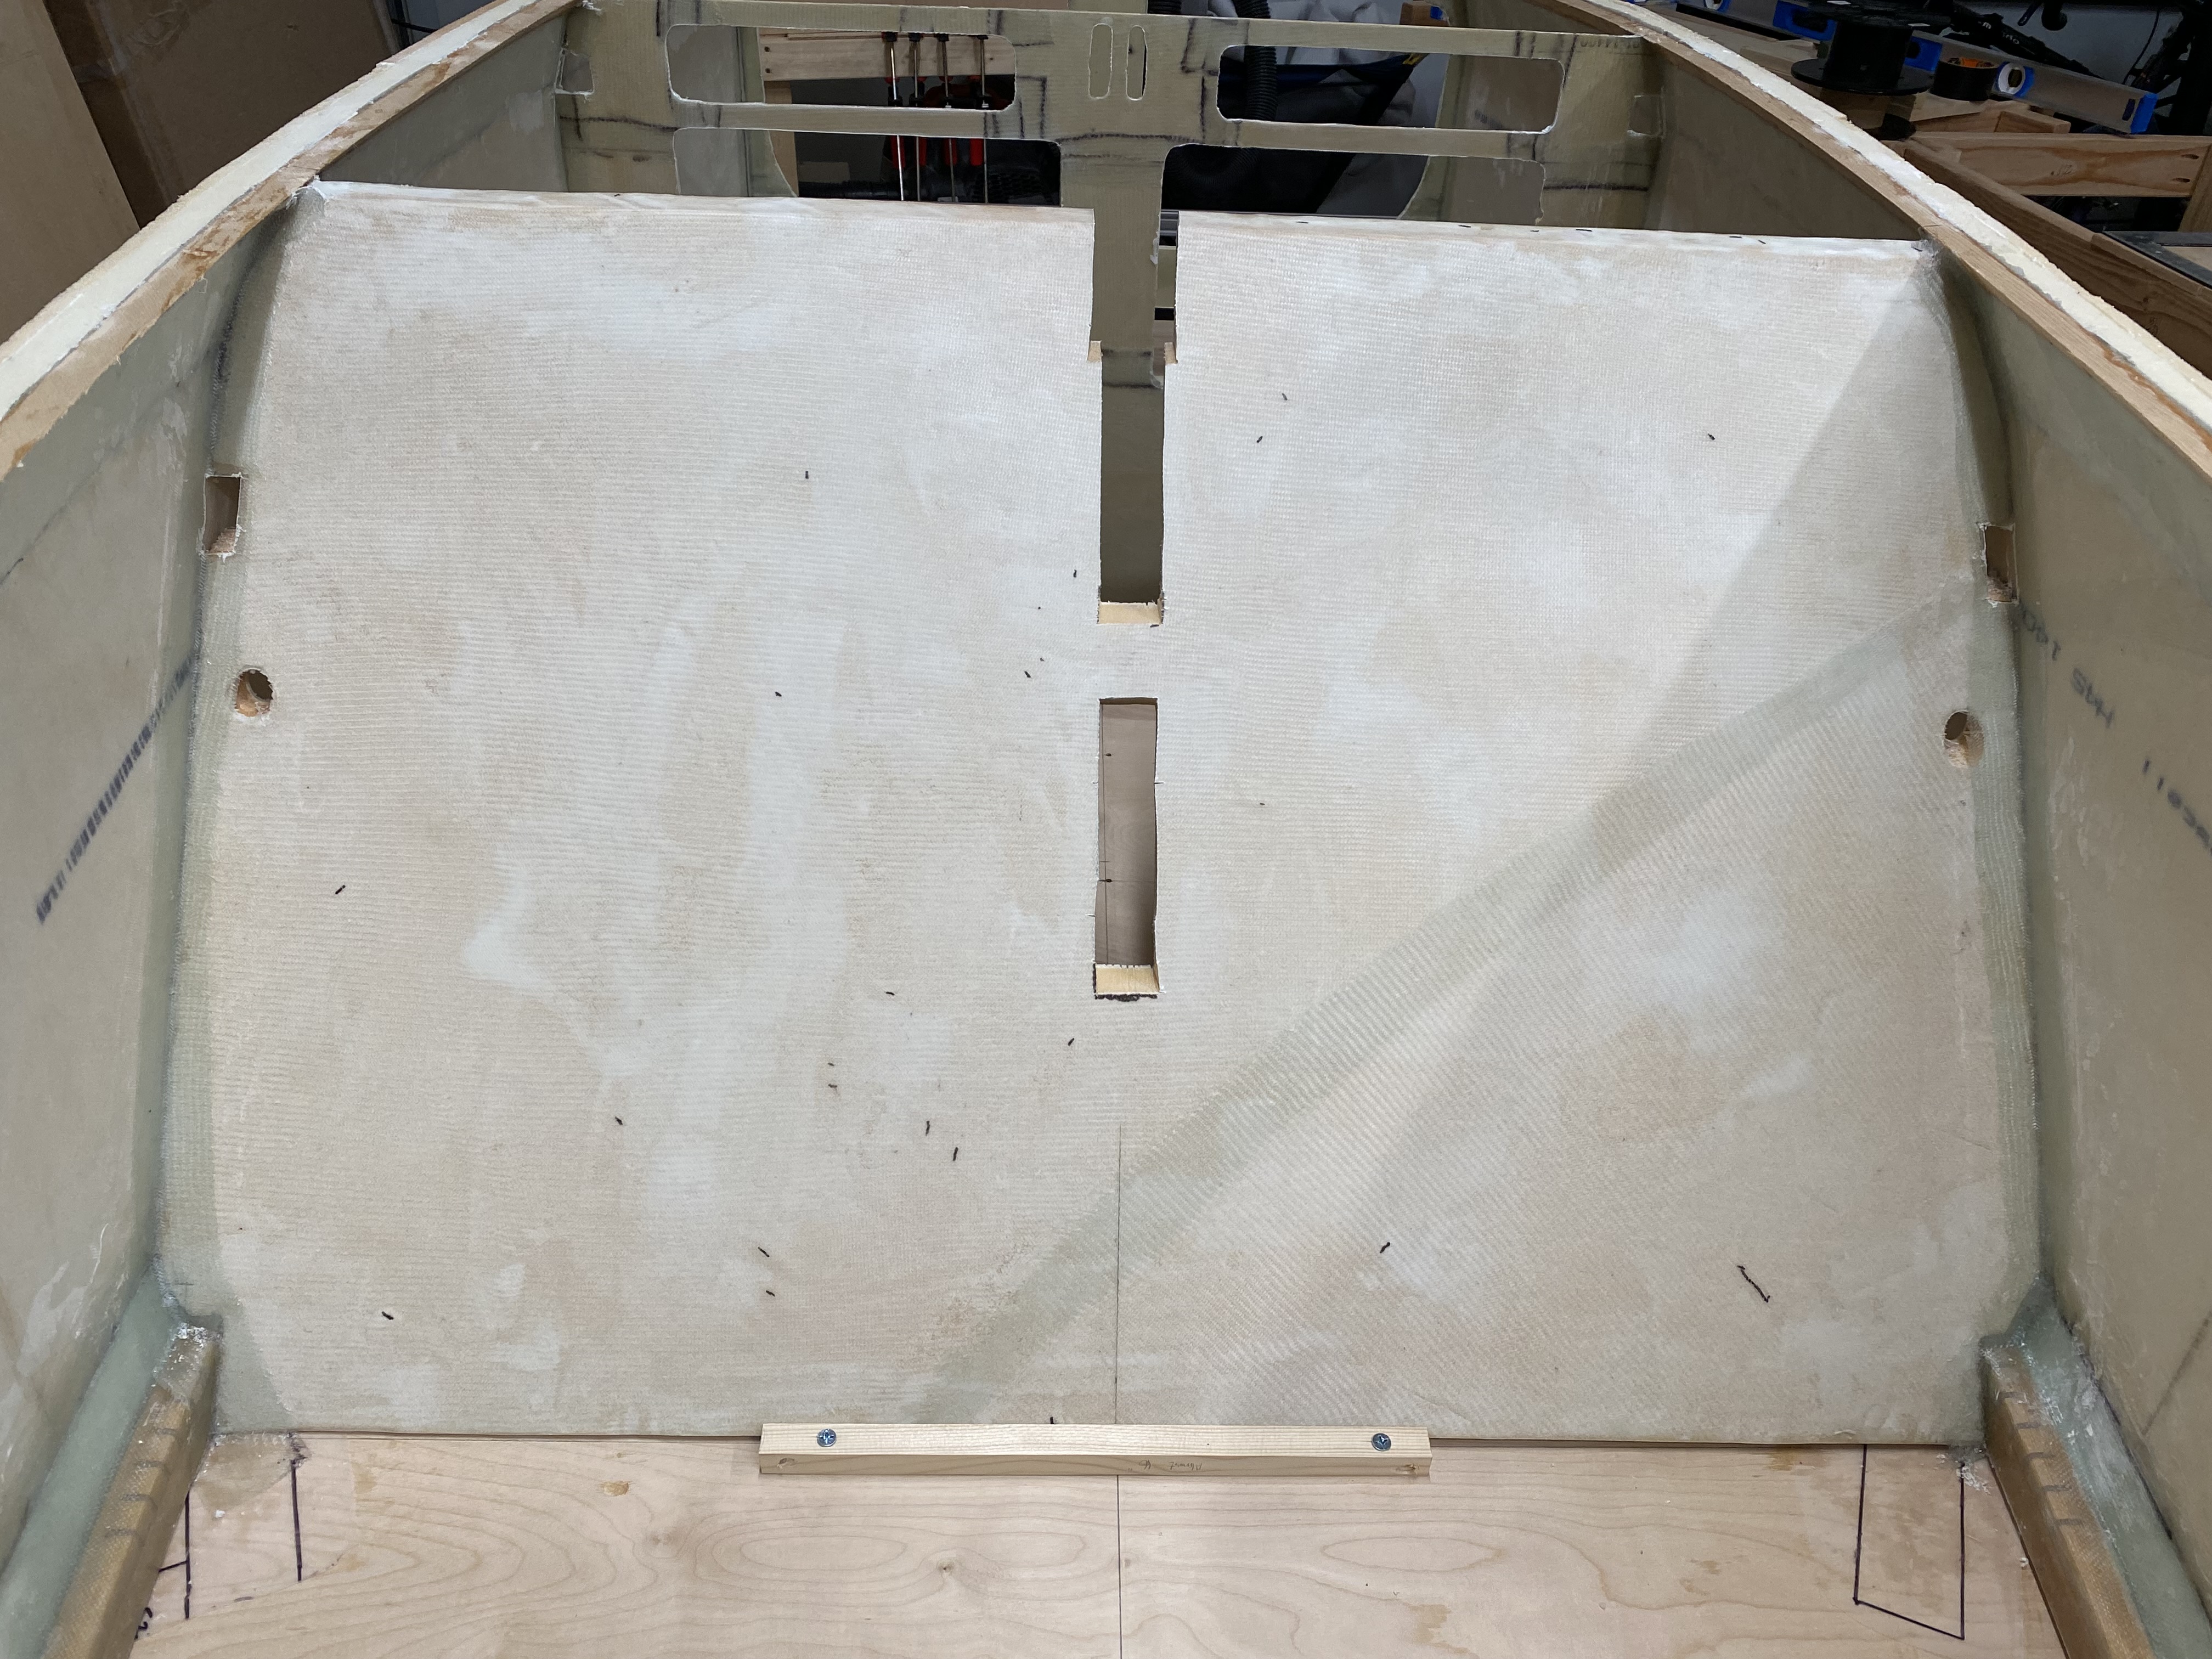
Next up was the instrument panel. This was much easier to install, because it’s just vertical. No issues. Definitely too thin to use drywall anchors, so I didn’t bother.
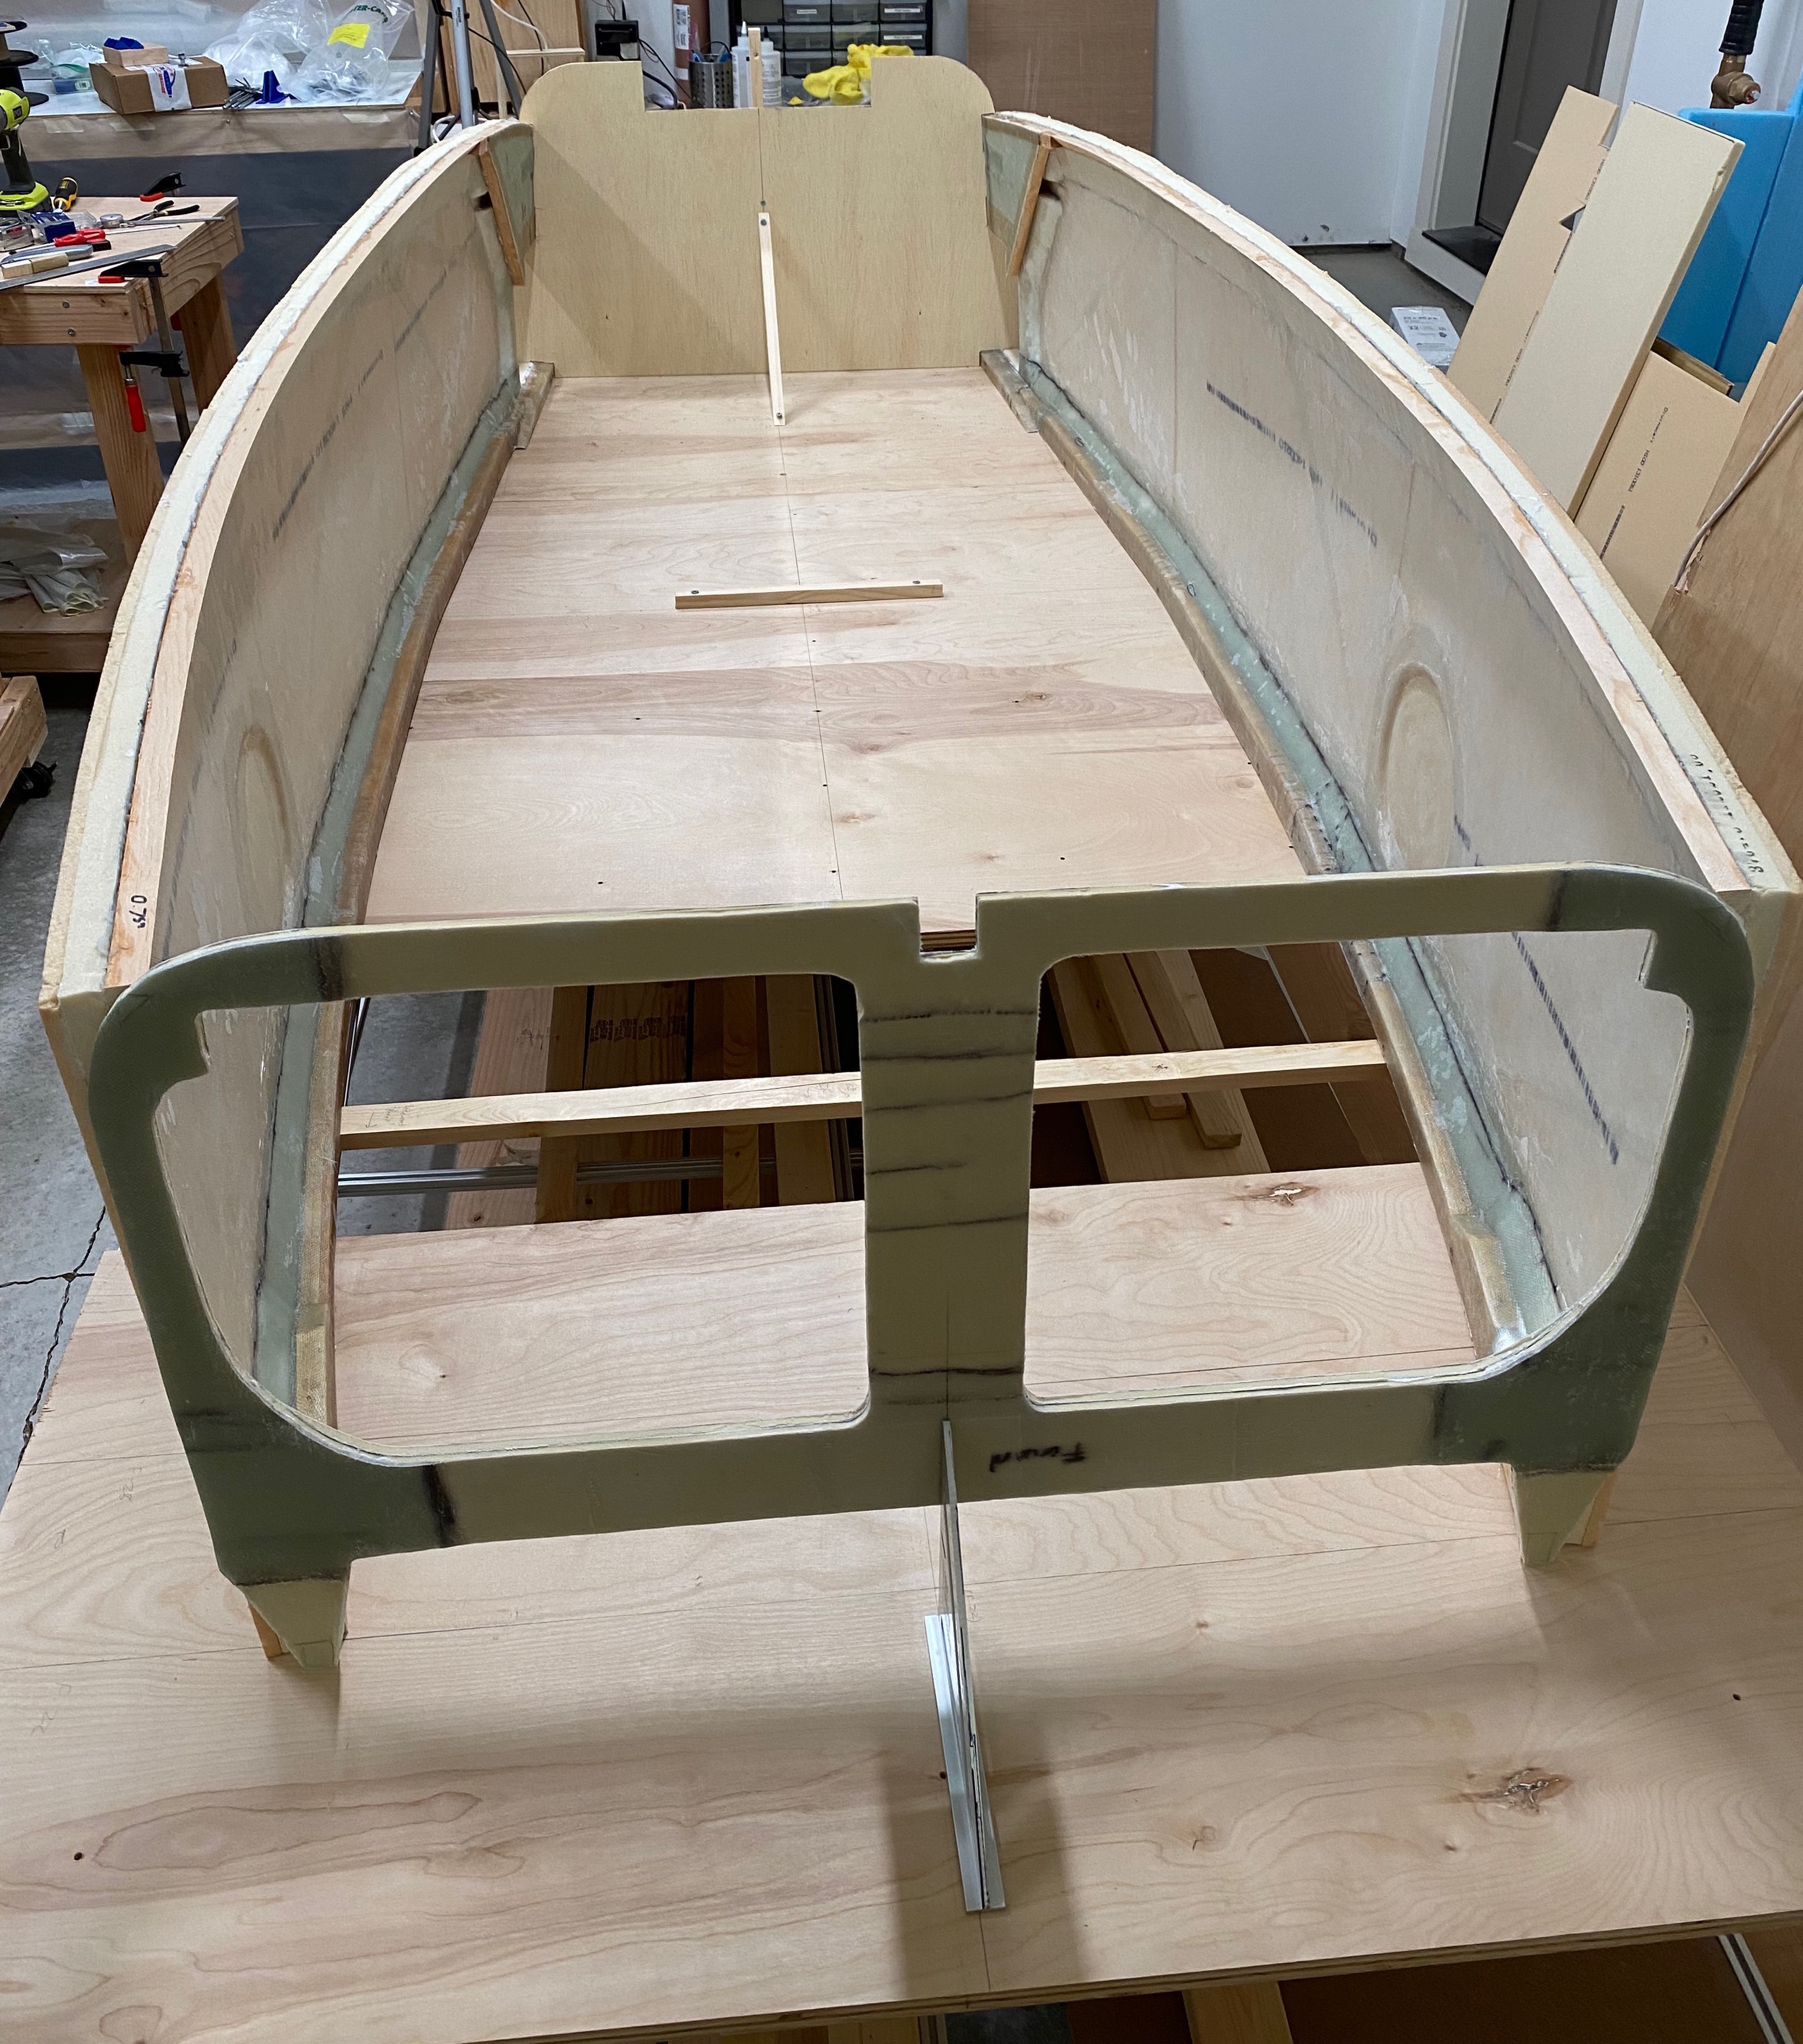
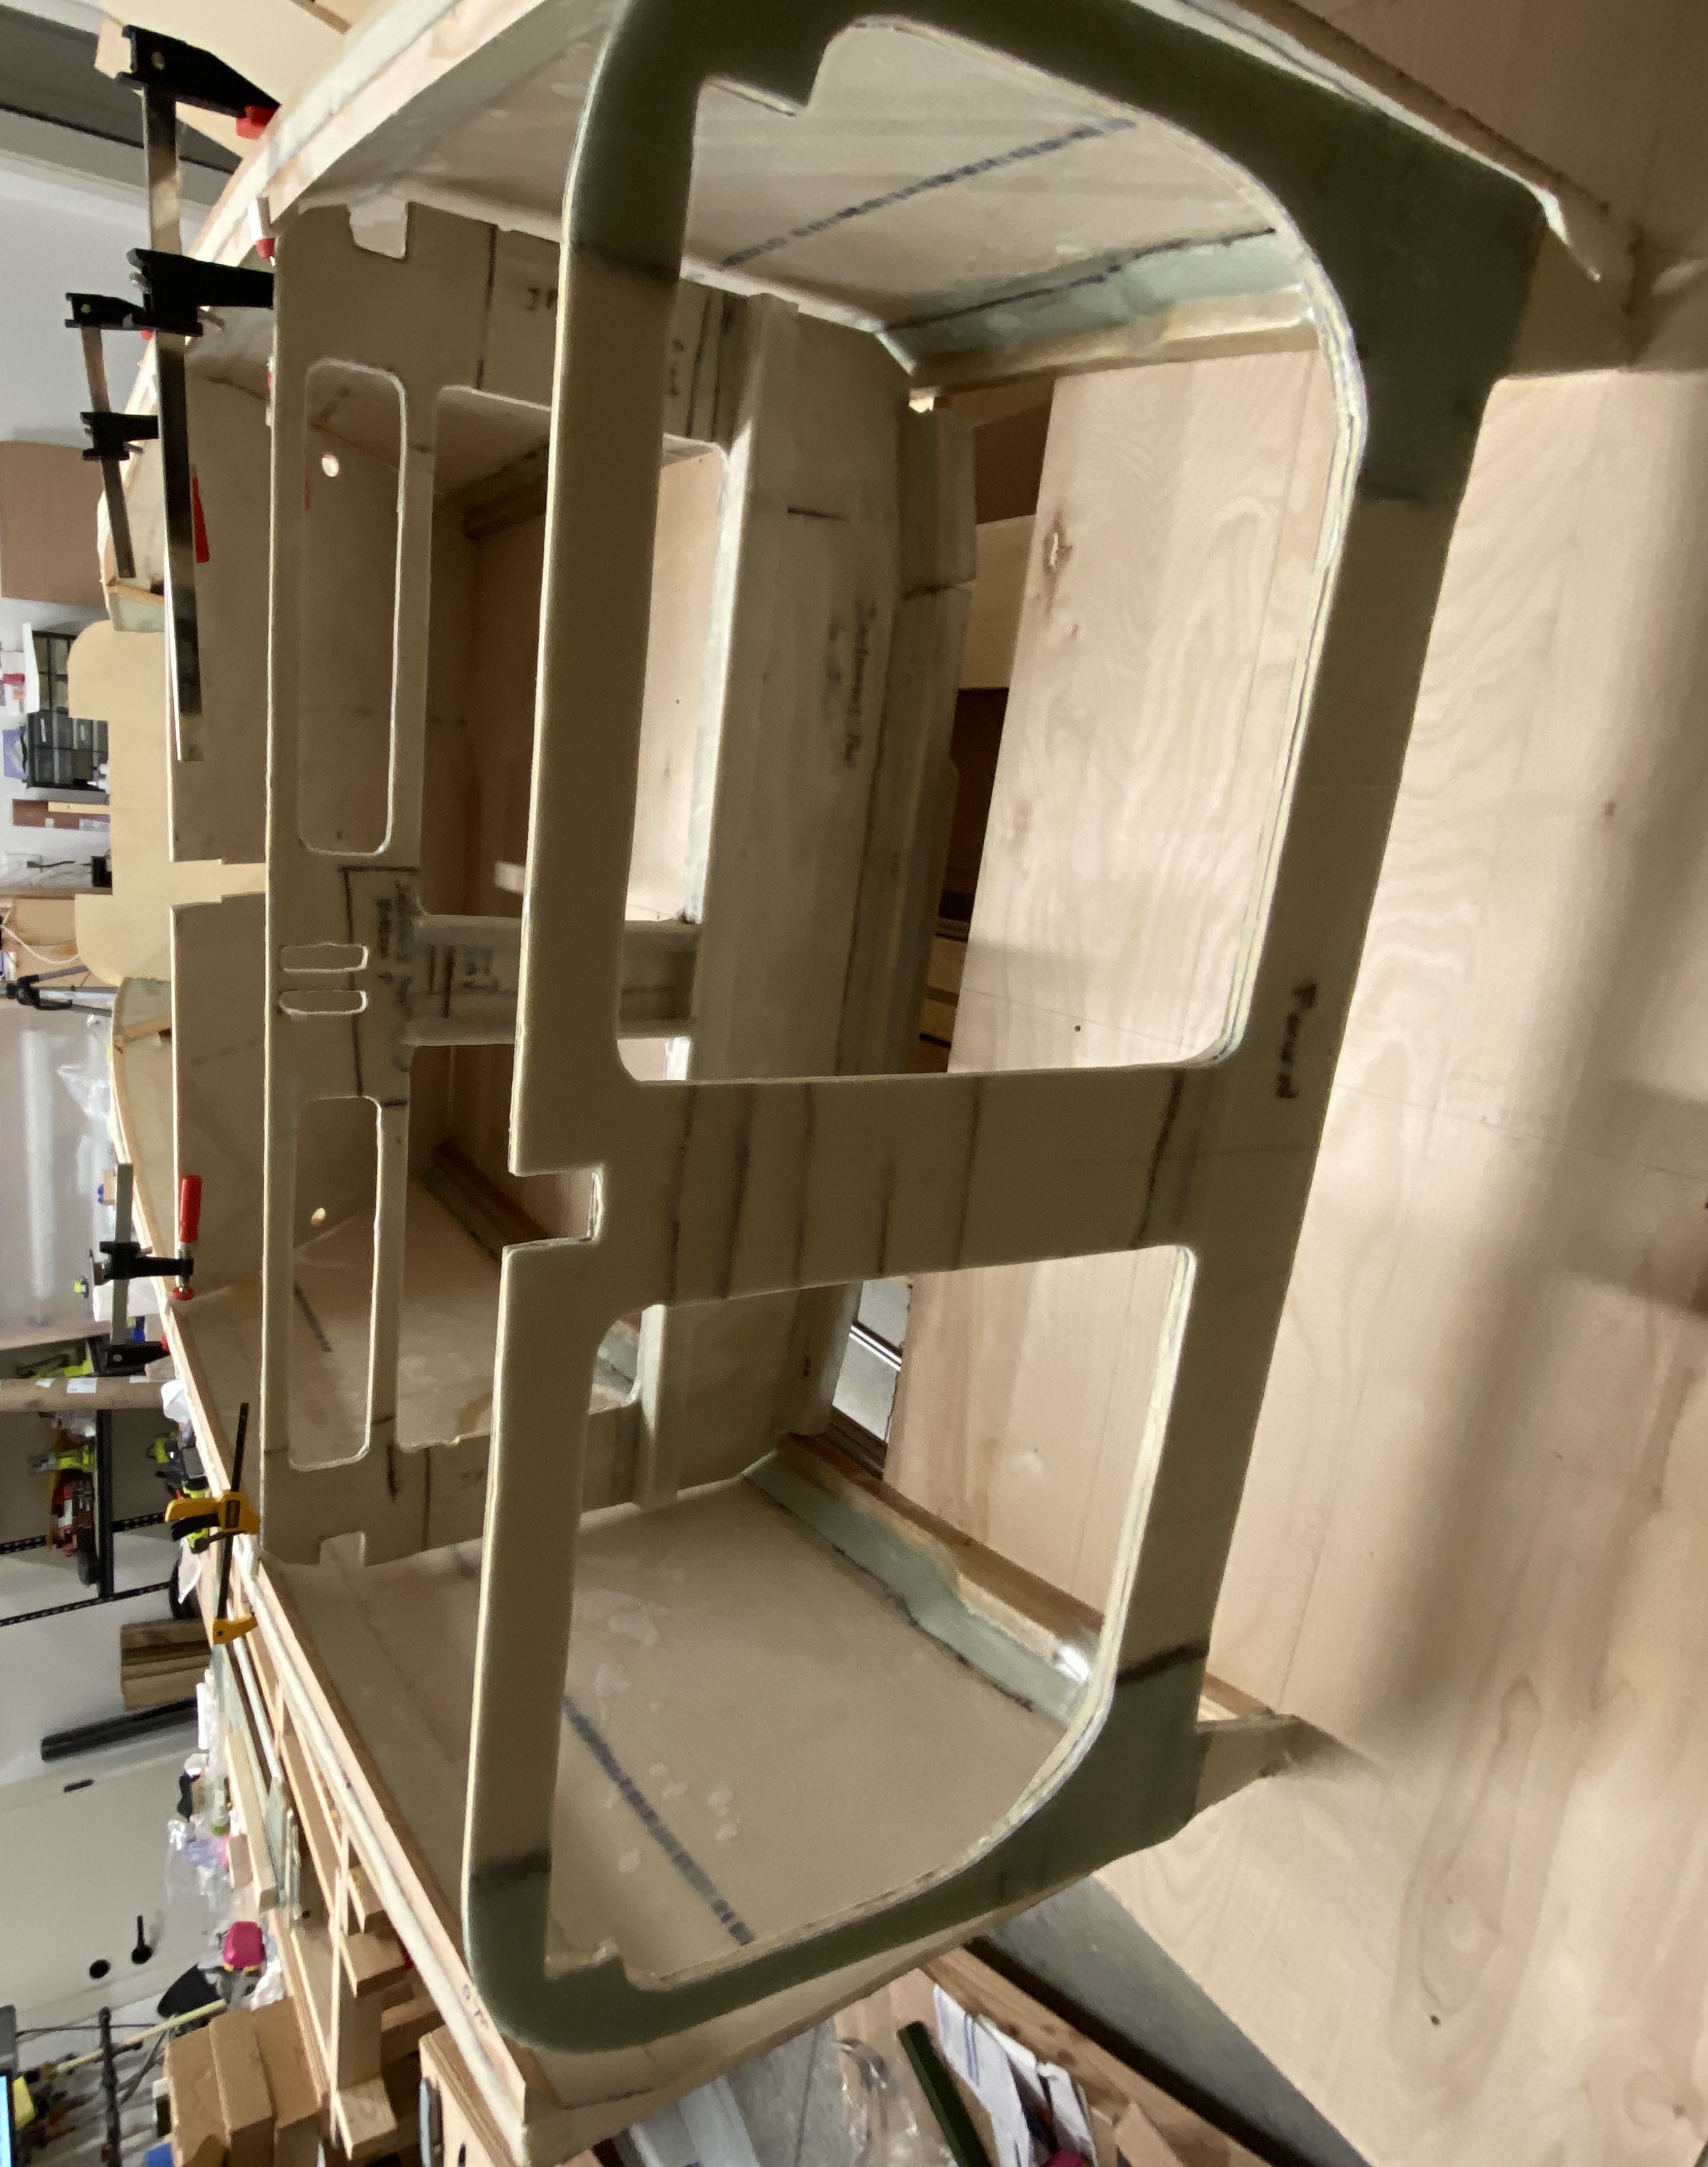
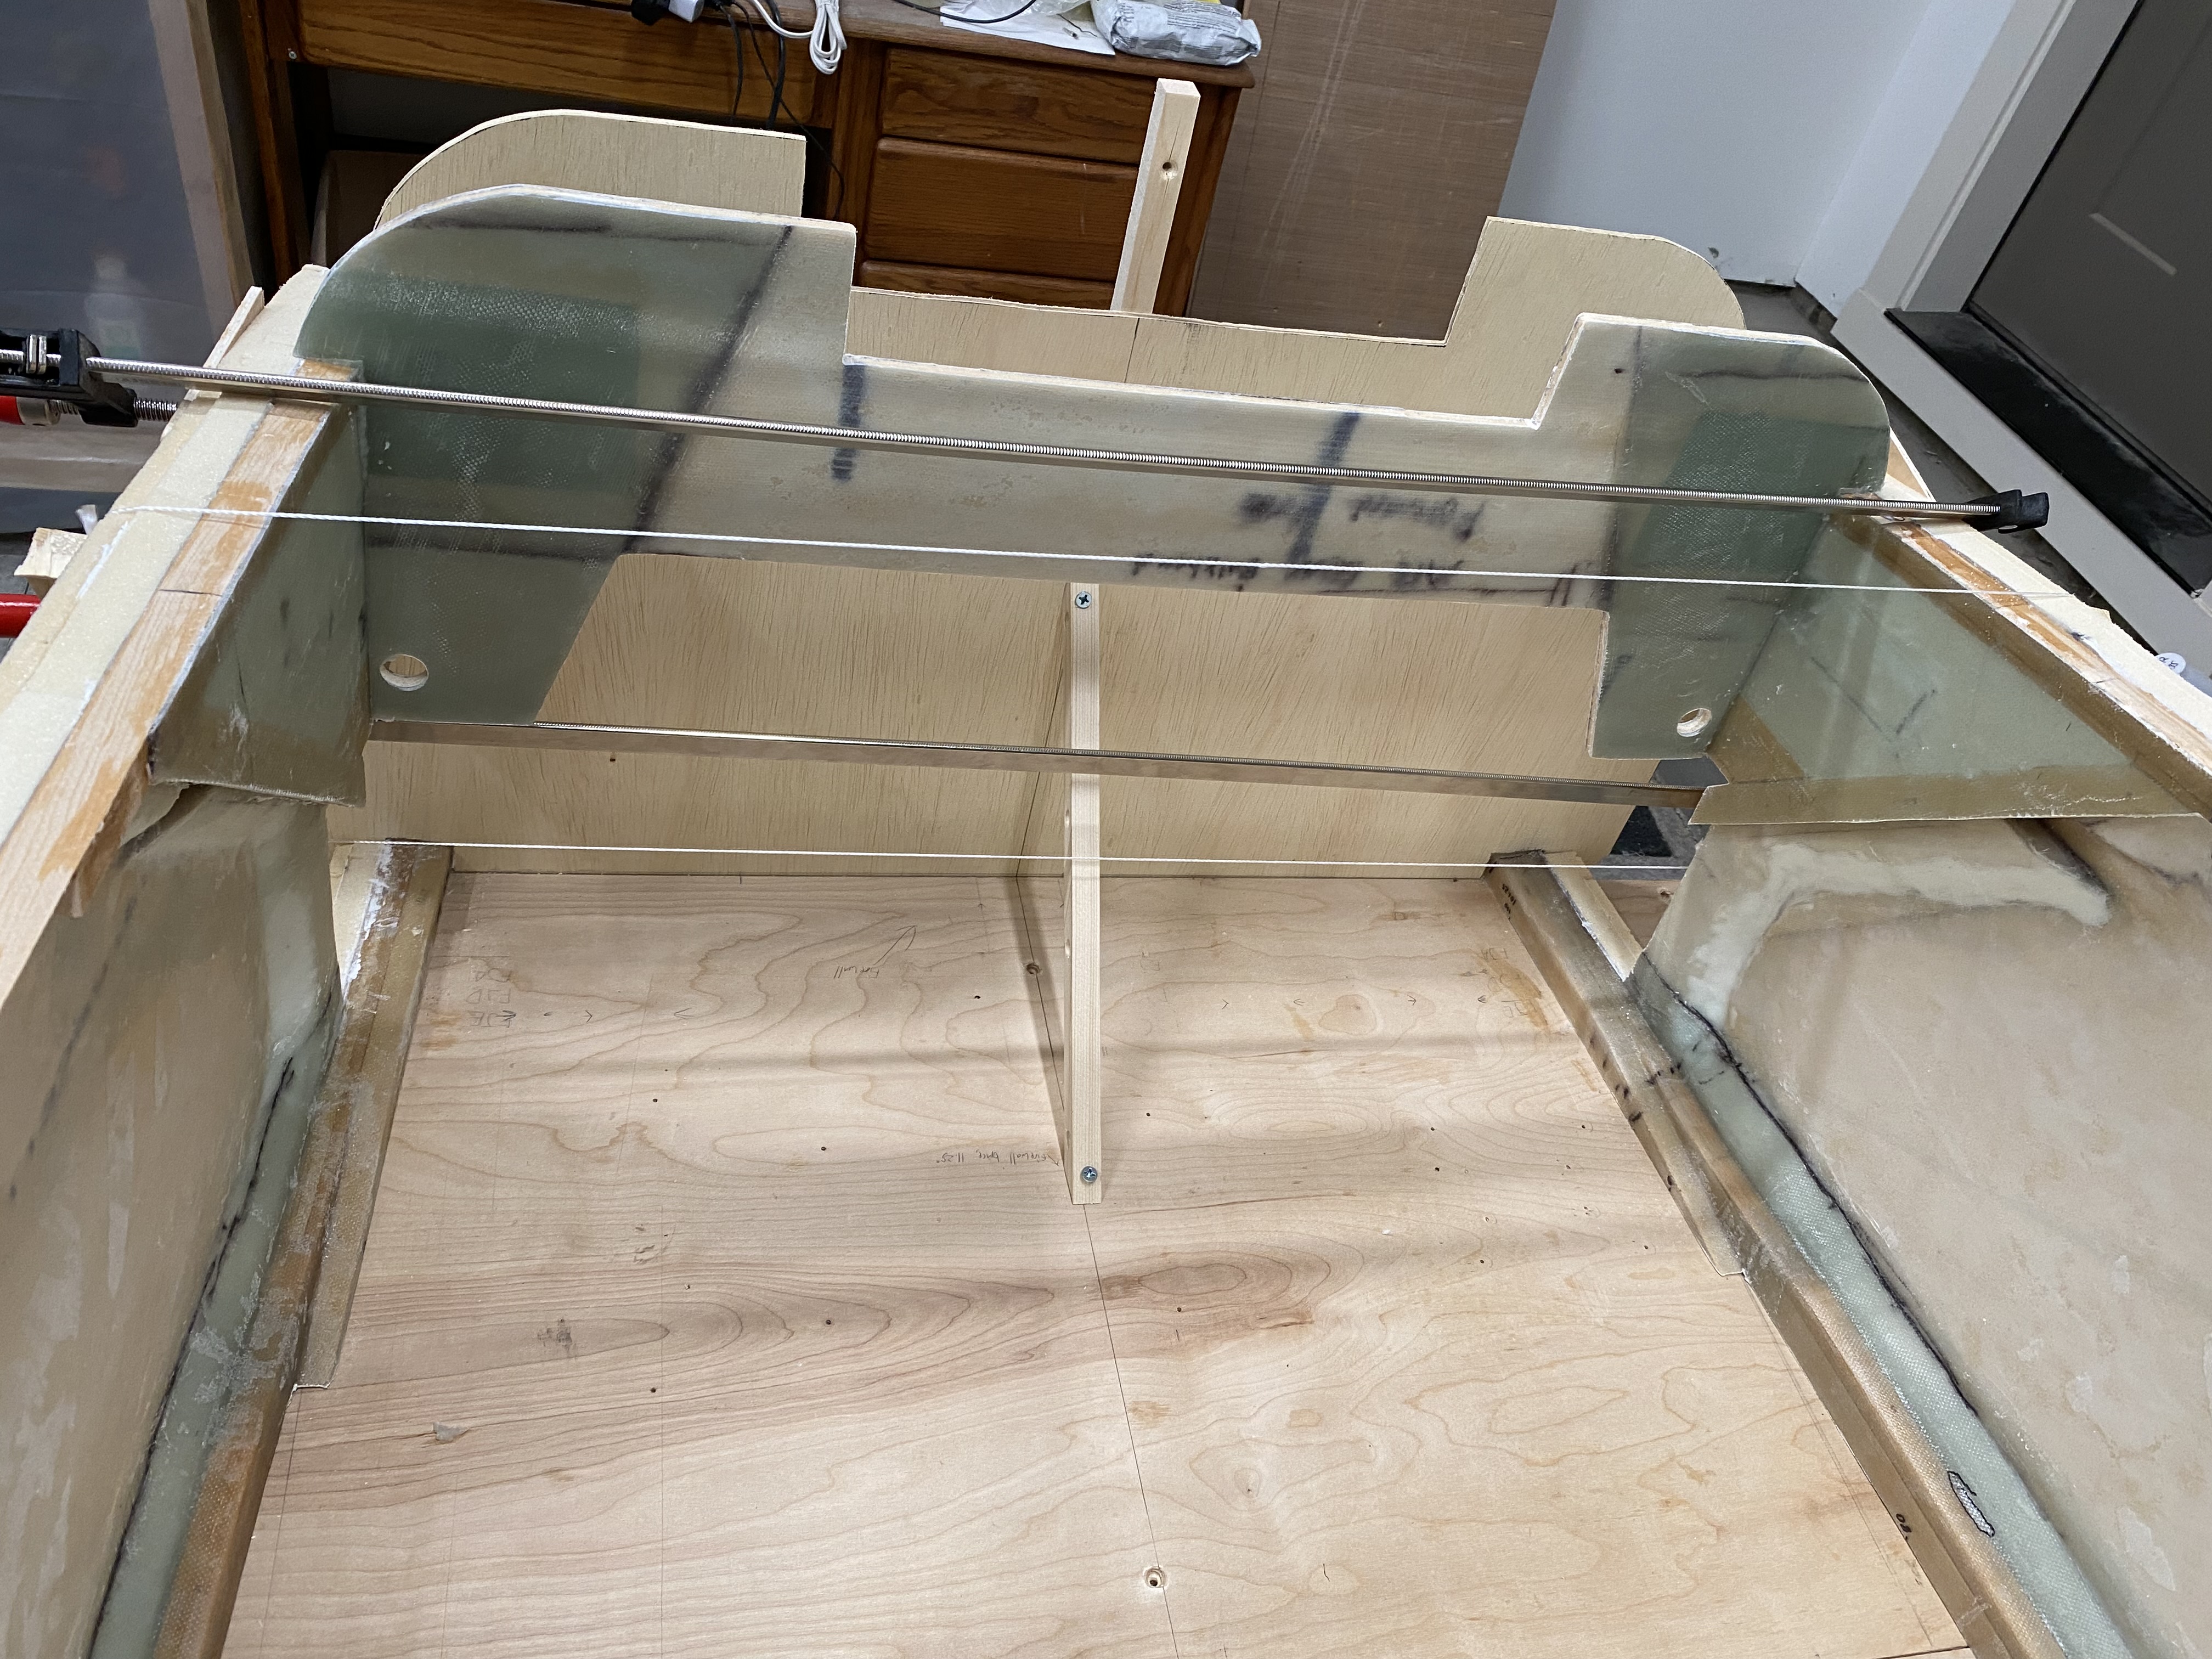
The last of the initial bulkheads to install is F-22. F-22 fits in front of the fuselage sides, with the doubler fitting between them. I used screws to hold them in, and also more of the twine-based clamps.
I let this cure for about 36 hours, to ensure it was solid.
Once it was cured, I sanded down the flox and prepared for the reinforcement layups. These are 2-inch wide strips of 2-plies of BID. Make these using the BID taping technique. These get applied along the entire length of the seams between each bulkhead and the fuselage sides. F-22 does not get tapes to the forward side. However, it also receives 4-inch wide strips of 4-ply BID where the doubler meets the fuselage sides.
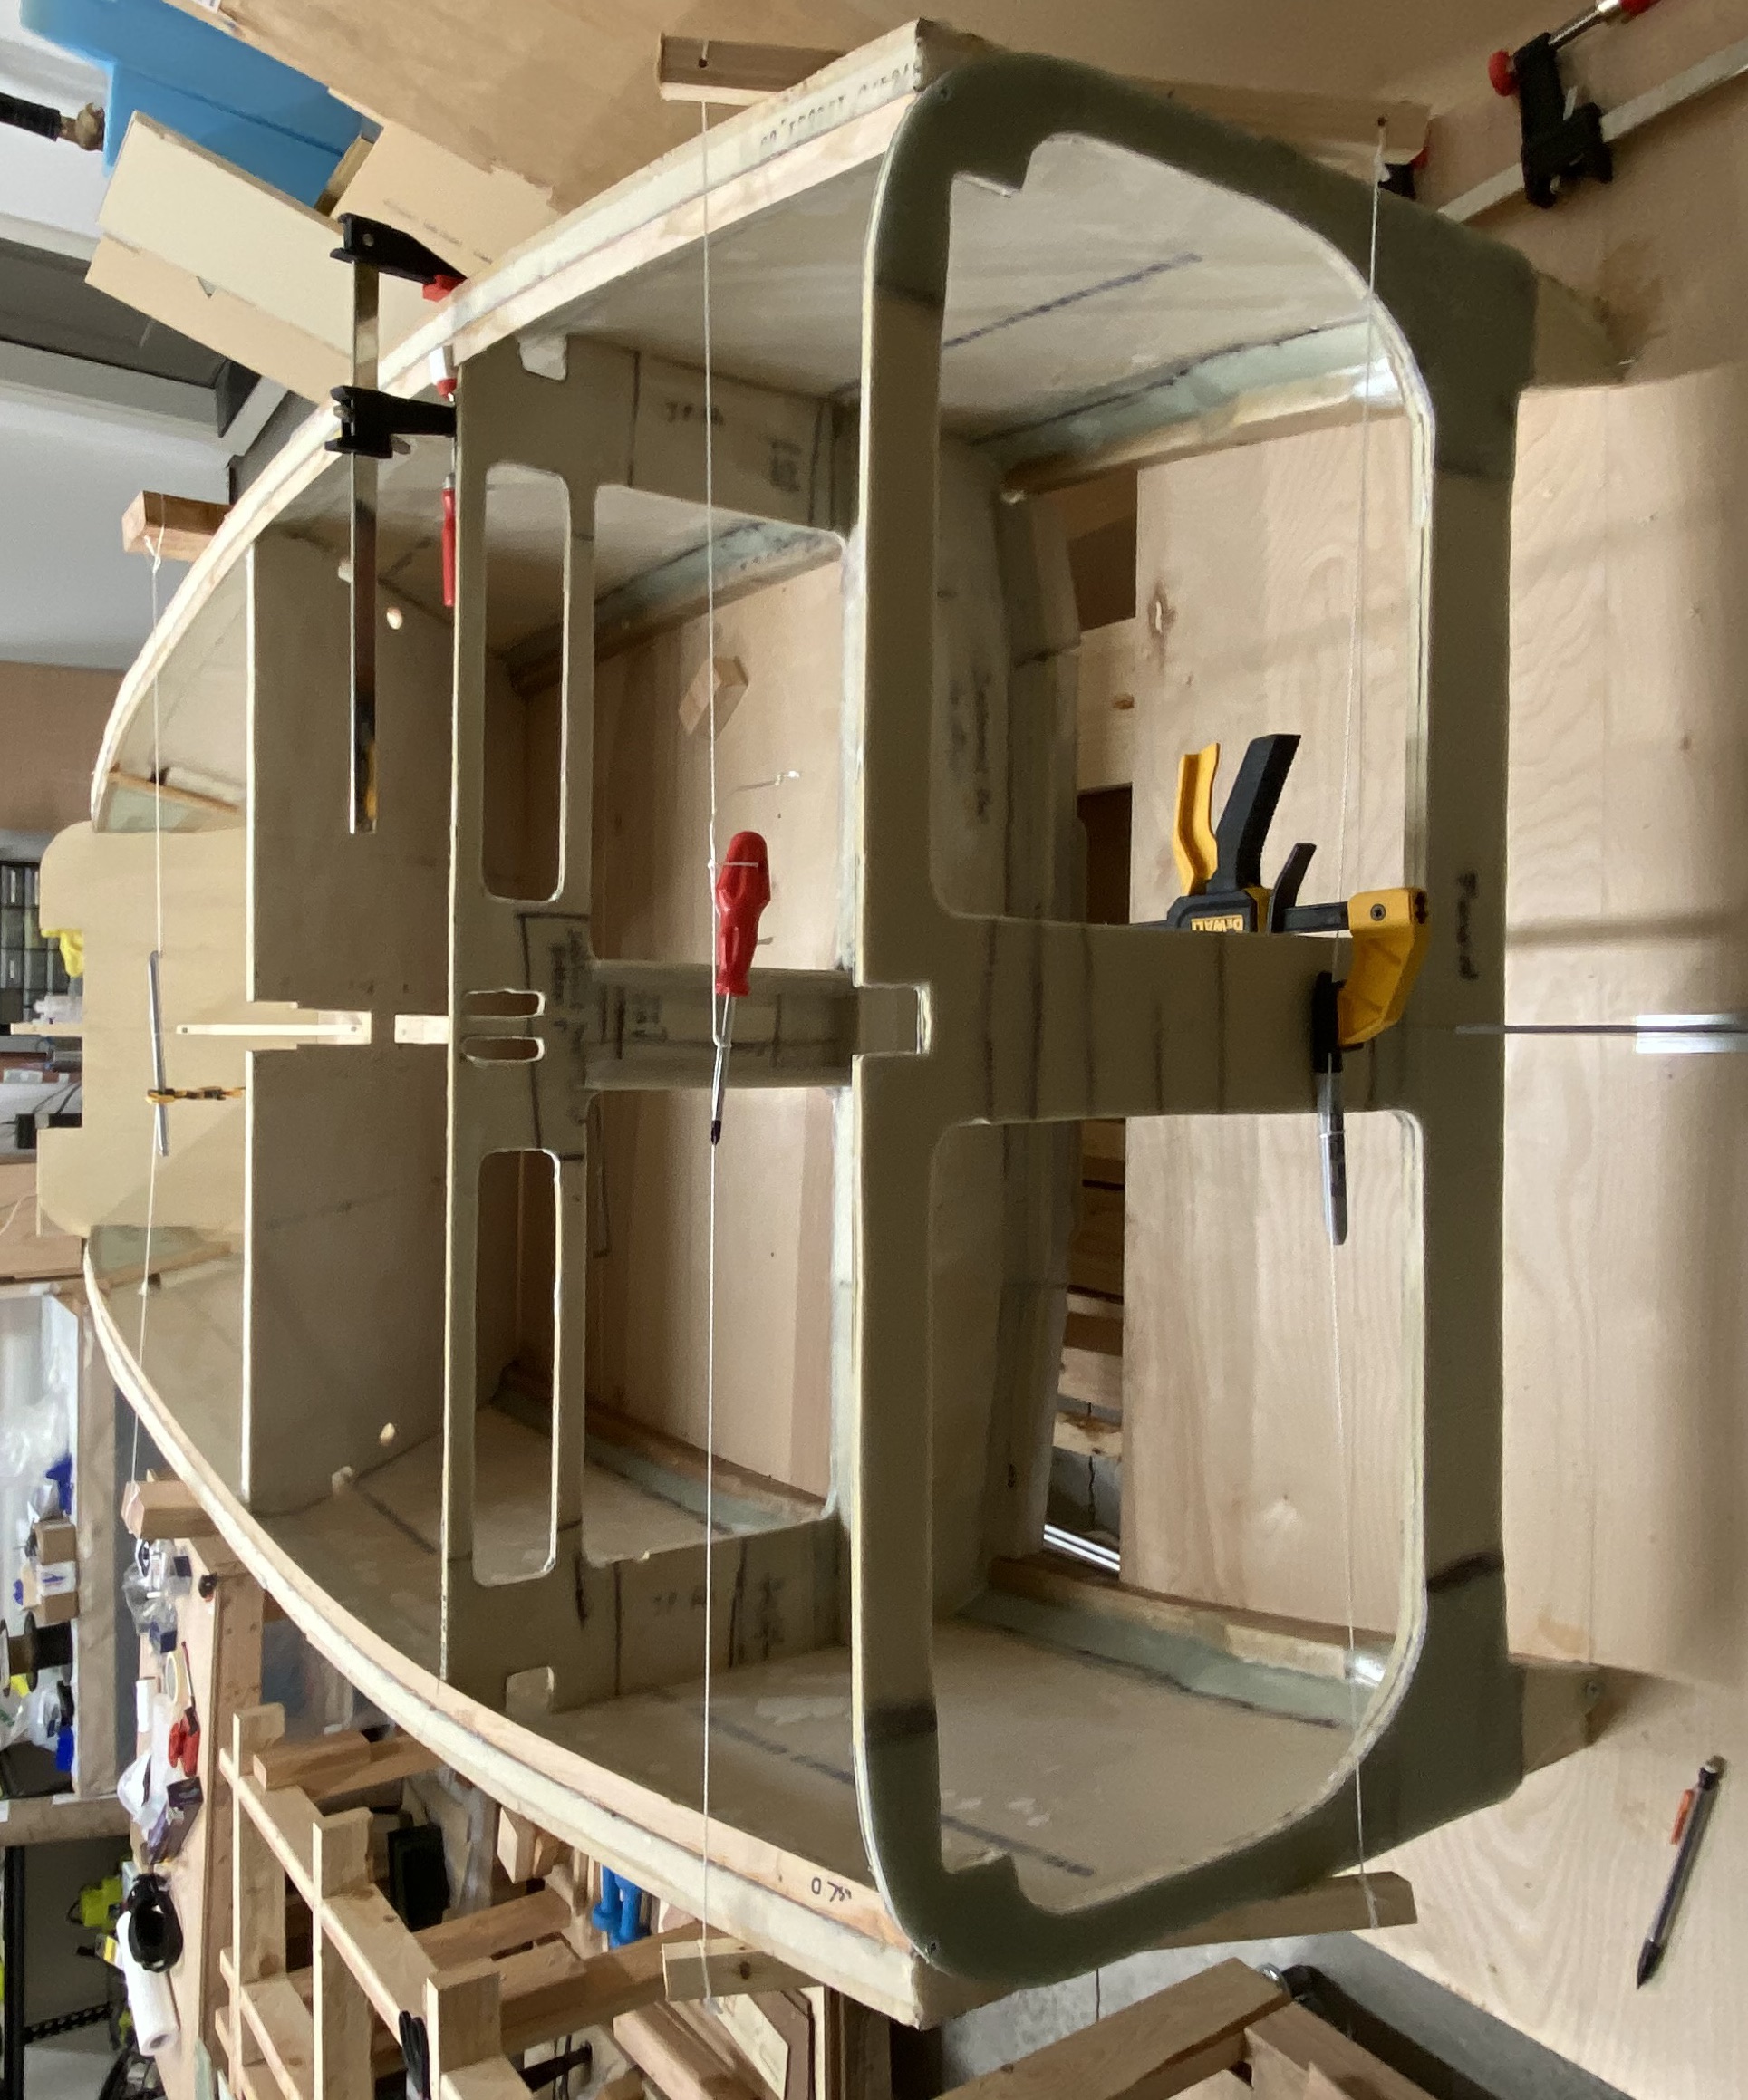
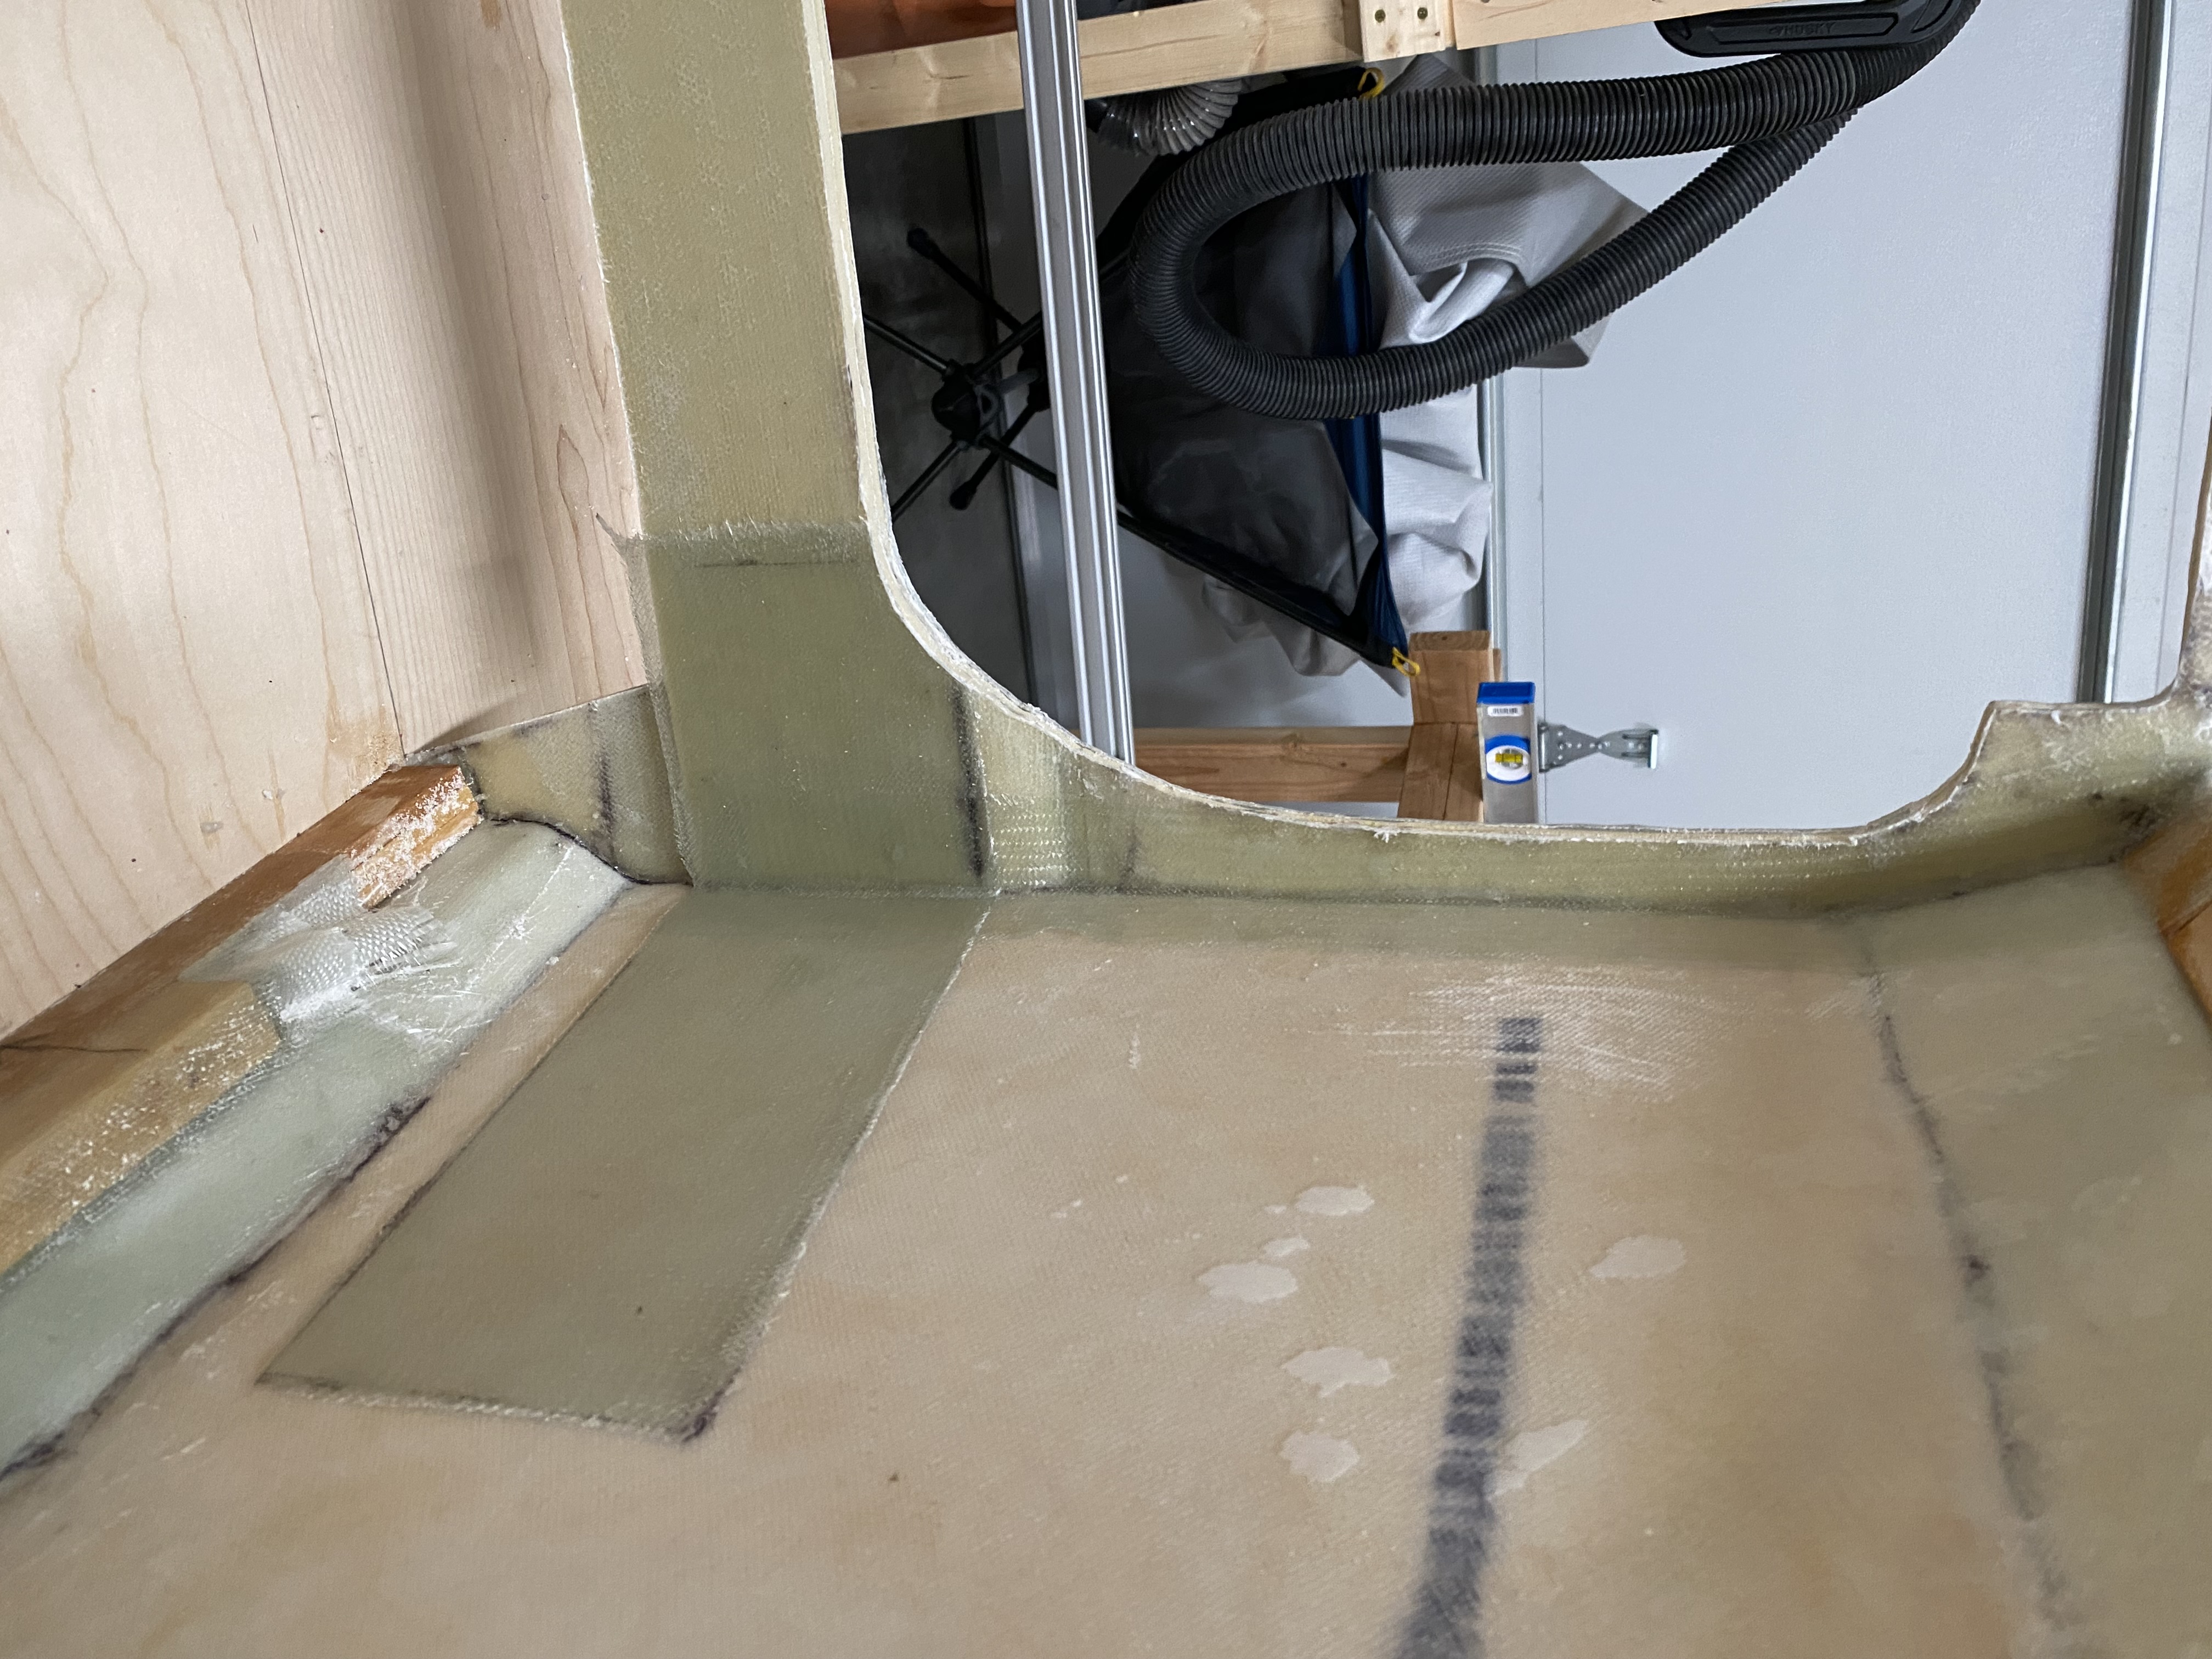
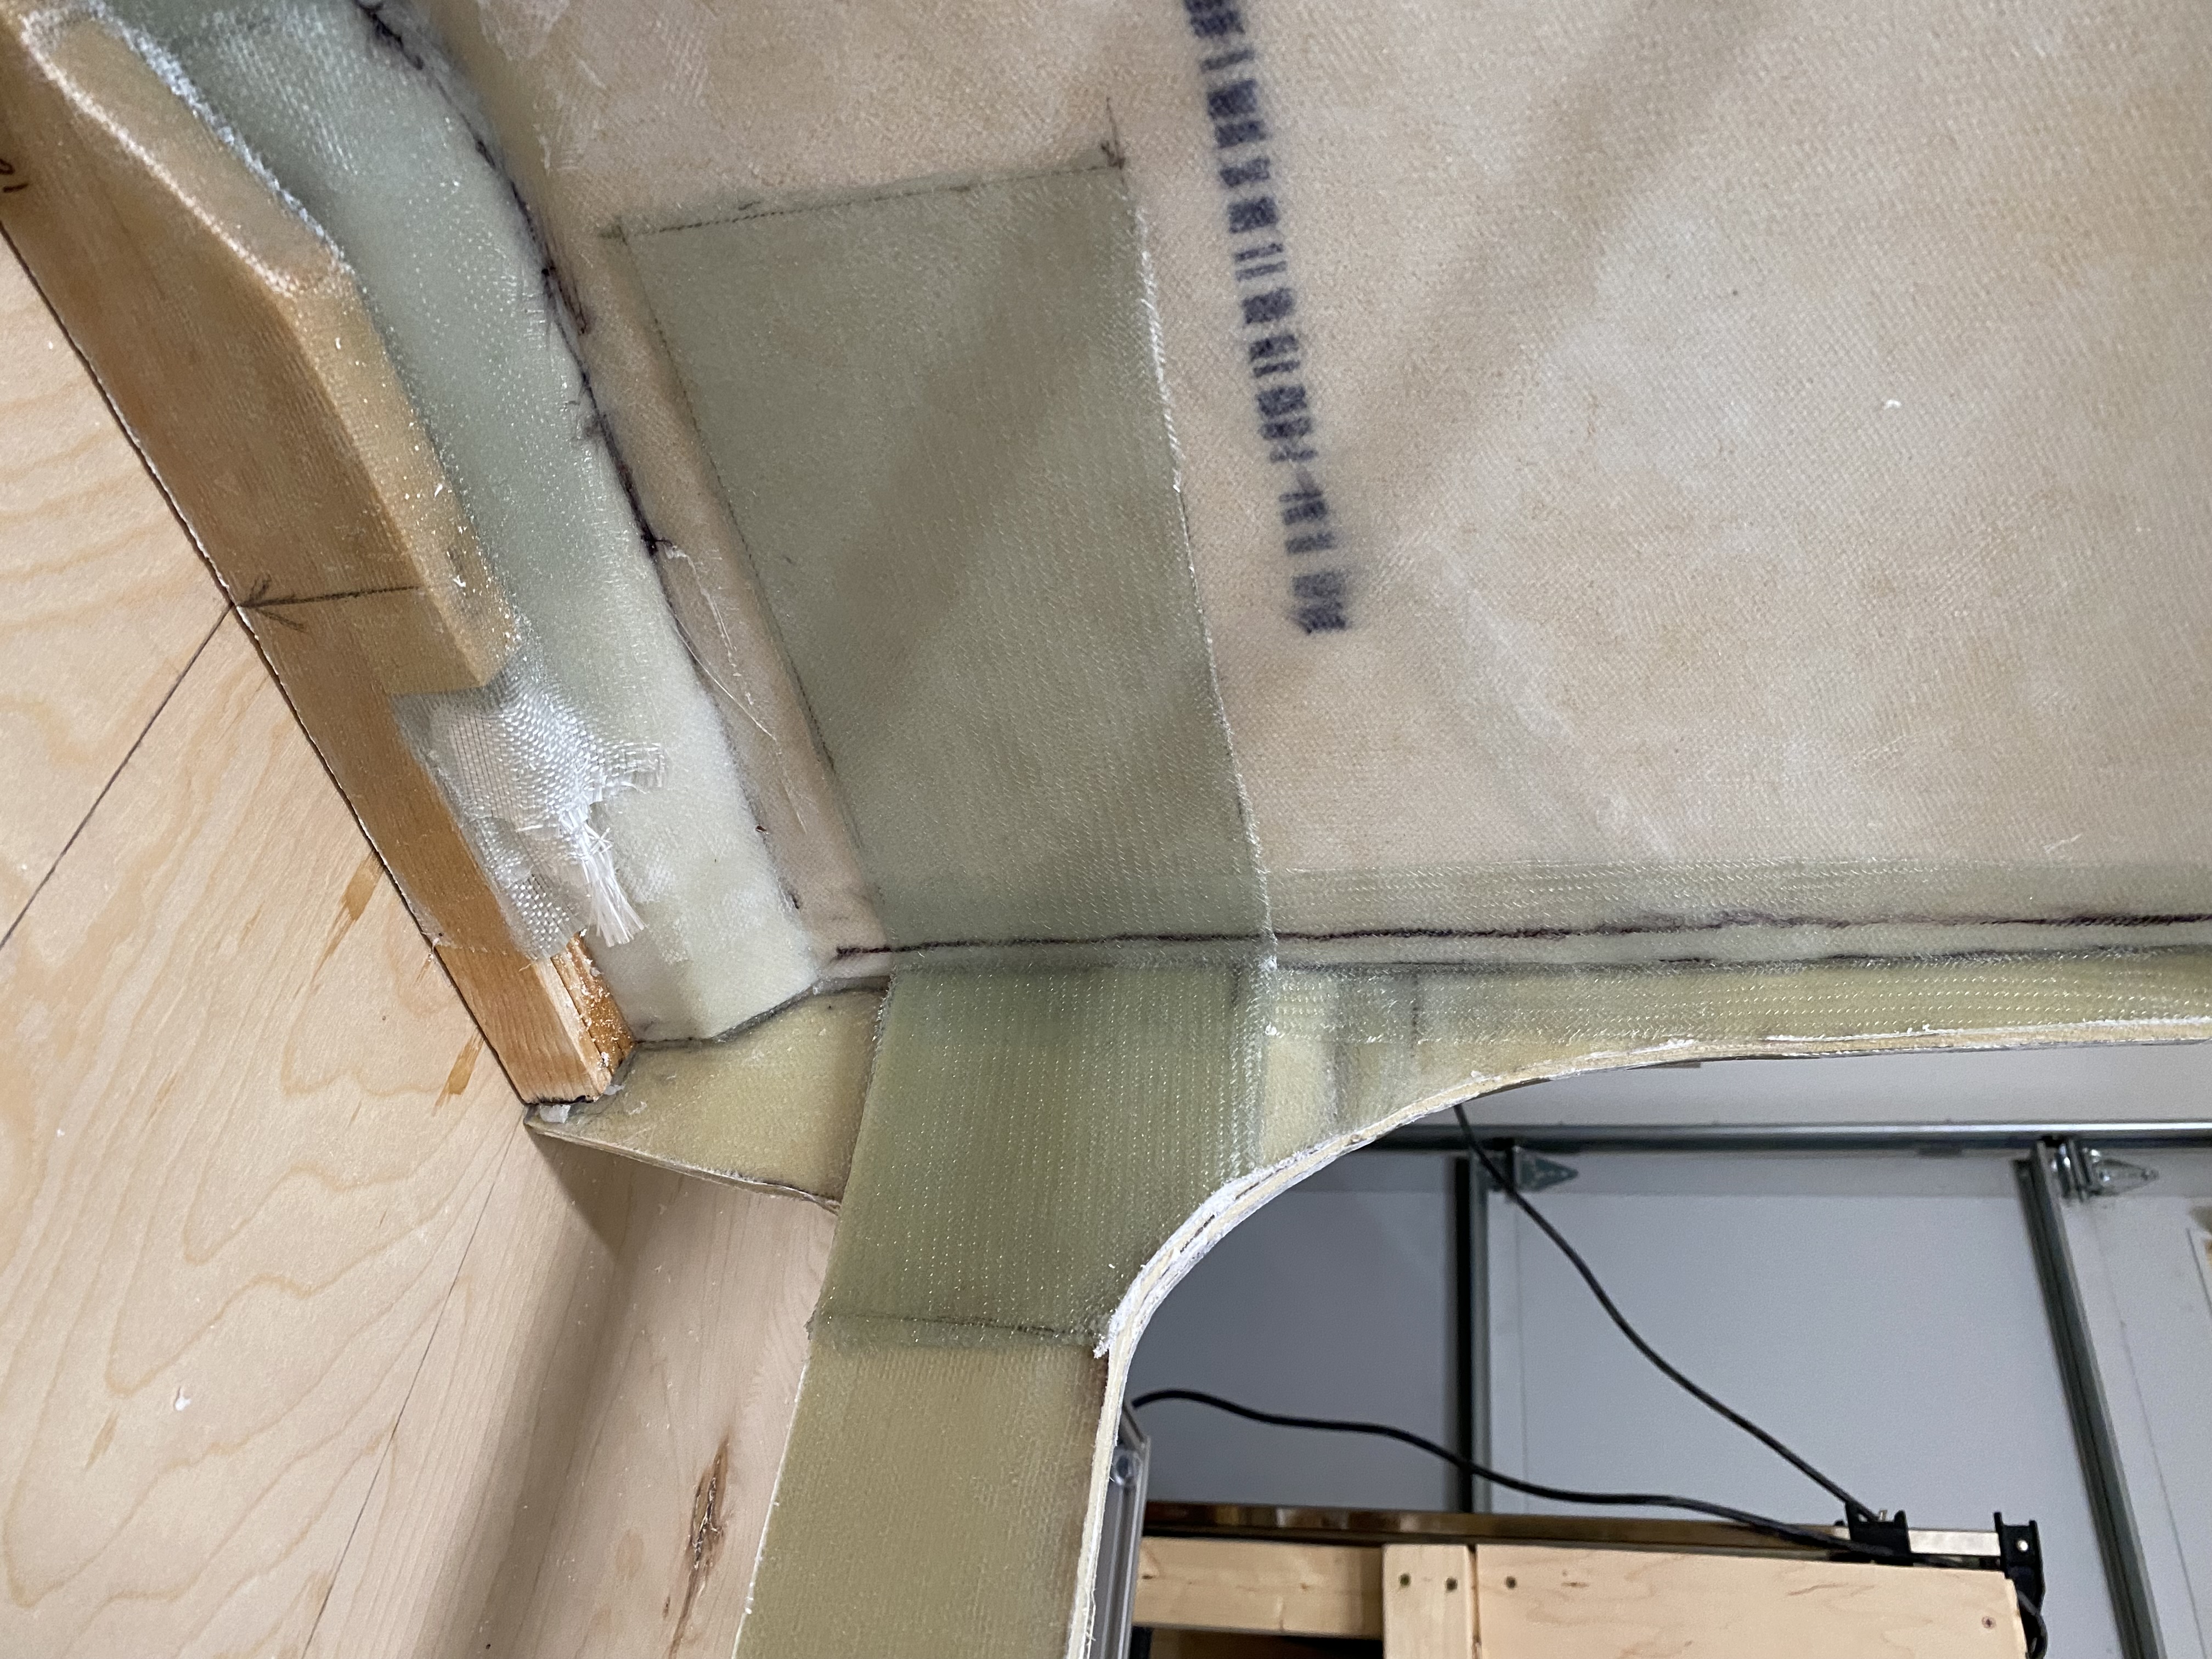
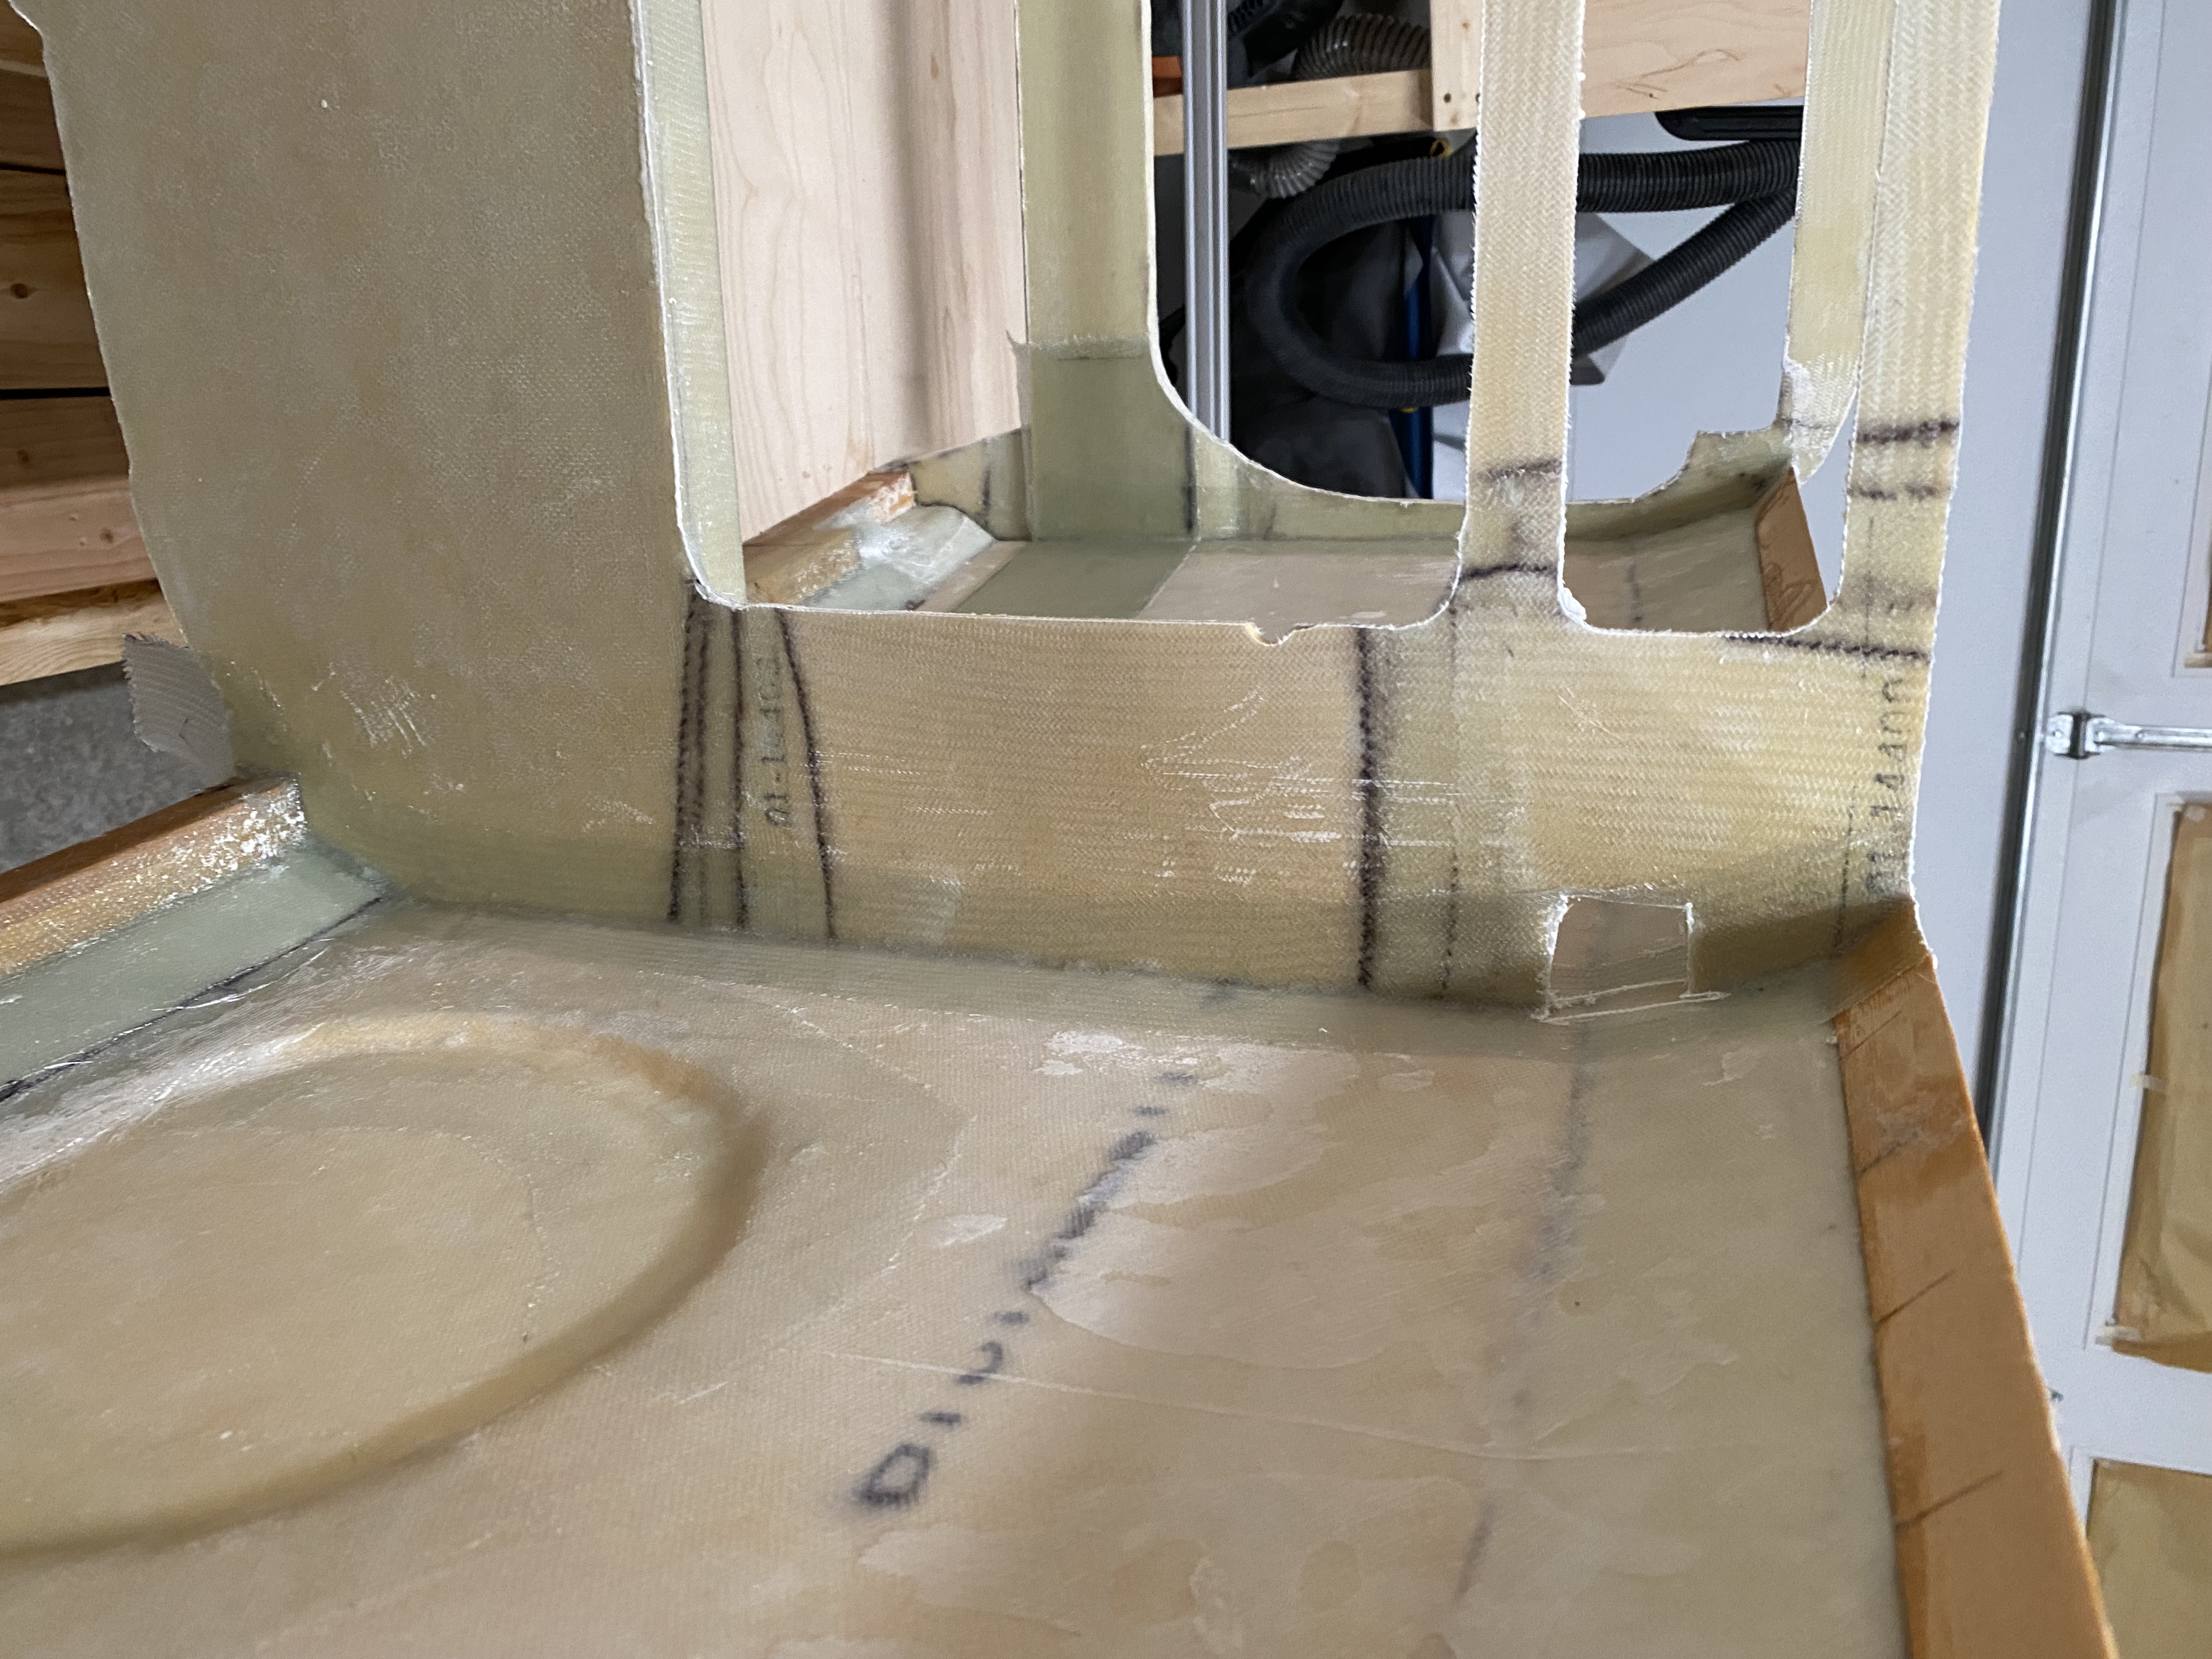
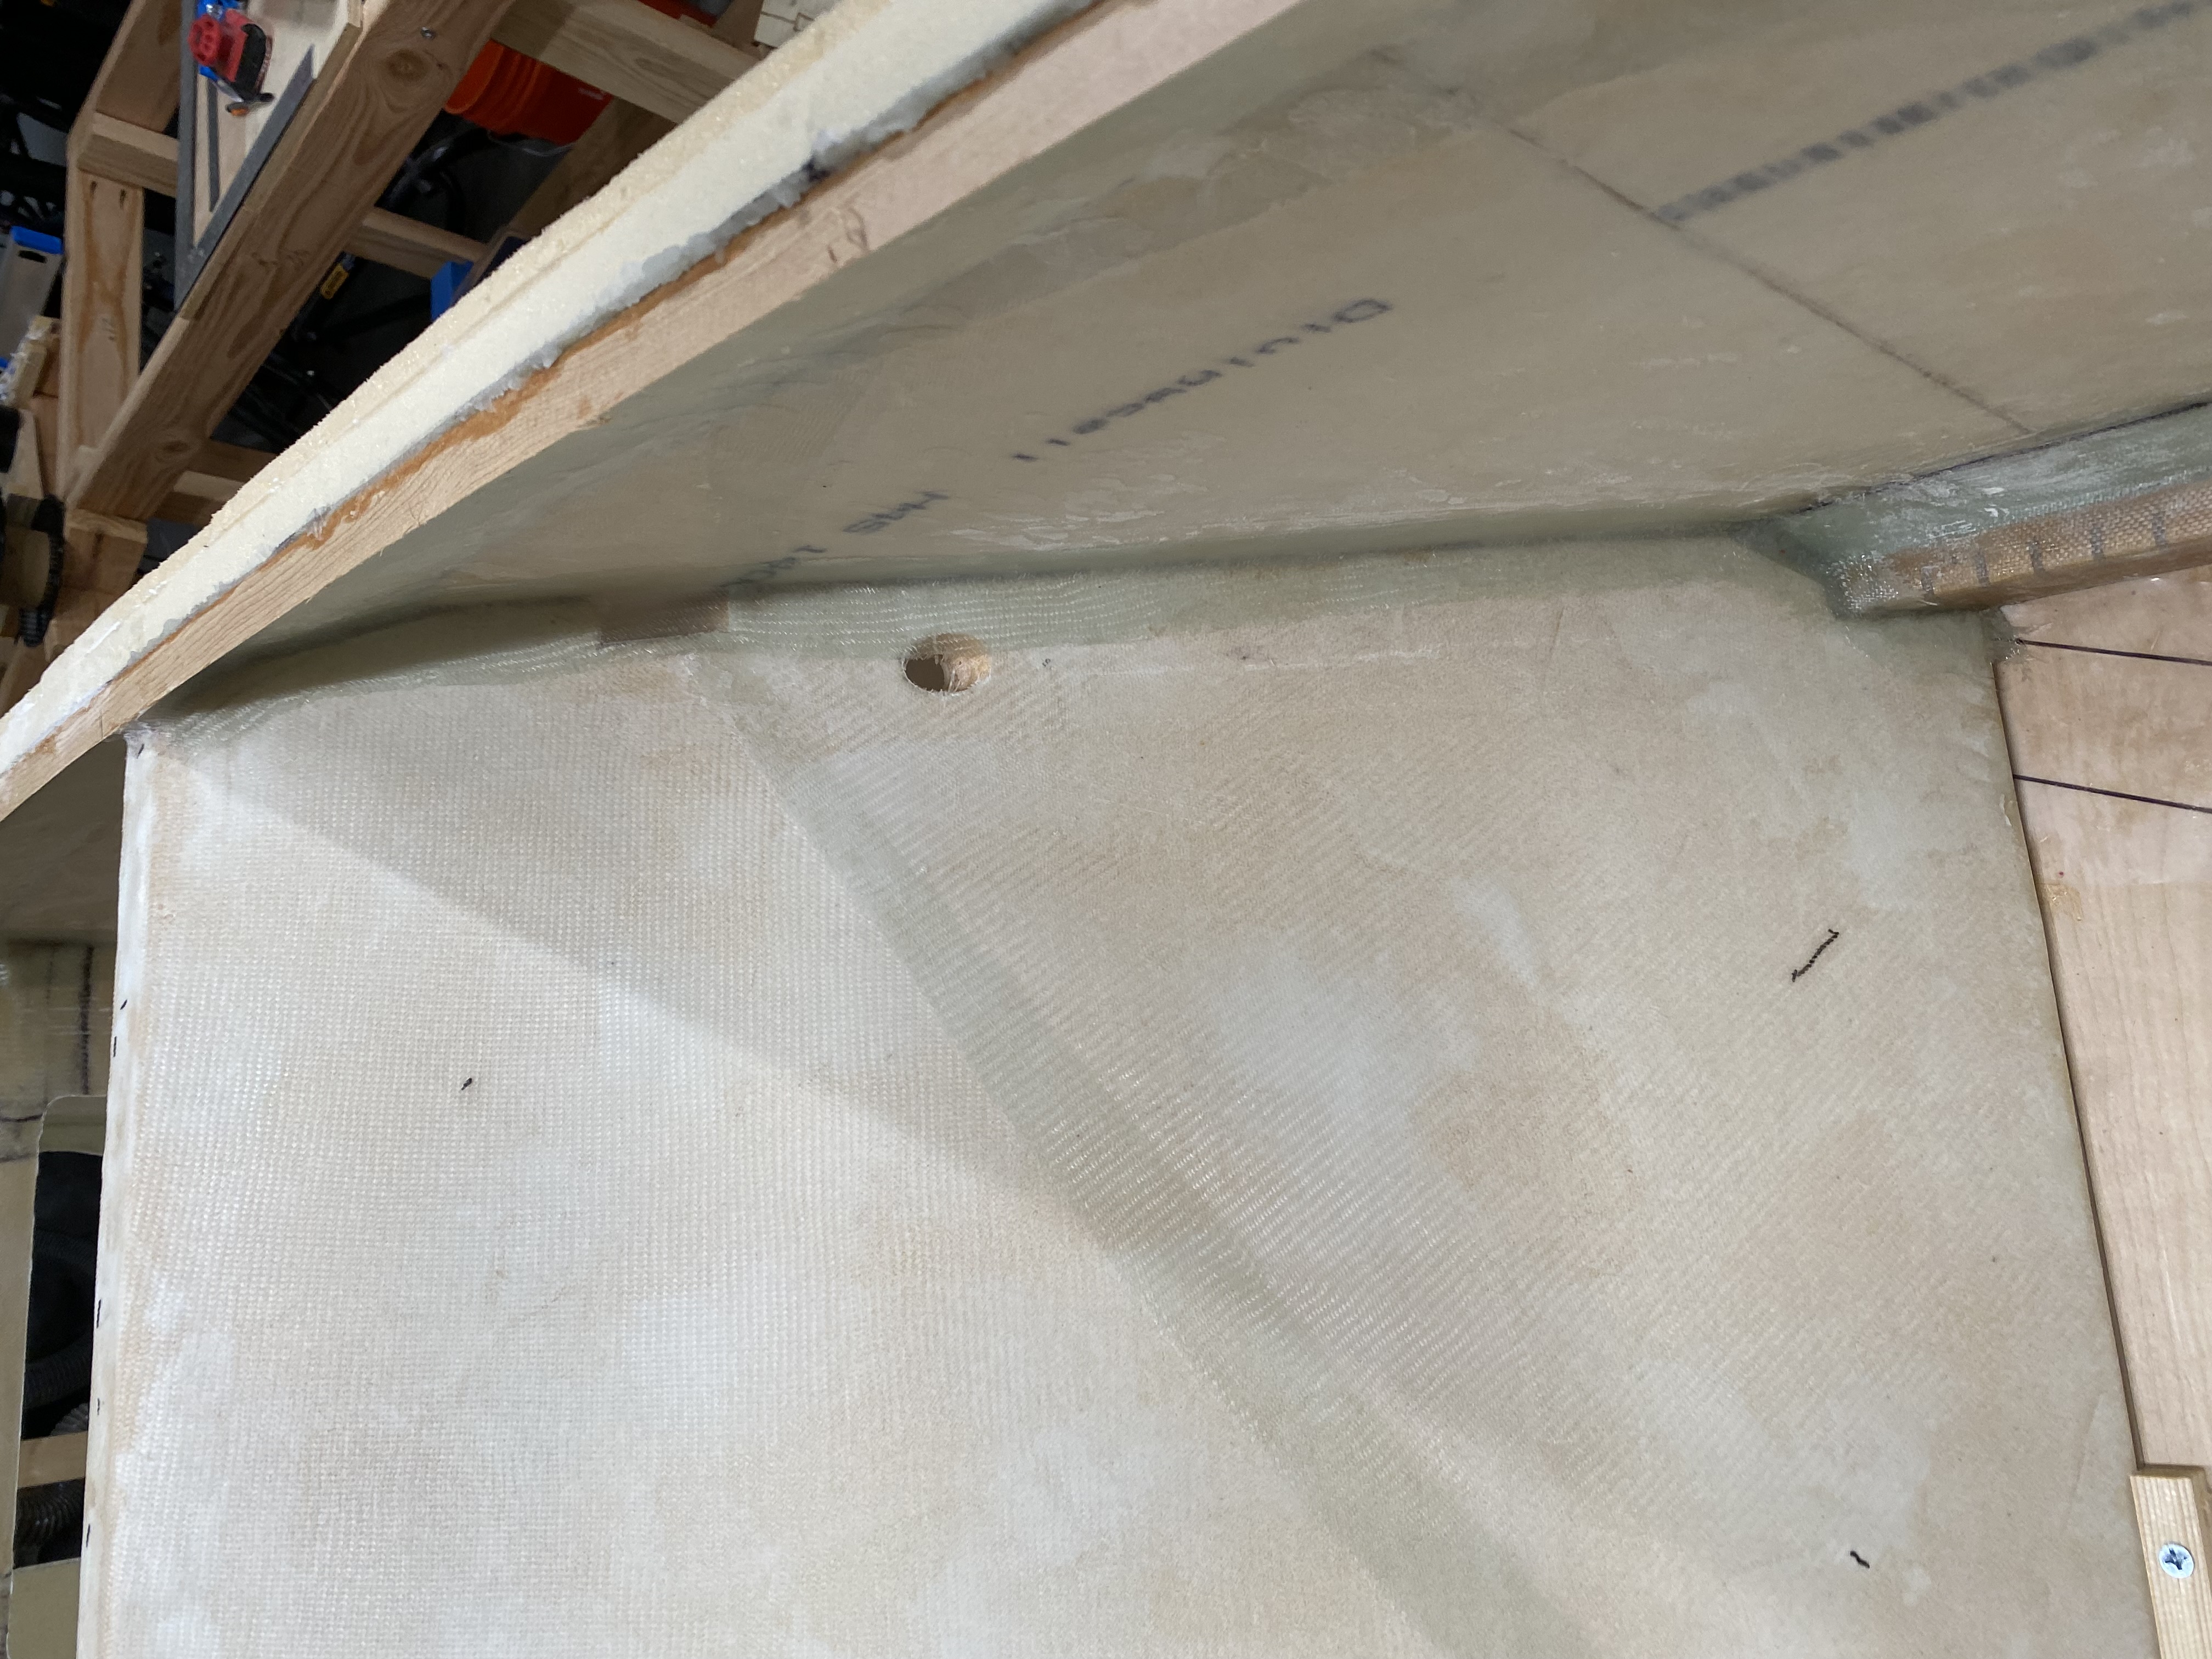
Once I taped as much as I could of these panels, I installed F-28. Similar to F-22, it only receives reinforcement on the aft face. That’s because in the next chapter, I’ll be removing foam and upper longerons immediately in front of F-28, so there’s no point adding reinforcement layups there.
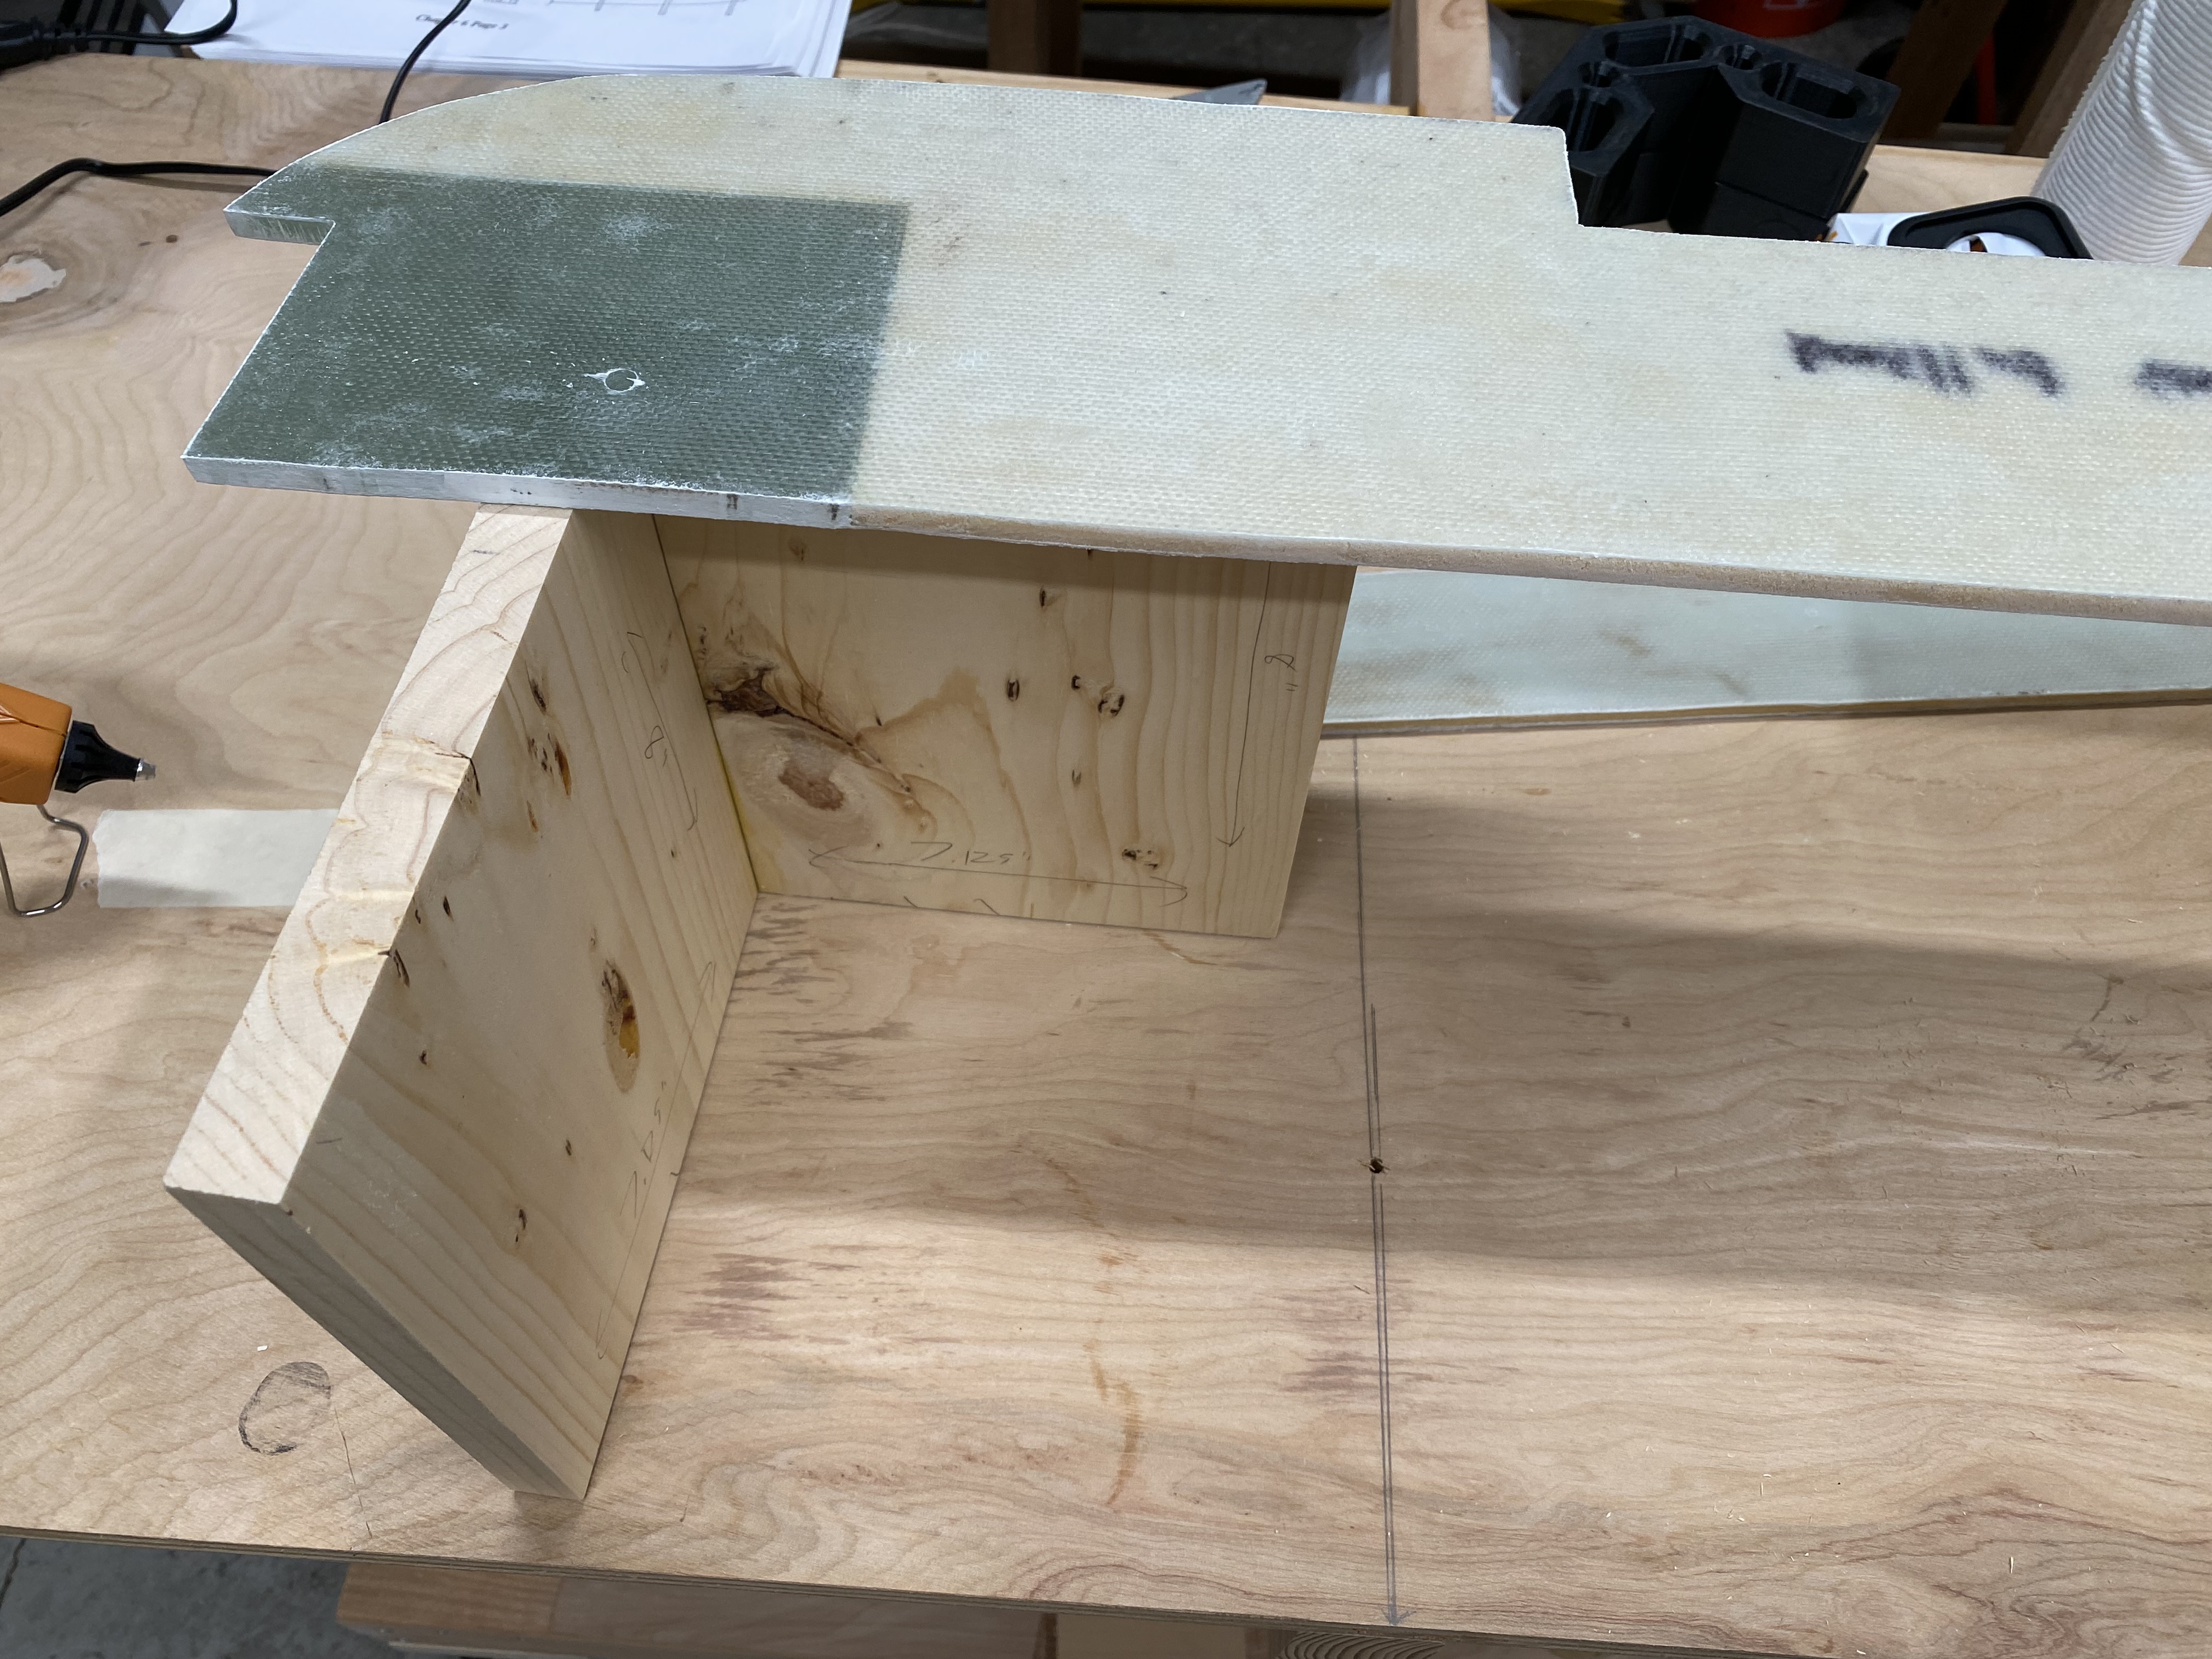
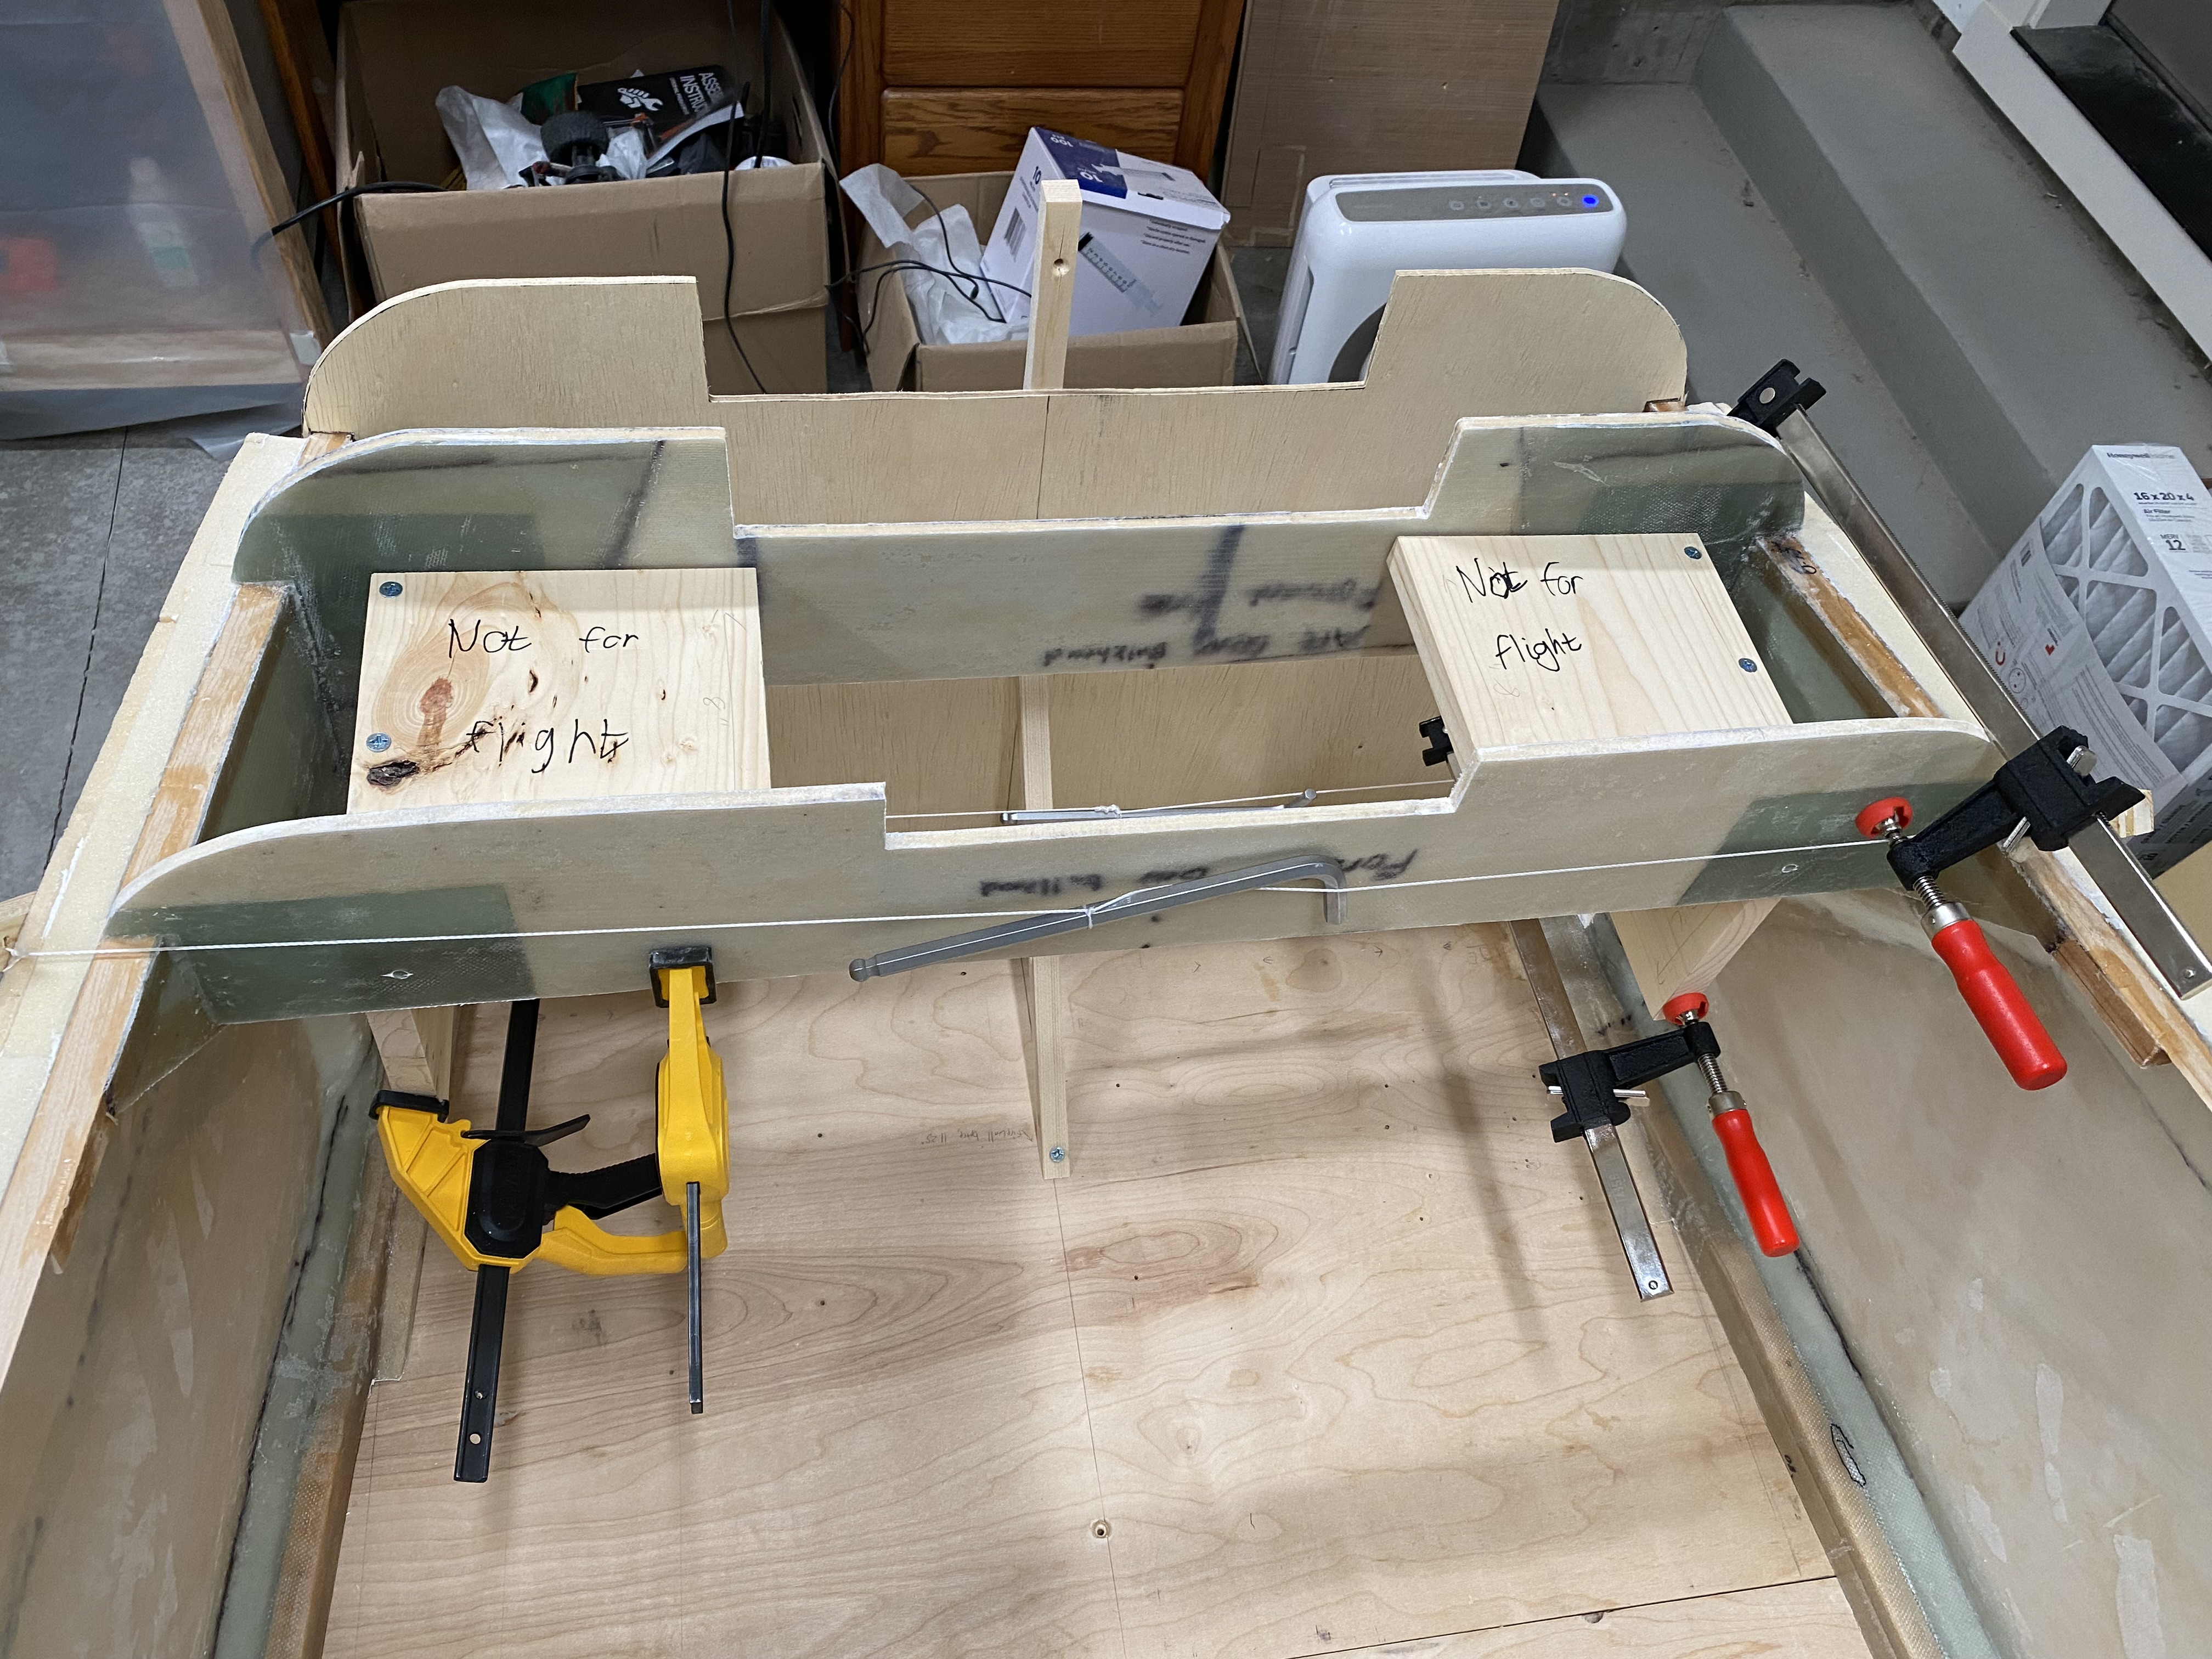
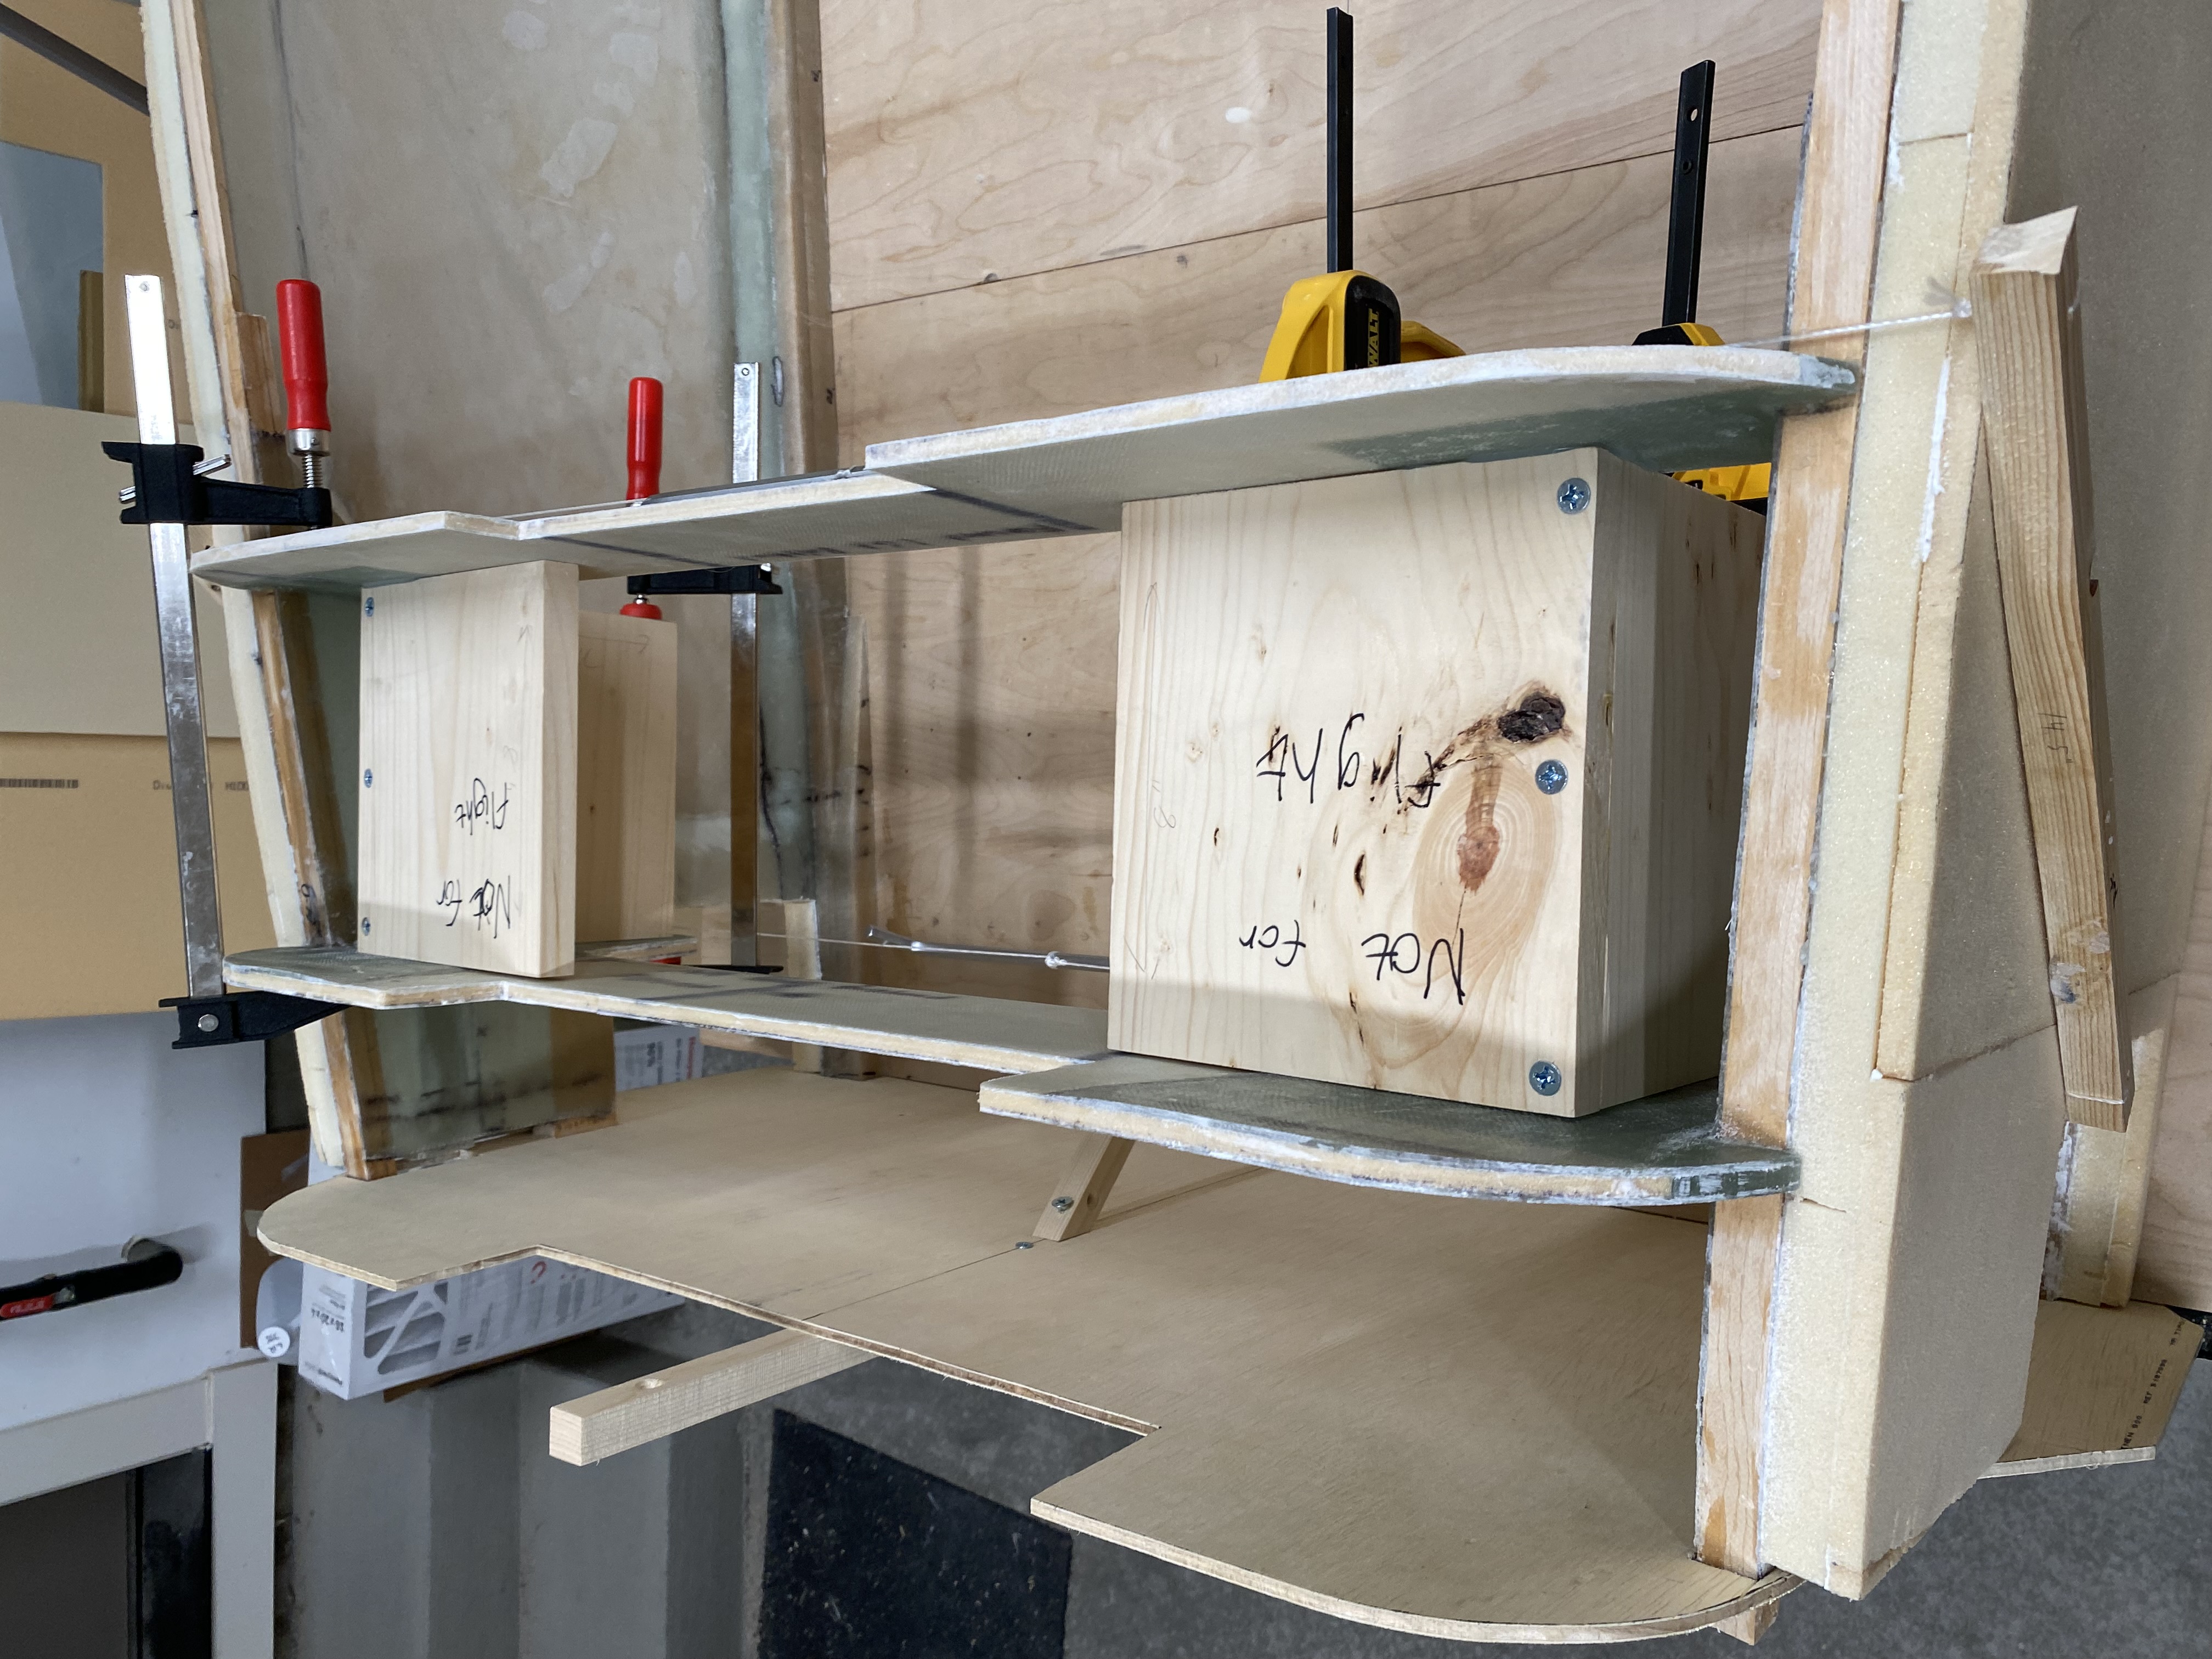
Landing Gear Box
After securing as much as needed in the forward half of the fuselage, I moved aft, to the landing gear box. First, I installed the aft landing gear bulkhead. At 5 inches forward of the firewall. I had to trim it down slightly to fit, but I got it in there. After curing and adding reinforcement layups, I installed the lower part of the forward landing gear bulkhead. I hot-glued a box 8-inches long to the bulkhead, which provided exact spacing, as well as helped guide the drill so I could match-drill a 0.25 inch hole from the forward landing gear bulkhead to the aft landing gear bulkhead. This hole was drilled once the flox cured. After drilling the hole, I used a rubber mallet to knock out the wood. I then added reinforcement layups
Center Keel and Seatback Brace
The center keel adds strength to the fuselage, and contains the hot air duct (likely unused for me, but that duct is still a structural component, so I’m keeping it). It’s the base of the center console and is part of the mounting point for the safety harnesses. Additionally, the fuel selector valve nominally in the center keel, but I don’t need to install that, so I’m not going to work on that.
You start the center keel by first microing and glassing foam, then cutting it out. I marked the shapes in black sharpie on the foam, then I micro’d and glassed it. The triangular pieces are received 2 layers of BID, any orientation. I chose diagonal with respect to the base. The rectangular pieces received 2 layers of UNI, oriented along the length of the piece.
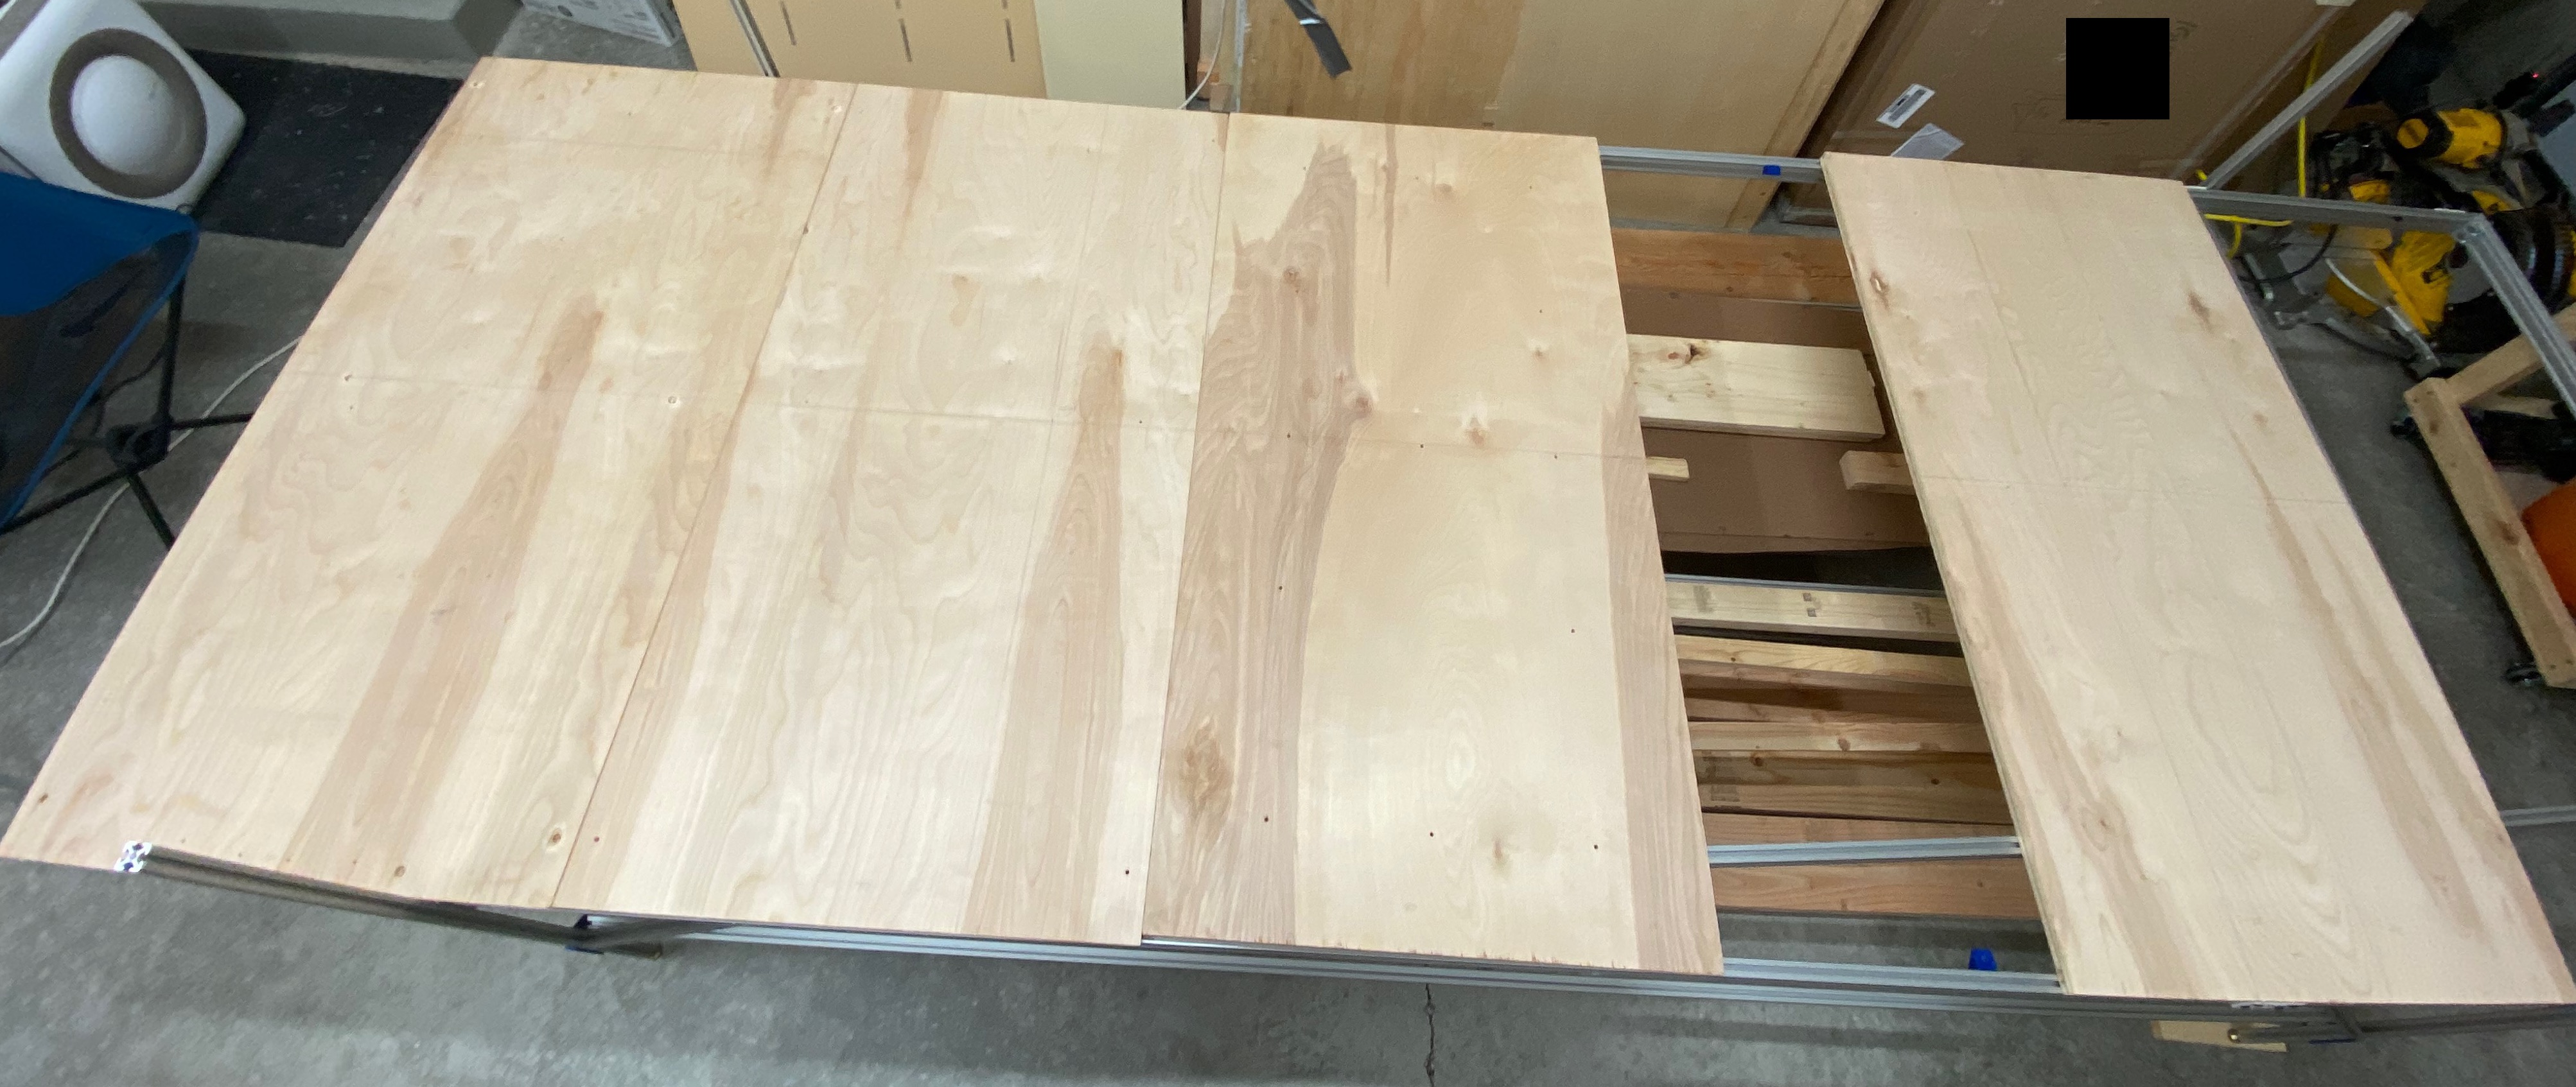
The Fuselage Bottom
With the sides assembled, now it’s time to install a floor.
Log
- 2022-12-14: Started work.
- 2022-12-15 through 2022-12-16: Prepared shop for fuselage assembly - tore down the fuselage forms jig - building platform to assemble fuselage on.
- 2022-12-17: Ordered parts for constructing aluminum workbench, started work on the center keel.
- 2022-12-18: Glassed inside fiberglass parts of the center keel.
- 2023-01-08: Attached temporary firewall to assembly table. Trimmed temporary firewall to allow fuselage sides to slot in. Trimmed forward ends of fuselage sides to allow correct positioning of F-22. Installed screw holes for F-22. Started work fitting the front seatback in to the trial assembly.
- 2023-01-18: Finished trial fit of front seatback, instrument panel, and F-22 with the fuselage sides.
- 2023-01-19: Installed the front seatback, instrument panel, and F-22.
- 2023-01-21: Sanded off flox from installed bulkheads, prepared for reinforcement layups.
- 2023-01-23: Added reinforcement layups to joints between front seatback (aft joint only), instrument panel (aft side, plus below the electrical channel on the forward side), and F-22 (aft side + the 4-ply reinforcements to the doubler).
- 2023-01-24: Trimmed reinforcement layups. Prepared to install aft landing gear bulkhead.
- 2023-01-25: Installed aft landing gear bulkhead. Prepared lower part of forward landing gear bulkhead.
- 2023-01-26: Installed forward landing gear bulkhead.
- 2023-01-27: Drilled matching holes from forward landing gear bulkhead into aft landing gear bulkhead. Installed the lower piece of the permanent firewall.
- 2023-01-29: Added reinforcement layups to the landing gear attach bulkheads and F-28.
- 2023-02-01: Rotated the fuselage to be right-side-up.
- 2023-02-03: Installed the upper piece of the forward landing gear bulkhead. Added reinforcement layups to the forward side of the front seatback.
- 2023-02-04: Added layups to join the 2 parts of the forward landing gear bulkhead on the forward side. There were issues in this layup discovered after cure.
- 2023-02-07: Prepared forward landing gear bulkhead for repair.
- 2023-02-08: Moved fuselage onto sawhorses, disassembled table used for fuselage assembly.
- 2023-02-09: Added repair layups to forward landing gear bulkhead.
- 2023-02-10: Rotated fuselage back to upside-down.
- 2023-02-11: Added reinforcement/joining layups to the aft side of the forward landing gear bulkhead. Joined & glassed internal pieces of the seatback brace. Floxed them to one side of the seatback brace.
- 2023-02-12: Joined pieces for the conduit duct.
- 2023-02-13: Floxed other side of seatback brace in place. Floxed safety harness in place in the conduit duct.
- 2023-02-16: Laid up 7-ply UNI layup over the safety harness mounting point in the conduit duct.
- 2023-02-17: Glassed the outside edges of the front seatback.
- 2023-02-18: Glassed the outside of the conduit duct.
- 2023-02-20: Removed the firewall & prepared for reinstall. Joined the heat duct and the front seatback.
- 2023-02-21: Test fit center keel, determined need for an extension of the heat duct.
- 2023-02-22, 2023-02-23: Added foam as spacers for the firewall install. Sanded down to the exact length needed.
- 2023-02-24: Reinstalled firewall. It’s now square. Created inside layup for the heat duct extension.
- 2023-02-25: Joined heat duct extension pieces with flox, glassed exterior.
- 2023-02-26: Installed center keel, along with heat duct extension.
- 2023-02-27: Started work on floor. Cut panels to shape, joined with 5-minute epoxy.
- 2023-03-01: Built frame to support floor during contour and layup. Cut out landing brake. Marked where contour pieces will go.
- 2023-03-02: Cut out contouring foam for floor, fit in place.
- 2023-03-04: Epoxied contouring foam for floor into place.
- 2023-03-05: Glassed ~3/4 of the floor. Stopped after running out of fiberglass.
- 2023-03-09 through 11: Sanded floor in prep for finishing glassing.
- 2023-03-12: Glassed remainder of floor.
- 2023-03-18: Installed floor onto fuselage.
- 2023-03-27: Installed BID strips on starboard side (part 1 - the strips over the lower longerons were too short)
- 2023-03-29: Installed BID strips on port side
- 2023-04-01: Installed BID strips on starboard side, finishing up the fuselage assembly.
Last updated: 2023-08-12 07:19:09 -0700