Workbench
These are heavily inspired by the EAA Chapter 1000 Standardized Work Tables, only designed to to be 2 feet by 4 feet instead of 2 feet by 5 feet. A bunch of people in the cozy community prefer joining 6 tables of these size to ultimately create the plans-recommended 12 foot by 4 foot table for the wings and other large pieces. This is my take on that.
Version 1.4, April 2022
Starting on the fifth table, the primary goal is to simplify construction by removing the use of half-laps entirely. Here’s what I came up with:
- Extend the lip of the top frame to line up with the tabletop.
- Do away with resting the top frame on the legs. Screw the top frame into the legs.
- Increase the size of the bottom frame to match the
- Build the bottom frame into the legs.
- Use height-adjustable casters. Screw them into the bench using t-nuts.
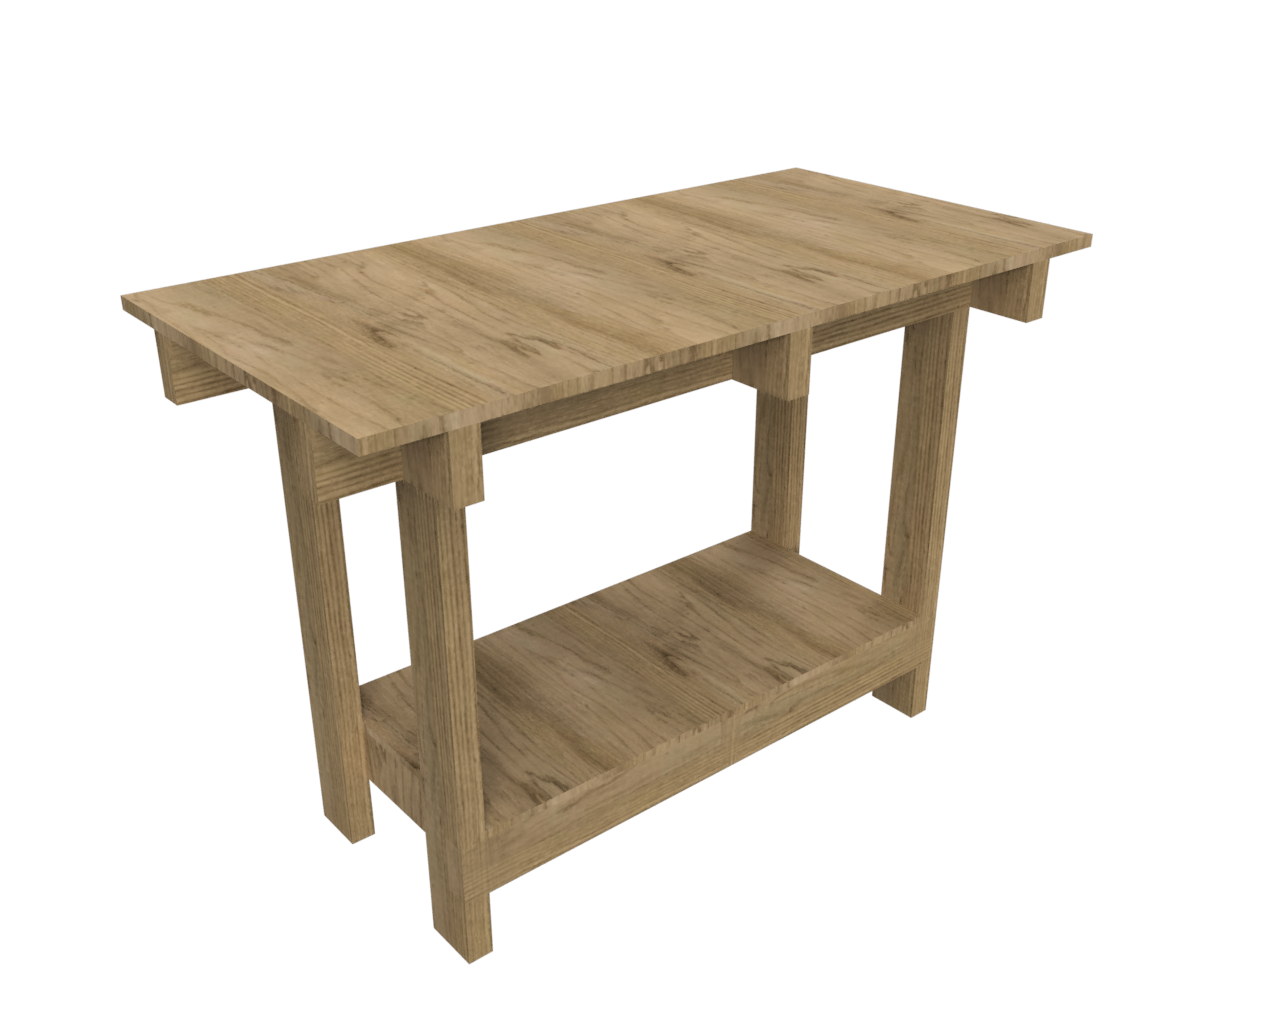
Here’s image of what I came up with:
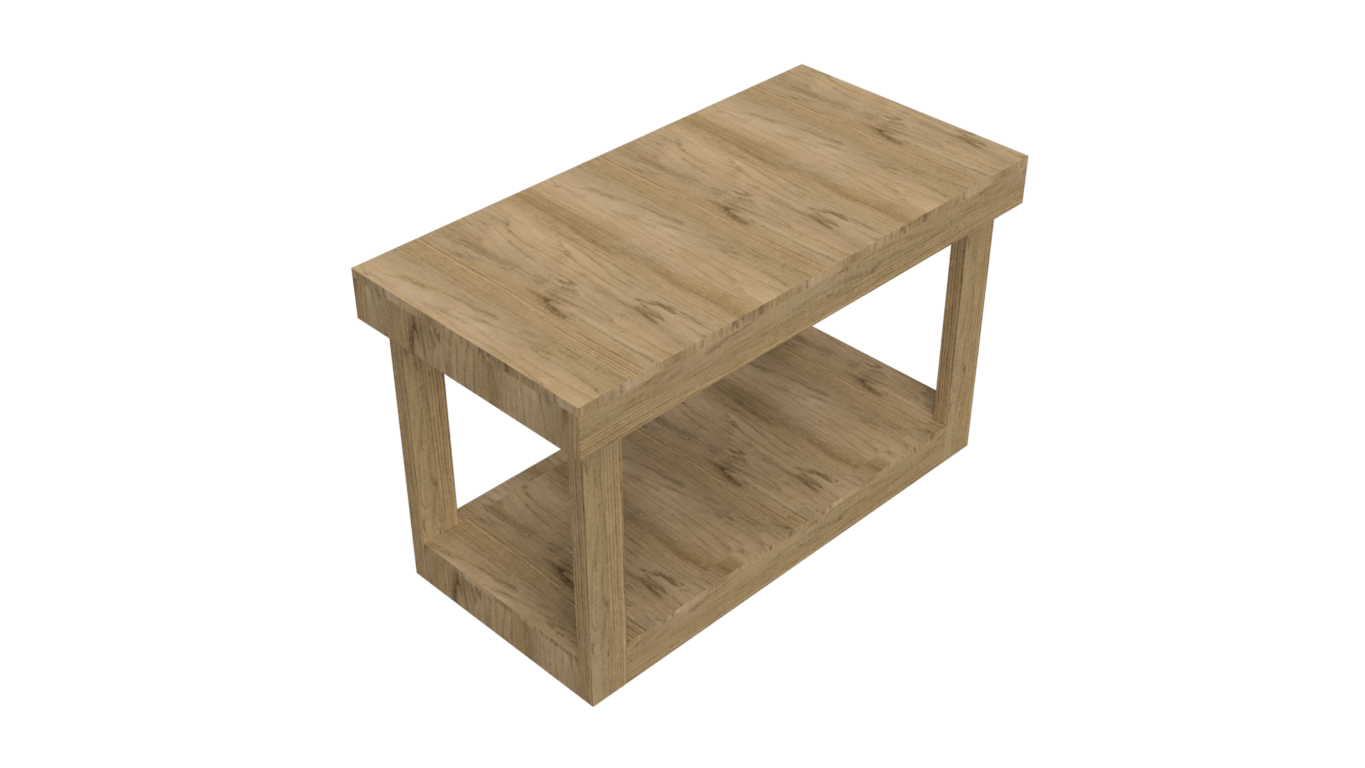
None of these previews include the wheels, because my CAD-fu isn’t good enough.
Materials
- 2 by 4 studs
- 2x 48“ studs (the top frame rails)
- 3x 21“ studs (the top frame spans)
- 2x 38“ studs (the bottom frame rails)
- 3x 18“ studs (the bottom frame spans)
- 4x 28“ studs (the legs)
- Plywood
- 1x 48“ by 24“ by 3/4“ plywood (the top surface)
- 1x 45“ by 21“ by 1/4“ plywood (the bottom shelf)
- Extra hardware
- 4x castering wheels with center screw
- 4x t-nuts which fit those center screws
- Many screws
- Optional: Pocket hole jig + pocket hole screws (for securing things to the legs).
Instructions
- Top Frame:
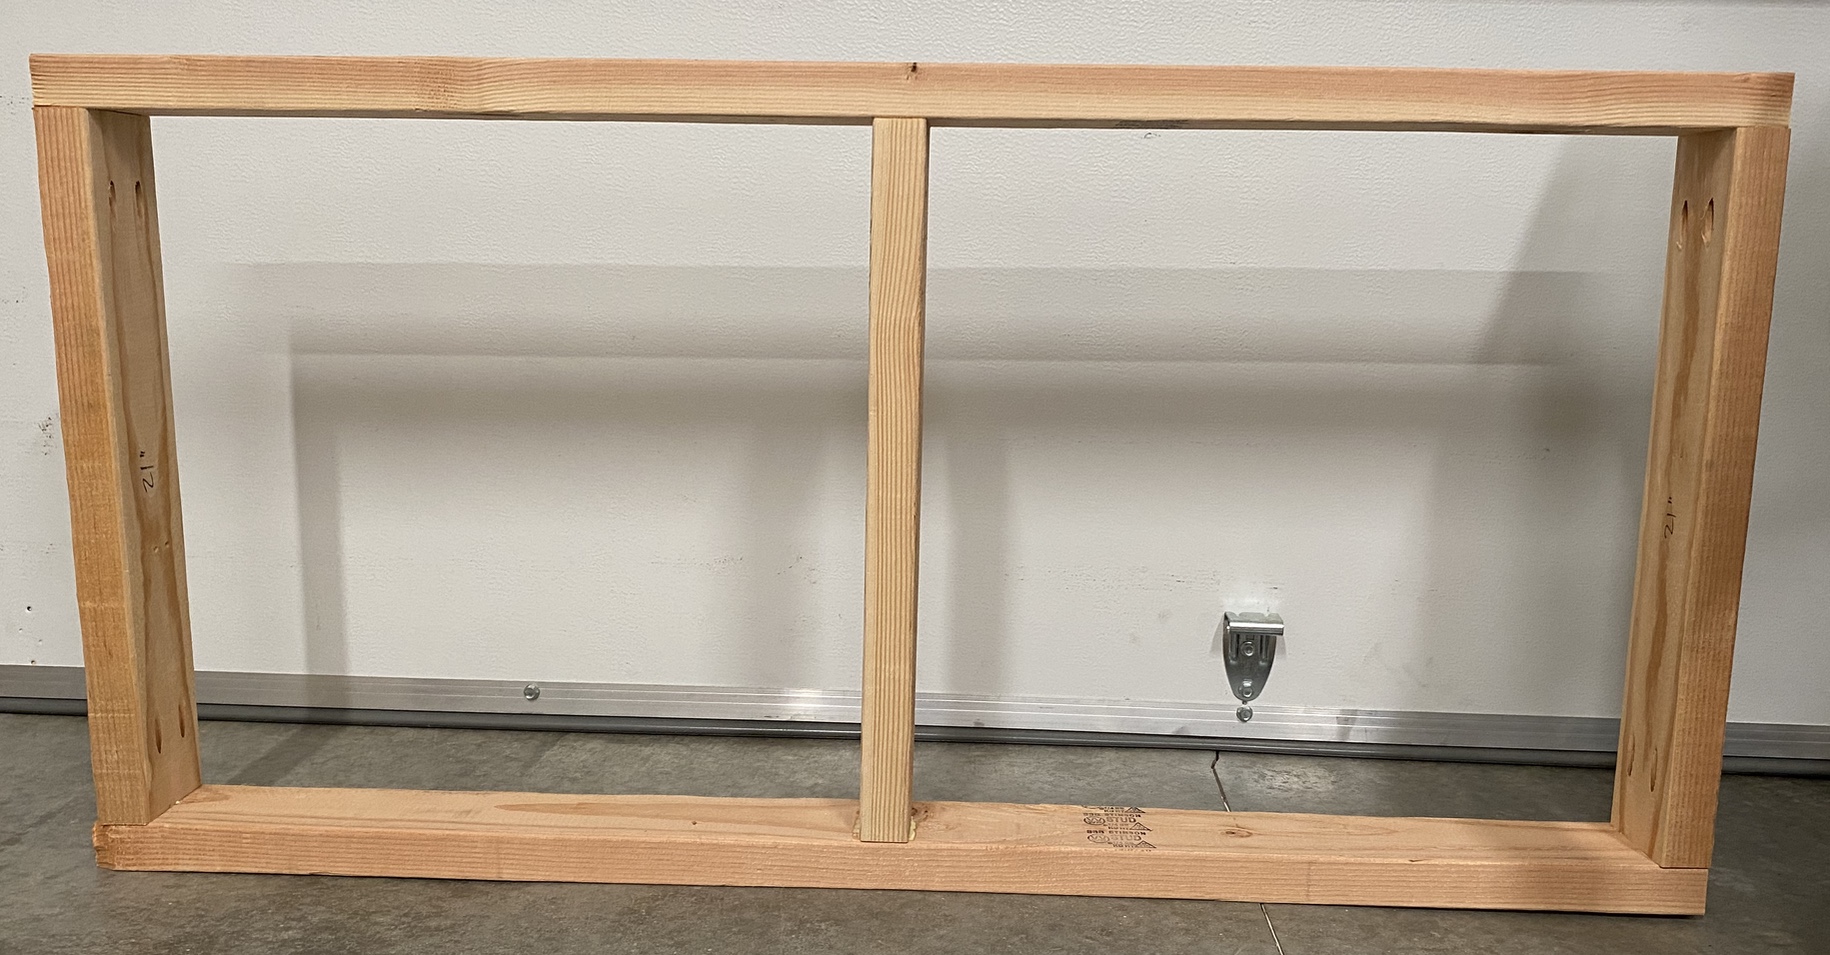
- Screw the top frame pieces together. Remember that the spans go inside of the rails.
- Bottom Frame:
- Screw the bottom frame pieces together. The rails screw into legs, same with each edge span.
- Placing the bottom assembly on the floor, place the top frame in place (the tops of the legs should meet at the 4 inner corners of the top frame). Make sure that the top of the top frame to be flush with the top of the legs. It’ll help to use scrap wood to hold the frame on the legs. Screw the top frame into the legs from both the rails and the edge spans.
- Re-orient the frame to be upside down. Drill a hole in each leg, then put in a t-nut. Add a nut to the caster, then screw that in as well. The nut makes it a lot easier to lock in a height once you have the desired height.
- Re-orient the frame back to normal. Screw the benchtop into the top frame.
- Cut 1.5“ by 3.5“ tabs into the bottom shelf top, then slide that in to rest on the bottom frame. No need to screw this in, the legs of the table will keep it from moving around too much.
Version 1.3, March 2022
On the fourth table I built, I had what’s really the second meaningful change to the design of my tables This results in a larger bottom shelf, and a much easier build process. There’s still work to improve the build process and make that easier, which will be part of the version 1.4 design.
In this version, the top is still made using half-laps, but the bottom-shelf frame is joined using butt-joints and mostly screws.
Materials
- 2“ x 4“ studs
- 2x 48“ studs
- 3x 24“ studs
- 4x 28“ studs
- 2x 40“ studs
- 3x 16“ studs
- Plywood
- 1x 48“ x 24“ x 3/4“ plywood (you could also use 1/2“ plywood and it wouldn’t matter)
- 1x 40“ x 19“ x 1/4“ plywood
- 4x 3.5“ tall castering wheels.
- Get t-nuts and wheels with screws in them. This way, you have height-adjustable wheels that make aligning each table in height significantly easier.
As before, get large studs and cut them to size. You can make this with 6x 8’ studs. You can also use 10’ or 12’ long studs and cut them to size. Whatever will fit in your vehicle. Similarly, it’s much more economical to get 4’ by 8’ sheets of plywood, instead of project boards.
Instructions
- Top Frame
- Cut half-laps into the 48“ studs. These will have a depth of 1.75“ (half the height of the studs). They should be 1.5“ long (the width of the studs). Cut 2 of them 4“ from the edges, then a third in the exact center of the 48“ stud (starts 23.25“ from either edge). Make these cuts all on the same side.
- Cut rabbets into 3 of the 24“ studs. These will be at the ends of the studs. As before, they’ll be 1.75“ deep, and 1.5“ long. Make these cuts all on the same side.
- Join the 48“ studs with the 24“ studs you just cut into. The correct orientation for this is that the 24“ will slot down into the 48“ (so that, when weight is placed on the 24“ studs, they’ll transfer that weight into the 48“ studs)
- Bottom Shelf
- Butt together the 40“ studs and the 16“ studs such that the 16“ studs are in between the 40“ studs. Screw them together. Optionally, you can glue them, but honestly, that’s not necessary.
- Legs
- The legs should be oriented so that the height of them (the nominally 4“/actually 3.5“ side) is parallel to the 40“ studs/the length of the table.
- With the bottom legs flush to the bottom of the bottom shelf, and extending straight up, glue and screw them in to the bottom shelf.
- Wheels
- With the table inverted (resting on the top of the table), install the castering wheels + any shim material onto the bottom of the bottom shelf.
- Make sure the caster wheels are installed so that most, if not all, of the weight from the top surface is transferred directly to the wheels. (If you get casters that have a single screw going up through them - which you should, because that makes adjusting the height easier - then predrill & install a t-nut going through any shim material and into the legs.)
- Installing the Top Frame
- Revert the table so that it’s on its wheels. Lock them at this point (and also brace the table so that it still doesn’t move unnecessarily)
- You should be able to place the top frame directly on the legs at this point. It should just line up. Obviously, this isn’t a long-term solution.
- Using scrap pieces, add brackets to the outside of the legs. These will actually hold the top frame in place and keep it from sliding around. I used 2x4s, but if you have any scrap 3/4“ plywood, you could cut it to size and use that.
- Place the top frame back onto the legs, and screw the brackets into the top frame.
- Surfaces
- Cut out rectangles in the corners of the bottom 40“x19“ sheet so that it’ll actually fit into the bottom shelf.
- Screw the 48“x34“ sheet into top of the frame. I added screws at where the 24“ studs intersected with the 48“ studs.
- Slide the bottom 40“x19“ into the bottom shelf.
Future Thoughts
Some thoughts I have on improving this one:
- I should entirely remove the need for the half-lap joineries. It would allow me to create a more precise table, as getting the depths of these cuts correct is difficult.
- I should use height-adjustable locking casters. This requires some additional hardware, but makes finely aligning individual tables possible. I’m going to go back and add these at a later date to my tables, where possible.
Because of both, expect to see a version 2.0 sometime in the future, as I create additional workbenches.
Initial Version, July 2021
Initially, I designed these to basically join using half-laps. Essentially, each wood stud would have either dados or rabbets cut into them, then I’d join them together using glue and screws. This makes for a very strong table, but it’s more than I need. Archived here is the initial table version.
Materials
This is made using 2x4 studs and plywood, held together using simple woodworking joints, with wood glue and screws to supplement.
- 2“ x 4“ studs (which should actually measure 1.5“ x 3.5“)
- 2x 48“ studs
- 3x 24“ studs
- 4x 32“ studs
- 2x 37“ studs
- 3x 16“ studs
- Plywood
- 1x 48“ x 24“ x 3/4“ plywood “project board”.
- 1x 34“ x 16“ x 1/2“ plywood “project board”.
To minimize material needed to buy, you can buy 6x 8’ studs, and have the lumber yard cut them to size. Additionally, for the plywood, it’s significantly cheaper to buy 4’ by 8’ sheets (oftentimes, these sheets only cost about twice as much as a project board, but you get 4 times as much material), and either cut them down yourself, or have the lumber yard do so on site. Most places won’t charge you to get the wood cut.
After the initial table, in the next 2 versions, I added 4x 3“ castering wheels to each table. This required cutting the 32“ studs to only 28“, and some additional spacers between the bottom of the studs holding the bottom shelf and the wheels.
Instructions
First, we’re going to build the frame, then screw in the table and shelf tops.
- Top Frame
- Cut half-laps into the 48“ studs. These will have a depth of 1.75“ (half the height of the studs). They should be 1.5“ long (the width of the studs). Cut 2 of them 4“ from the edges, then a third in the exact center of the 48“ stud (starts 23.25“ from either edge). Make these cuts all on the same side.
- Cut rabbets into 3 of the 24“ studs. These will be at the ends of the studs. As before, they’ll be 1.75“ deep, and 1.5“ long. Make these cuts all on the same side.
- Join the 48“ studs with the 24“ studs you just cut into. The correct orientation for this is that the 24“ will slot down into the 48“ (so that, when weight is placed on the 24“ studs, they’ll transfer that weight into the 48“ studs)
- Legs
- Cut rabbets and half-laps into the 32“ (or 28“) studs. These will have a depth of 1.5“, and a length of 3.5“. The half-lap should be made on the other end (but same side) of the stud. The half-lap cut should be inset 4“ from the end it’s cut on.
- If you instead intend to install castering wheels, both ends of the 28“ studs will have these rabbets cut at their ends.
- Join the rabbet from these studs into the inside corners of the 48“ studs and the 24“ studs of the top-frame.
- Bottom Shelf
- Cut 3 half-laps into the 37“ studs. All these should be 1.75“ deep, and 1.5“ long. 2 of them should be inset 1.5“ from the ends, and the third should be in the dead center (starting 17.75“ from the ends).
- Cut 2 rabbets into the 16“ studs. Similar to above, these should be 1.75“ deep and 1.5“ long.
- Join the 37“ studs into the legs from earlier, into the unused half-lap cuts near the bottom.
- Join the 16“ studs into the 27“ studs.
- (Optional) Installing castering wheels:
- With the table inverted (top on the ground):
- Add the shim material (enough to cover the distance between the 4“ from the bottom of the shelf-studs to the floor, minus the height of your casters. In my case, the caster wheels, including hardware, were 3.5“ tall, so I added 0.5“ of shim material).
- Predrill wholes for the casters, and screw them in.
- Surfaces
- Cut out rectangles in the corners of the bottom 34“x16“ sheet so that it’ll actually fit into the bottom shelf.
- Screw the surfaces to their respective places (the 48“x24“ plywood sheet should screw into the top, the 34“x16“ sheet should screw into the bottom).
- It’s actually entirely unnecessary to screw the bottom sheet into place. It’ll be held in place by the legs on the bottom.
Last updated: 2022-04-25 21:05:02 -0700